















P1130946NW Caloric Range - Instructions
Keep searches simple. Use keywords, e.g. "leaking", "pump", "broken" or "fit".
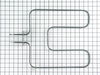
Broiler heating element quit working
I had no trouble replacing the Broiler heating element, total time 30 minutes. Just had to pull the range out to unplug it and remove the back sheild of the range, then remove the two push on electrical connections. Then removed one screw holding the element to the inside of the oven, replaced with the new element, attached the connections, but the back sheild back on and it was done.
Parts Used:
-
Rhonda from Great Bend, KS
-
Difficulty Level:Really Easy
-
Total Repair Time:30 - 60 mins
-
Tools:Screw drivers
Was this instruction helpful to you?
Thank you for voting!
I had to replace the broiler element because it had burned up like a sparkler.
I read instructions and hints online. Then, I pulled the range out from between the cabinets and unplugged it (carefully). I used a small Philips head screwdriver to remove the 10 metal screws holding the large metal sheet on the back of the oven. Then I removed the 4 screws holding on the metal sheet on the upper level of the back of the range since it had to be removed to move back the big sheet metal away from the back. The large metal sheet has the power cord threaded through it on the bottom and I left that in place. I then removed the oven door by lifting it up off the hinges after I removed the screw on each side that held the door on the hinges. The door is quite heavy for a girl. I unscrewed the plate at the back of the broiler element, unhooked it from the hangers, and carefully pulled the connectors apart from the oven wiring and the dead broiler element. (Being completely unfamiliar with this kind of connector it took me some time to figure out they slid apart.) Following advice online I had used electrical tape to tape down the wires so they wouldn't slip backwards out of the oven. The new broiler element connectors slid smoothly and easily into the oven wires. I removed the electrical tape I had used as temporary holders, hung the element on the previous wire slings and removed the new wire slings for a backup. I screwed back the plate on the new element into the back of the oven wall. I used the part number orientation on the element to make certain I had it right side up. If I have to do this again it will be easy and take very little time. My biggest problem was getting the oven door back on because it was heavy for me and I was too short to be able to see what I was doing as I repeatedly tried to get the oven door and hinges aligned. Eventually the door was back on and screwed down. Everything that had been unscrewed was put back in place and screwed down tightly. The oven and broiler are working perfectly.
Parts Used:
-
Georgia L from Coupeville, WA
-
Difficulty Level:A Bit Difficult
-
Total Repair Time:30 - 60 mins
-
Tools:Pliers, Screw drivers
Was this instruction helpful to you?
Thank you for voting!
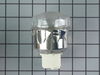
oven light replacement
bought used, oven light was damaged from previous repair attempt, without installation instructions removing the fixture was tricky, had to bend the housing tabs inward w/screwdriver to release fixture (more damage). once out the new fixture went in place quite easily, wires simply hook up, re install back panel, re-connect power, Have a nice Day!
Parts Used:
-
martin from portland, OR
-
Difficulty Level:A Bit Difficult
-
Total Repair Time:15 - 30 mins
-
Tools:Pliers, Screw drivers
Was this instruction helpful to you?
Thank you for voting!
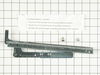
Door wouldnt shut evenly.
Ordered hinge, went to Sears bought some tools to finish manufacturing the hinge, tapped out the screw hole, installed the hinge.
Parts Used:
-
David from Westlake, OH
-
Difficulty Level:Difficult
-
Total Repair Time:1- 2 hours
-
Tools:Screw drivers
Was this instruction helpful to you?
Thank you for voting!
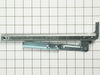
Oven door hinge broken
Discriptions provided by others in this section made it easy and there is little additional insight I can add. The part was delivered the next day. I don't reply to these requests for comments, as providing what I paid for is the expectation. But, this outfit did a good job.
Parts Used:
-
Sherry from Mountain Ranch, CA
-
Difficulty Level:Really Easy
-
Total Repair Time:30 - 60 mins
-
Tools:Screw drivers
Was this instruction helpful to you?
Thank you for voting!
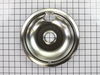
I needed to replace to two 8* drip bowls on the kitchen range
(a) I took out (and threw away) two stained 8* chrome drip bowls on my kitchen range; (b) ti put in two new 8" chrome drip bowls on my kitchen range. I'm pleased that I was equal to the task.
Parts Used:
-
Dallas from Arlington, TX
-
Difficulty Level:Really Easy
-
Total Repair Time:Less than 15 mins
Was this instruction helpful to you?
Thank you for voting!
Old dirty drip pans
Removed heating element, installed new drip pan, replaced heating element. Was amazed at fast delivery - ordered in afternoon, arrived fed ex next morning!
Parts Used:
-
gizella from mays landing, NJ
-
Difficulty Level:Really Easy
-
Total Repair Time:Less than 15 mins
Was this instruction helpful to you?
Thank you for voting!
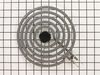
burner not working
-
Marcia from Wellesley, MA
-
Difficulty Level:Really Easy
-
Total Repair Time:Less than 15 mins
Was this instruction helpful to you?
Thank you for voting!
old drip bowl was worn out
-
Richard from Germantown, MD
-
Difficulty Level:Really Easy
-
Total Repair Time:Less than 15 mins
Was this instruction helpful to you?
Thank you for voting!
needed a new drip bowl and couldn't find ons that fit exactly but you had it
I removed the old one and put in the new one. Works great!!!!!!!!!!!!
Parts Used:
-
Elsie from Garner, NC
-
Difficulty Level:Really Easy
-
Total Repair Time:Less than 15 mins
Was this instruction helpful to you?
Thank you for voting!
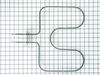
no heat from bottom element
1. waited unsuccessfully for heat (one hour) 2. realized the bottom element wasn't working (one minute) 3. found part on-line from pictures (five minutes) 4. ordered part (one minute) 5. received part (36 hours) 6. installed part (five minutes) 7. "THAT'S how you fix the oven" look to husband (1-2 years)
Parts Used:
-
Susan from Suffield, CT
-
Difficulty Level:Really Easy
-
Total Repair Time:Less than 15 mins
-
Tools:Screw drivers
Was this instruction helpful to you?
Thank you for voting!
Broken Hinges On Oven Door.
I had already removed the old hinges by removing the screws/bolts and removing the broken hinges from the back side through the drawer below the oven that I had already removed. Took the new hinges and screwed the two metal screws into the top hole on the new hinges after placing hinge in vise, one screw on each then removed them and placed them to the side. Determined the right tap from my tap set, and then tapped the bottom two holes on the new hinges, one on each. Placed the bolts that came with the new hinges into the holes I had just tapped, screw them in, then I removed them and placed to the side. Took hinges and bolts / screws to the oven, inserted hinges in through the drawer that I had removed up to each side where hinges would come back out to the front of the oven. Placed screws / bolts one at a time through oven door frame into the hinge on the back side, and then threaded them into the hinges and tightened. Replaced oven door onto new hinges and checked for correct operation. Door works like new.
Parts Used:
-
DAVID from FRANCISCO, IN
-
Difficulty Level:Easy
-
Total Repair Time:15 - 30 mins
-
Tools:Screw drivers
Was this instruction helpful to you?
Thank you for voting!
Oven lower element
Description of the element indicated that it would work for the oven burner. However, it obviously was meant for the broiler element. I had to remove the thin metal piece with the attachment holes in it (the holes didn't match the holes in the back of the oven). To install I had to drill two holes in the remaining attachment flange to match the holes on the back of the oven. Then I made three metal supports out of sheet metal to hold the element up approximately 1 1/2" off of the bottom of the oven. Just thankful to find one that I could make work. Oven works fine now. LF
Parts Used:
-
Lawrence from South Fork, CO
-
Difficulty Level:Really Easy
-
Total Repair Time:15 - 30 mins
-
Tools:Pliers, Screw drivers
Was this instruction helpful to you?
Thank you for voting!
oven coil burned out
-
Kathleen from Weston, WI
-
Difficulty Level:Really Easy
-
Total Repair Time:15 - 30 mins
-
Tools:Pliers
Was this instruction helpful to you?
Thank you for voting!
Oven heating element burnt out
-
Mark from Madison, WI
-
Difficulty Level:Really Easy
-
Total Repair Time:Less than 15 mins
-
Tools:Screw drivers
Was this instruction helpful to you?
Thank you for voting!