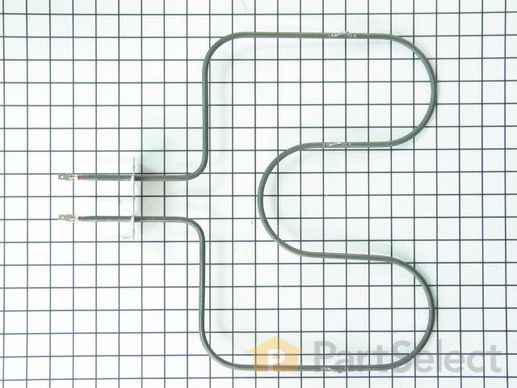
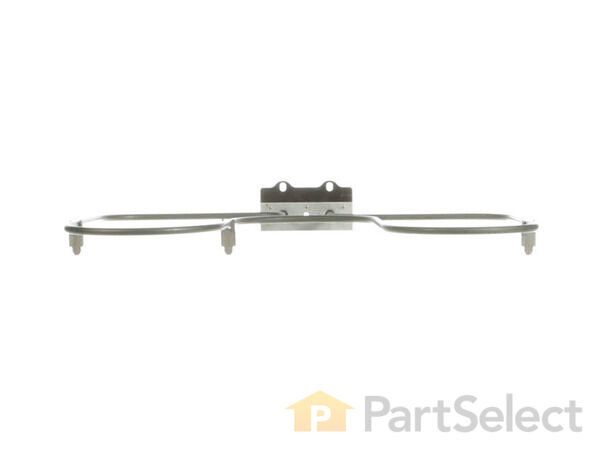
Please note: This is a substitute from the original part. It may physically look different, but will still function the same. This bake element is found on the bottom of the oven.
How Buying OEM Parts Can Save You Time and Money
Troubleshooting
This part fixes the following symptoms:
Little to no heat when baking | Element will not heat | Oven not heating evenly
Keep searches simple. Use keywords, e.g. "leaking", "pump", "broken" or "fit".
Sorry, we couldn't find any existing answers that matched.Try using some different or simpler keywords, or submit your new question by using the "Ask a Question" button above!
Judith
February 22, 2019
Will this fit my oven - is it the same as what i have?
For model number art6001w
Hello, Thank you for contacting us. I have researched the model you have provided and have found the part you are looking for is PartSelect Number PS1500395. I looked up the part and it is listed as No Longer Available/Discontinued. There is no part substitutions listed. My suggestion here would be to call the manufacturer and see if they can provide you with a substitution for these part numbers. Hope this helps!
2 people found this helpful.
Was this helpful?
Thank you for voting!
Kelvin
June 19, 2019
How long will it take for me to get this? I live in Virginia.
Hi Kelvin,
Thank you for your question. The current costs for our shipping fees and time frames are listed below:
Economy (Usually 3-7 Business Days - may go to 10 business days), US Postal Service - $7.45
Standard (Usually 2-3 Business Days - may go to 3-5 business days), UPS or FedEx - $9.95
Next Business Day, UPS or FedEx - $24.95
I hope this helps. Thank you and have a great day!
Was this helpful?
Thank you for voting!
David
February 3, 2020
Will the wp77001094 element replace the ps1500395 Amana oven bake element ?
For model number ARTC7522CC
Hello David, Thank you for contacting us. I have researched the model you have provided and have found the part you are looking for is PartSelect Number: PS1500395 (Manufacturer Part Number Y0059552). I looked up the part and it is listed as No Longer Available/Discontinued sorry. There are no part substitutions listed. Our suggestion here would be to call the manufacturer and see if they can provide you with a substitution for these part numbers. We hope this helps.
Was this helpful?
Thank you for voting!
Allen
December 3, 2018
My mfg number is p1142669nw
Amana range
Does this replace my element
Thank you
For model number ARR6300W
Hi Allen,
Thank you for your question. Yes, this would be the correct bake element for your appliance. I hope this helps. Thank you and have a great day!
Was this helpful?
Thank you for voting!
Customer Repair Stories
Average Repair Rating: 4.5 / 5.0, 48 reviews.
What's this?
Keep searches simple. Use keywords, e.g. "leaking", "pump", "broken" or "fit".
Sorry, we couldn't find any existing installation instruction that matched.
The Baking element in the bottom of the stove apparently shorted out and partially melted
First I turned off the circuit breaker on the house electricity panel. I removed the two screws that held the element in place in the oven. There were two wires connected to the element by spade plugs that were free floating in a fiberglass pad. I reconnected the spade plugs and put the element back in place and put back in the two screws. This procedure had I known what I was doing could have been done with the stove in place and would take no more than 5 to 10 minutes. Having no experience at this, I had pulled the stove out into the room and also removed the back cover which turned out to be unnecessary. I put everything back in place and held my breath and turned on the circuit breaker. Voila! It worked!
Timothy from Salem, OR
Difficulty Level:
Easy
Total Repair Time:
15 - 30 mins
Tools:
Pliers
56 of 58 peoplefound this instruction helpful.
Was this instruction helpful to you?
Thank you for voting!
The oven light has been broken forever-I turned on the oven and the element started flaming.
My husband replaced the bake element in moments. We couldn't get the broken light out of the socket because we couldn't locate our needle nose pliers. After a few days I finally got tired waiting and found a small pair of pliers in the house and got the remains of the bulb out and screwed it in, and plugged it in and we're in business! Never wait for a man to do what you can do yourself! I was so pleased that ordering the parts on-line was so easy and I didn't have an expensive repair bill to pay!
Broiler stopped workin in summer. Oven had no heat for wife to make Christmas cookies.
First thing I tripped the range breaker. Pulled the range out from the wall and unpluged main plug. I then removed the 12 sheet metal screws from the back lower cover. I then unpluged the wires from the four element connections and marked the color on the range back.Two upper blue and red and two lower yellow and red. I then tested the resistance of the elements to confirm that they were bad. With volt/ ohm meter set for OHM'S I had no reading. When my new parts arrived I first made sure that they matched the origonals. I tested the OHM'S on the new parts and began the change. I removed the two upper element holding screws on the inside rear wall. I then removed the two hanging support screws from the inside top of the oven. For the oven element, simply remove the one screw at the back wall. Reassembly is reverse of removal. The element ends will stick out the back side of the range about one inch.Be sure that insulation is in place and that there is no contact between element ends and metal walls.Attatch the wires as you had them marked on the back. Replace the rear cover and tighten all the screws. Plug main plug back into socket. Reset breaker and slowley turn oven control up to a low temperature setting.After a few minuets the oven indicator light will go out.Open oven and check the temperature. End cap has three screws to remove. Slip off old cap and replace with new one. Snug the three screws. Push the range back in place. Have the wife back some cookies and enjoy.
un-screwed 2 scrws and pulled out the old one and pulled off the 2 wires put the new one on the floor of the oven and hooked-up the 2 wires and pushed it in the back wall and replaced the 2 screws! done maybe 5 minutes
edward from hamburg, NJ
Difficulty Level:
Really Easy
Total Repair Time:
Less than 15 mins
Tools:
Screw drivers
11 of 11 peoplefound this instruction helpful.
Was this instruction helpful to you?
Thank you for voting!
Oven never came up to correct temp. Broiler did, so it had to be the bake element.
Turned off the power! Unscrewed the element (2 screws) pullled the wires out. Put the new part right in. Easy! Thank you-only a week before Thanksgiving, what a life saver! Also, order on Monday AM and was delivered by mid-day on Wednesday!
Cheryl from Marietta, GA
Difficulty Level:
Really Easy
Total Repair Time:
15 - 30 mins
Tools:
Screw drivers
8 of 9 peoplefound this instruction helpful.
Was this instruction helpful to you?
Thank you for voting!
My oven would no longer heat to 350F even under the BROIL setting
Using a nut driver, remove the back panel of the oven. Remove the electrical connections from the elements.
The Bake element has two Philips head screws at the back of the oven, the Broil element has one screw at the back of the oven and two on top of the oven near the front. Remove the screws.
The element then falls out very easily. The new element has to be pushed gently through the insulation on the back of the oven, but this was not a problem.
One issue: make sure that the Broil element is "right side up." The screw on the back of the unit is below the electrical connections.
Replace the screws, reconnect the electrical connections, and test the oven. If everything works, replace the back panel.
Total time from turning the first screw to the last was roughly 30 minutes.
My bottom oven didn't work, and I had called a service to come out and fix it. It was a $60 charge just to come out. My friend owns an apartment complex, and she told me it was two screws and a pull to remove the element and replace. I took the element out, ordered it for $38, had it the next day and repaired my oven in a matter of minutes. It was so easy and inexepensive. I feel like I can do anything!
Allison from Cumming, GA
Difficulty Level:
Really Easy
Total Repair Time:
Less than 15 mins
Tools:
Screw drivers
5 of 5 peoplefound this instruction helpful.
Was this instruction helpful to you?
Thank you for voting!
Baking Element Went
The hardest part was the two screws (they were baked on I guess). We turned off the breaker, put paper towels in the oven carefully sprayed wd40 on the screw. Waited about 5 minutes unscrewed the two screws, gently pulled out the plate. When you pull the two wires out there are two contacts. Look at the direction their on. Slide them off put in the new unit to the contacts, gently slide back in and put the two screws back. It was really that easy and I had no idea what I was doing. No need to pull oven out can all be done for the front side.
Janet from Richboro, PA
Difficulty Level:
Really Easy
Total Repair Time:
15 - 30 mins
Tools:
Screw drivers
5 of 6 peoplefound this instruction helpful.
Was this instruction helpful to you?
Thank you for voting!
bake element broken
Received part after one working day and was installed in five minutes.. Would recommend as a do it your self project with the support of PartSelect.com
dale from Simi Valley, CA
Difficulty Level:
Really Easy
Total Repair Time:
Less than 15 mins
Tools:
Screw drivers
4 of 4 peoplefound this instruction helpful.
Was this instruction helpful to you?
Thank you for voting!
Oven would not stop heating even with Bake turned off!
The lower element had burned out but in the process, it developed a short from line to neutral. Since the short was located about 3/4 of the total length from the one hot leg (L1) and the other hot leg (L2) was the relay controlled leg, there was a current path that allowed the element to heat even with L2 disconnected by the relay. Actually replacing the element was easy, just remove the back cover(s) and the element mounting screws (2) inside the oven cavity and the new unit slides into place. Reconnect the two wires to the new element and replace the back covers. Back in business and the cookies are coming out perfectly!
Keep searches simple. Use keywords, e.g. "leaking", "pump", "broken" or "fit".
Sorry, we couldn't find any existing reviews that matched. Try using some different or simpler keywords.
★★★★★
★★★★★
Steve W - May 1, 2022
Verified Purchase
Worked as expected.
Part was in good condition and works great!
★★★★★
★★★★★
Marge W - August 28, 2021
Verified Purchase
Bake Element Replacement
It took my husband about 30 minutes to unplug the burned out element and plug in the new element. All went very well.
★★★★★
★★★★★
Patrick L - April 9, 2021
Verified Purchase
exactly what I needed perfect fit
it was very easy to install and worked great
★★★★★
★★★★★
Traci S - October 30, 2020
Verified Purchase
Great Value!
The part I ordered arrived quickly. It was easy to install and took less than 5 minutes to replace. Thank you!
★★★★★
★★★★★
John N - August 26, 2020
Verified Purchase
Easily replaced the old one!
The heating element was easy to install. worked like it should!
★★★★★
★★★★★
Richard M - August 12, 2020
Verified Purchase
Back in business
It's not as wide as the original one, but it's working OK. I have to allow a bit more time for the oven to get to temp. Anyway, glad to have my oven back.
★★★★★
★★★★★
Douglas B - July 19, 2020
Verified Purchase
Easy install for a great part!
Our part came quickly and was exactly what we needed. Oven back up and running in no time!
★★★★★
★★★★★
Richard L - May 24, 2020
Verified Purchase
simple 10 minute task
wish company had offered express shipping. 10 days without the oven was trying.
★★★★★
★★★★★
Alice G - May 19, 2020
Verified Purchase
Exact part perfect
The part came faster than expected. They sent the correct part. 5 stars!!!
★★★★★
★★★★★
Marilyn K - April 24, 2020
Verified Purchase
Saved a repair call.
Great video instructions. Had to apply dw40 to disconnect. After that all went smoothly. Would recommend.
With our Fix app model plate image recognition technology, we'll recommend the parts guaranteed to fit your appliance. Simply snap a photo, and we'll take care of the rest.
"I love love love this app. It's so nice to have useful information (receipts, manuals, parts lists, warranty info, pictures, etc.) on all of my household appliances and devices in one place."
You added to your cart
✖
$
Qty:
Total item(s) in cart:
Order Subtotal
$
*Taxes and shipping will be applied during checkout