















MSD2272VES02 Maytag Refrigerator - Instructions
Keep searches simple. Use keywords, e.g. "leaking", "pump", "broken" or "fit".
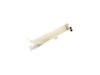
The water dispenser flow was very slow and the housing leaked when the filter was removed.
Removed front plastic grill and screws holding the filter in place. Also removed lower back cardboard panel to access water lines. Video on this website told me how to remove water lines from filter, you must depress a collar around the water line while pulling out the water line. Then install the new Water Filter Housing and water lines. The only problems I had was the tight space to work in and one of the water lines was leaking, but pushing the water line in further solved the problem.
Parts Used:
-
Daniel from CAROL STREAM, IL
-
Difficulty Level:Easy
-
Total Repair Time:30 - 60 mins
-
Tools:Nutdriver, Screw drivers, Socket set
12 of 13 people
found this instruction helpful.
Was this instruction helpful to you?
Thank you for voting!
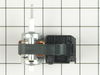
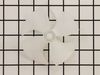
Rattling noise in beind freezer compartment
remove shelves in freezer compartment incl.holders(slide up to remove)
Remove lamp/shield
Remove panel (six phillips screws)
disconnect motor
pull off fan blade
squeeze bracket holding motor to remove
remove motor.
Re-assemble (in reverse)
Remove lamp/shield
Remove panel (six phillips screws)
disconnect motor
pull off fan blade
squeeze bracket holding motor to remove
remove motor.
Re-assemble (in reverse)
Parts Used:
-
Herman from Cottonwood, AZ
-
Difficulty Level:Easy
-
Total Repair Time:30 - 60 mins
-
Tools:Pliers, Screw drivers
14 of 19 people
found this instruction helpful.
Was this instruction helpful to you?
Thank you for voting!
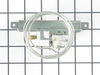
Refrigerator quit cooling, freezer defrosted making a huge mess in kitchen floor
First, verified power supply. I have power at wall outlet, no power at compressor. Also noticed no condenser fan operation. Searched YouTube and watched a few diagnostic videos of how to test for proper operation of my model. Dropped the control panel down to reveal the thermostat switch and control board. Wiggled thermostat knob and compressor would work intermittently. Thermostat bad internally. Removed wiring connections, removed cover over temp.probe. slowly removed capillary tube. Removed plastic sheath from tube. Take your time installing new capillary tube into plastic sheath as not to kink and damage tube. Route the new tube back into position that the old one was in. Reinstall covers. NOTE: My wiring terminals on the new switch were in different locations but the switch was the same dimensions. I used a multi-meter to determine the correct wire locations on new switch and installed. Reconnected power and all works well now.
Parts Used:
-
Kevin from ANDERSON, SC
-
Difficulty Level:Easy
-
Total Repair Time:30 - 60 mins
-
Tools:Nutdriver, Pliers, Screw drivers
11 of 11 people
found this instruction helpful.
Was this instruction helpful to you?
Thank you for voting!
The ice maker had a internal brownish leak substance. This in turn dripped on the ice in the tray, which froze the ice cubes in a ball which would not let the ice to be ejected from the dispenser, and in turn cracked the tray which holds the ice cubes, so I had to replace the tray and ice maker.
On a side by side refer, you need both doors open to unscrew the three 1/4 inch screws,
1. Remove the ice tray
2.the ice arm needs to be in the up position, so no water will flow while dissembling.
3. Remove the two top screws,
4. While holding the ice maker with o e hand, remove the bottom screw.
Balance the ice maker and unplug the ice make electric plug in the rear of the ice maker.
5. Take the I e maker out.
6. The ice maker does not come with the ice arm, so you need to remove the arm from the old or broken ice maker and install it in the new ice maker.
7. Resemble in reverse order.
I did not unplug the refer from the wall socket, you may want to do this. It recommended but I did not.
There you go.
1. Remove the ice tray
2.the ice arm needs to be in the up position, so no water will flow while dissembling.
3. Remove the two top screws,
4. While holding the ice maker with o e hand, remove the bottom screw.
Balance the ice maker and unplug the ice make electric plug in the rear of the ice maker.
5. Take the I e maker out.
6. The ice maker does not come with the ice arm, so you need to remove the arm from the old or broken ice maker and install it in the new ice maker.
7. Resemble in reverse order.
I did not unplug the refer from the wall socket, you may want to do this. It recommended but I did not.
There you go.
Parts Used:

-
John from WELLTON, AZ
-
Difficulty Level:Very Easy
-
Total Repair Time:15 - 30 mins
-
Tools:Nutdriver
14 of 20 people
found this instruction helpful.
Was this instruction helpful to you?
Thank you for voting!
Refrigerator No Longer Cooling Properly
Approximately:
1. Unplugged refrigerator.
2. Emptied Freezer.
3. Removed Ice Maker.
4. Waited a few hours for ice to melt around back panel & nuts.
5. Removed back panel and the cover over fan and fan motor.
6. Waited many more hours for ice to thaw over fins, wiring, etc.
7. Easily replaced the bi-mental defrost thermostat.
8. Replaced panel, fan cover, ice maker.
9. Plugged in refrigerator and waited a bit.
This worked! Yahoo.
p.s. I am a 65+ year old mechanically minded woman. :-)
1. Unplugged refrigerator.
2. Emptied Freezer.
3. Removed Ice Maker.
4. Waited a few hours for ice to melt around back panel & nuts.
5. Removed back panel and the cover over fan and fan motor.
6. Waited many more hours for ice to thaw over fins, wiring, etc.
7. Easily replaced the bi-mental defrost thermostat.
8. Replaced panel, fan cover, ice maker.
9. Plugged in refrigerator and waited a bit.
This worked! Yahoo.
p.s. I am a 65+ year old mechanically minded woman. :-)
Parts Used:

-
Elizabeth from DELRAY BEACH, FL
-
Difficulty Level:A Bit Difficult
-
Total Repair Time:More than 2 hours
-
Tools:Nutdriver, Screw drivers
11 of 11 people
found this instruction helpful.
Was this instruction helpful to you?
Thank you for voting!
'Frig door made a popping sound when opening and closing.
Removed upper hinge cover and hinge, lifted door from lower hinge socket, removed lower cam from 'frig hinge, and replaced with new. I had a helper hold the 'frig door while I removed old upper cam, and replaced with new. Piece of cake and works like new! This must be a design problem..
Parts Used:


-
Lance from Richardson, TX
-
Difficulty Level:Really Easy
-
Total Repair Time:15 - 30 mins
-
Tools:Socket set
11 of 12 people
found this instruction helpful.
Was this instruction helpful to you?
Thank you for voting!
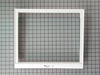
Cover Pan Crisper(bottom glass shelf and frame) were broken
-
anthony from ormond beach, FL
-
Difficulty Level:Really Easy
-
Total Repair Time:Less than 15 mins
13 of 18 people
found this instruction helpful.
Was this instruction helpful to you?
Thank you for voting!
It was just time to replace the water filter.
We took out the old filter and put in the new one. Ran out a few gallons of water then it was ready to use.
Parts Used:
-
Denise from Hoschton, GA
-
Difficulty Level:Really Easy
-
Total Repair Time:Less than 15 mins
15 of 25 people
found this instruction helpful.
Was this instruction helpful to you?
Thank you for voting!
Ice maker not making cubes.
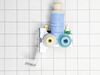
First off you need to shut off the water supply valve that goes to the icemaker. Next pull the refrigerator from the wall , thats the fun part. I did not unplug my refrigerator when I did this . You can to be extra safe. At the bottom on the back side remove the cardboard cover on the bottom like four or five screws and set this aside. The water valve is on the bottom on the right side. There are 3 water lines attached to it. Having a towel handy might be helpfull. 1 line supplys the water, 1 is for the water dispenser and 1 is for the ice maker. These are push in connections no wrench needed. Remove the 2 screws that attach water valve to frame. Arrange it to make removing the 2 wire connections and water lines easier to remove. Wire connections just pull off. Mark them as to what valve they go to. Next remove the water lines. you need to remove a plastic lock that insures that the water lines do not pop off, very simple. Next push down on the nylon connector push down on the top of connector and pull on the plastic water line at the same time and it will come out. Do this to all 3 water lines. Remove old water valve and install new one in the reverse order. The water lines just push in no need to mess with connector when line is in reinsert the plastic lock. Reconnect the power connections. Align the water valve bracket with screw holes in frame and reattach the 2 screws holding it in place. Now would be a good time to turn on the water and check for leaks. You can check water dipenser but ice maker has a mind of its own. If all is good reinstall the cardboard cover on the back bottom and push refrigerator back where it was. Make sure the water line is not kinked. Aftre a couple of hours the ice maker should start making ice.
Parts Used:
-
Robert from STRONGSVILLE, OH
-
Difficulty Level:A Bit Difficult
-
Total Repair Time:30 - 60 mins
-
Tools:Nutdriver, Screw drivers
10 of 11 people
found this instruction helpful.
Was this instruction helpful to you?
Thank you for voting!
Fridge stopped working
I called a repair man from a pretty large name to come out and take a look. He found out in about 10 minutes that it was a bad capacitor. The quote he gave me was $75 for the part and $175 labor. I tried my best not to laugh and tell him no thank you. He did have to charge me for him to show up, which was only $98.
So I used what he told(minus the "scrap it") and opened it back up. Although he had left wires everywhere and the broken pieces laying inside, I thought it was enough for me to order the part. PartSelect was very easy to navigate and ordering was a breeze. Took about 4 days to get the part and I ordered in the X-mas craze. Fixed it in about 15 minutes.
So I used what he told(minus the "scrap it") and opened it back up. Although he had left wires everywhere and the broken pieces laying inside, I thought it was enough for me to order the part. PartSelect was very easy to navigate and ordering was a breeze. Took about 4 days to get the part and I ordered in the X-mas craze. Fixed it in about 15 minutes.
Parts Used:

-
Dan from Sumner, WA
-
Difficulty Level:Easy
-
Total Repair Time:15 - 30 mins
-
Tools:Nutdriver
10 of 11 people
found this instruction helpful.
Was this instruction helpful to you?
Thank you for voting!
Freezer/refrigerator no air flow
Using a 1/4" nut driver and a philips screwdriver I removed all the screws in the shelf brackets and coil cover and removed coil cover. Removed fan blade and then faulty motor (held in with clips) Installed new motor-two wires (power) and ground (green) pushed fan blade back on and tested, then reinstalled all panels and shelf brackets.
Parts Used:
-
Jim from Au Sable Forks, NY
-
Difficulty Level:A Bit Difficult
-
Total Repair Time:15 - 30 mins
-
Tools:Nutdriver
10 of 12 people
found this instruction helpful.
Was this instruction helpful to you?
Thank you for voting!
auger blades broken
Removed ice bin then pulled front cover with nut driver . Pull small rod from side ( one screw holding rod and spring). Pull auger out. Take plastic nut off end ( CLOCKWISE) LEFT HAND THREAD. Keep all ice crusher blades in order when you pull them off. Install new auger and reverse steps. web site has exploded view. It looks difficult but it isn't.
Parts Used:

-
Michael from Ponchatoula, LA
-
Difficulty Level:A Bit Difficult
-
Total Repair Time:30 - 60 mins
-
Tools:Nutdriver, Pliers, Screw drivers
11 of 15 people
found this instruction helpful.
Was this instruction helpful to you?
Thank you for voting!
door was making a poping sound upon opening and closing
First I removed all contents from inside refrigerator door.Then I removed (1) 10mil screw,which holds cover for top hinge.Next I removed the (3) hinge screws,and lifted door off of bottom hinge.Pulled off plastic closure cam from bottom metal hinge post.I cleaned metal post ,applied a small amount of vaseline to post, slid on new plastic cam,installed door, replaced screws.Very easy,10 to 15 min tops.
Parts Used:
-
Tony from Mesquite, NV
-
Difficulty Level:Really Easy
-
Total Repair Time:Less than 15 mins
-
Tools:Nutdriver, Socket set
10 of 12 people
found this instruction helpful.
Was this instruction helpful to you?
Thank you for voting!
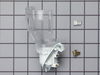
socket melted with bulb in it.
-
martin l. from JACKSONVILLE,, IL
-
Difficulty Level:Really Easy
-
Total Repair Time:Less than 15 mins
12 of 18 people
found this instruction helpful.
Was this instruction helpful to you?
Thank you for voting!
freezer not cold, buzzing noise followed by a click then nothing from compressor, repeats every few minutes
Replaced the start relay, simple unplug old start relay and plug in of new one. Use care unplugging old one as it has 3 pins from the compressor that plugs into it and it must be carefully pryed loose with a flat screwdriver under it to prevent breaking one of them.
Parts Used:

-
ERIC from WYTHEVILLE, VA
-
Difficulty Level:Really Easy
-
Total Repair Time:Less than 15 mins
-
Tools:Screw drivers
9 of 10 people
found this instruction helpful.
Was this instruction helpful to you?
Thank you for voting!