















MSD2272VES02 Maytag Refrigerator - Instructions
Keep searches simple. Use keywords, e.g. "leaking", "pump", "broken" or "fit".
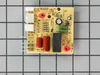
Freezer not defrosting coils refrigerator side getting warm
Refrigerator side top unscrewed hex screws unscrewed Phillips screws remove circuit board unplugged connects and installed new board in reverse order
Parts Used:
-
Randy from COUSHATTA, LA
-
Difficulty Level:Really Easy
-
Total Repair Time:15 - 30 mins
-
Tools:Nutdriver, Screw drivers
7 of 7 people
found this instruction helpful.
Was this instruction helpful to you?
Thank you for voting!
The wrong filter was sent the first time.
I removed the cap from the filter pushed a lever and removed fliter. I replaced the old filter, removed the caps on the new one and slid it into channel after replacing the outer cap. I removed water from the spigot for 4 mins. and it was ready to go. I pushed the reset button to get the green light to come on.
Parts Used:
-
Sandra S from Topeka, KS
-
Difficulty Level:Difficult
-
Total Repair Time:15 - 30 mins
8 of 11 people
found this instruction helpful.
Was this instruction helpful to you?
Thank you for voting!
Ice Maker would no longer move ice through the dispenser
As cookbook authors and publishers, my husband and I depend on our appliances. When our icemaker would no longer work, it was imperative that we repair it as quickly and ecomonically as possible. We had used PartSelect.com earlier to order a part to repair our Jenn-Air stove top and had great results. So, rather than paying a repairman four times or more the cost of the part, we ordered the part and my husband installed it. It took less than 30 minutes to remove the broken auger and install the new one. THANKS PartSelect.com -- we'll use you for all appliance parts needs.
Parts Used:

-
Sheila from Lena, MS
-
Difficulty Level:A Bit Difficult
-
Total Repair Time:15 - 30 mins
-
Tools:Screw drivers
8 of 12 people
found this instruction helpful.
Was this instruction helpful to you?
Thank you for voting!
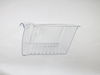
Crisper crac kerd and there was no glass insert cover
It took me less than 5 minutes and I had everything installed myself. thanks for the help in ordering the right parts
Parts Used:

-
Cheryl from Conklin, NY
-
Difficulty Level:Really Easy
-
Total Repair Time:Less than 15 mins
10 of 18 people
found this instruction helpful.
Was this instruction helpful to you?
Thank you for voting!
Ice maker was over producing
Technician at ASK suggested replacing ice maker. Ordered new ice maker(prompt delevery)then noticed it came without wire arm and white platic "flag". Ordered arm and "flag", replaced all old with new and seems to be doing well. Perhaps all I needed was the plastic "flag" on the limit arm wire. Will never know. The new icemaker wiring had short wires and a connector. Old ice maker had no connector so the short wires were removed and the old wires plugged into the ice maker. Mirror was required in order to see the side wall mounting screws. Very narrow work area, tiny freezer side.
Parts Used:
-
Gregory from Milford, OH
-
Difficulty Level:A Bit Difficult
-
Total Repair Time:15 - 30 mins
-
Tools:Nutdriver
7 of 9 people
found this instruction helpful.
Was this instruction helpful to you?
Thank you for voting!
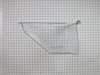
Crack in vegetable drawer
Emptied draw of contents pulled draw out and inserted new drawer....easy pea-zee
Parts Used:
-
Paul from NAYLOR, MO
-
Difficulty Level:Very Easy
-
Total Repair Time:Less than 15 mins
6 of 6 people
found this instruction helpful.
Was this instruction helpful to you?
Thank you for voting!
Water filter
-
David from port st lucie, FL
-
Difficulty Level:Really Easy
-
Total Repair Time:Less than 15 mins
10 of 18 people
found this instruction helpful.
Was this instruction helpful to you?
Thank you for voting!
broken drawer
-
Thomas from North Port, FL
-
Difficulty Level:Really Easy
-
Total Repair Time:Less than 15 mins
8 of 12 people
found this instruction helpful.
Was this instruction helpful to you?
Thank you for voting!
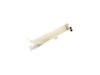
Water filter housing wasn't let the water go through the filter
I got model number off my unit and order the part. That was after trying a lot of different filters first. I did a rush order so I got it in 2 days. Pulled the unit out to shut the water off. Then took the back off so I could take the 2 screws that hold the water value . That way I wouldn't have to go back and forth. Now I went to the front. I already had had the vent cover at the bottom of the unit off. I had a head lap on so to make it easier to see under the unit. Then I use the nut driver or you can use 1/4 inch drive ratchet with sockets. To take the 2 screws out that hold the filter housing. Then lift the spring wire that is on the left side of the release botton. Then push the wire up out of the way. Reach back and pull the water value forward so you have slack in the water lines. Now you can pull the fliter housing out to you. Now release the 2 water lines by pushing down on the rings around the water lines and hold while you pull the water lines out. Now the old water filter housing is free you can set it to the side. I inspected the new filter housing for any deformities and cracks before I started installing. Now I hooked the water lines up by pushing them into the right size spring ring hole. Once lines was all the way in I pulled back on the water lines to make sure they were locked in place. Then I put a new water filter in and turned the water on to make sure of no leaks. Then I put everything back together in the reverse order I took it apart. Then I check the spicket to make sure everything was working right. After that I was able to push the refrigerator back in and then wipe everything up and I was done.
Parts Used:
-
DANIEL from DAVENPORT, FL
-
Difficulty Level:Easy
-
Total Repair Time:30 - 60 mins
-
Tools:Pliers, Screw drivers, Socket set
6 of 6 people
found this instruction helpful.
Was this instruction helpful to you?
Thank you for voting!
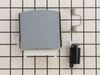
Door Chute Mechanism broke / air flow into ice maker
Have not installed yet as I'm on a quick TX-FL-TX turnaround. Bought and received the part in 24 hours...great. Order contained no instructions. I could probably figure it out myself just have not attempted yet.
Parts Used:
-
Thomas from Clearwater, FL
-
Difficulty Level:Really Easy
-
Total Repair Time:15 - 30 mins
-
Tools:Screw drivers
12 of 24 people
found this instruction helpful.
Was this instruction helpful to you?
Thank you for voting!
Refrig Door Cams wore out and made noises when opening and closing.
Followed Door Removal instructions by removing the Top Screws from the Cabinet. Lifted Door OFF the Metal Hinge. Unscrewed both Lower and Upper Cams from the Hinge and Door. Replaced with new after coating with Vasoline. Lifted Door back in place with help from Wife. Only problem was guiding the Door back onto the Hinge. Works fine. Two year old Frig. This is a design problem, as the cams should last longer than 22 months.
Parts Used:

-
Michael from Lewisville, TX
-
Difficulty Level:Easy
-
Total Repair Time:Less than 15 mins
-
Tools:Pliers, Socket set
6 of 7 people
found this instruction helpful.
Was this instruction helpful to you?
Thank you for voting!
Plastic door bracket for icemaker chute broken
Googled with question about how to get to the repair as there were no screws on the faceplate. Found I had to lift the faceplate at the bottom and pry out. Was kind of hard to get the long spindle back through the ears of the bracket holder along with getting the spring of the door lined up for the spindle to pass through to the other side. Finally got it right and then just put it all back together. Frustrating at first but I had to get it done as my wife was tired of having to take large clumps of ice out of the ice tray..three years wait for the repair. That door being open let warm air in and let the ice melt just enough to stick together in a clump. All is well now. Longer you wait the more appreciative she is however. ha
Parts Used:
-
Carl from Mt Juliet, TN
-
Difficulty Level:A Bit Difficult
-
Total Repair Time:30 - 60 mins
-
Tools:Pliers, Screw drivers
7 of 10 people
found this instruction helpful.
Was this instruction helpful to you?
Thank you for voting!
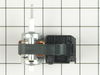
Fan motor was making noise.
First I removed all food in freezer.Then removed selves and hanger brackets.Then the back panel and light cover.Then I unplugged motor but before this I unplugged refrigerator from the wall.Removed motor from bracket after pulling of fan. Reversed the order to install motor and put back together
Parts Used:
-
Harry from Mountain Iron, MN
-
Difficulty Level:Easy
-
Total Repair Time:15 - 30 mins
-
Tools:Nutdriver, Screw drivers
6 of 7 people
found this instruction helpful.
Was this instruction helpful to you?
Thank you for voting!
My Crisper Draw side railing had broken
I ordered the 2 new drawers, the crisper pan and the meat pan with handle. I took them from the box, wiped them out and slid them right into the spots where my previous drawers were. End of story. This took less than 5 minutes to install. I used the chat feature to inquire as to what number items that I needed to order these 2 drawers, was given the numbers and order the items on line right then. Easy They arrived in record time, like maybe 2 days. They were well packed and arrived in pristine condition.
Parts Used:
-
Paula from FORT MYERS, FL
-
Difficulty Level:Very Easy
-
Total Repair Time:Less than 15 mins
6 of 7 people
found this instruction helpful.
Was this instruction helpful to you?
Thank you for voting!
Unit kept icing up
I FOLLOWED A U TUBE VIDEO. IT WAS ALMOST PERFECT FOR MY SIDE BY SIDE REFRIGERATOR.
Parts Used:
-
JERRY from TREASURE IS, FL
-
Difficulty Level:A Bit Difficult
-
Total Repair Time:1- 2 hours
-
Tools:Nutdriver, Pliers, Screw drivers
5 of 5 people
found this instruction helpful.
Was this instruction helpful to you?
Thank you for voting!