















MGS5875BDQ Maytag Range - Instructions
Keep searches simple. Use keywords, e.g. "leaking", "pump", "broken" or "fit".
oven wont heat up
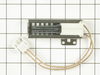
it was actually pretty easy, it took about 20 minutes to fix, i had to unscrew the bottom portion of the oven to get to the Igniter on the bottom, then unscrew the Igniter, take off the old pice, and snap the new one in, put it all back together, and that was about it, i had dinner done by the time my husband got home from work. thanks
Parts Used:
-
Crystal from Tonawanda, NY
-
Difficulty Level:Really Easy
-
Total Repair Time:15 - 30 mins
-
Tools:Screw drivers
4 of 5 people
found this instruction helpful.
Was this instruction helpful to you?
Thank you for voting!
Broken outer glass on oven door
My 4 year old son managed to break the oven door glass. The repair man asked for $175 to fix it
I had ordered the door kit from Part Select and it arrived earlier than promised. Fifteen minutes later I had it in place. The cost $49.64
Thanks Part Select,
Peter Lobo
I had ordered the door kit from Part Select and it arrived earlier than promised. Fifteen minutes later I had it in place. The cost $49.64
Thanks Part Select,
Peter Lobo
Parts Used:

-
Peter from Coral Springs, FL
-
Difficulty Level:Really Easy
-
Total Repair Time:Less than 15 mins
-
Tools:Screw drivers
6 of 11 people
found this instruction helpful.
Was this instruction helpful to you?
Thank you for voting!
Head burner had something spilled on it which stained it and left a large dark brown spot
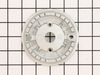
Simply remove two screws take old one off and line up and put new one on and replace the two screws. Couldn't have been easier.
Parts Used:
-
Donald from Hudsonville, MI
-
Difficulty Level:Really Easy
-
Total Repair Time:Less than 15 mins
-
Tools:Screw drivers
6 of 12 people
found this instruction helpful.
Was this instruction helpful to you?
Thank you for voting!
broken oven door inner glass pane.
Remove the door, remove screws from all sides
Remove sides and face of oven door by sliding down from under the oven handle trim.
Remove screws on 2nd light of glass and set aside.
Now you are at the inner door panes. their should be two in an insulated type unit.
Remove the remaining screws from the handle pracket and the permiter frame for the glass/insulation. Remove permiter frame and set aside.
Pull out inner door glass frame. get a pair of pliers and bend tab on frame up so you can pull the frame sightly apart, replace the glass, secure frame tightly around glass slide tab back into reciever slot and bend down ( you may need another person to assist in keeping both lights in the frame while trying to ben tab back in to place)
reassemble door as it came apart carefull not to over tighten the screws, they strip easy.
Remove sides and face of oven door by sliding down from under the oven handle trim.
Remove screws on 2nd light of glass and set aside.
Now you are at the inner door panes. their should be two in an insulated type unit.
Remove the remaining screws from the handle pracket and the permiter frame for the glass/insulation. Remove permiter frame and set aside.
Pull out inner door glass frame. get a pair of pliers and bend tab on frame up so you can pull the frame sightly apart, replace the glass, secure frame tightly around glass slide tab back into reciever slot and bend down ( you may need another person to assist in keeping both lights in the frame while trying to ben tab back in to place)
reassemble door as it came apart carefull not to over tighten the screws, they strip easy.
Parts Used:

-
Adam from modesto, CA
-
Difficulty Level:Easy
-
Total Repair Time:30 - 60 mins
-
Tools:Pliers, Screw drivers
4 of 6 people
found this instruction helpful.
Was this instruction helpful to you?
Thank you for voting!
Oven wouldn't reach temp, gas smell and loud pop when gas would re-ignite,took 45 mins or more to reach 350' from starting temp of 100'
Considered calling a repair facility, after reading your tips and what parts should fix what problem I decided to fix myself. Moved oven out,slide in gas range. Took off probe and tested with volt ohm meter, read 1090 ohms, should have been good. I could see oven igniter glow red, but I decided to replace both units, glad I did. Oven go's from 100' to 350' in 8 minutes now, for less than $85.00 have a fully functioning oven now. I'm sure the repair would have exceeded $300.00 or more being we live in a rural area. Thanks for the tips from your experts as well as you customers.
Parts Used:
-
Randall from LOS LUNAS, NM
-
Difficulty Level:Easy
-
Total Repair Time:1- 2 hours
-
Tools:Screw drivers, Socket set
3 of 3 people
found this instruction helpful.
Was this instruction helpful to you?
Thank you for voting!
oven wouldn't heat causing the house to smell of gas
took out racks removed 2 screws holding igniter removed 4 screws on back of stove and unplug igniter. reversed the order installing the new one
Parts Used:
-
James from Washburn, IL
-
Difficulty Level:Really Easy
-
Total Repair Time:15 - 30 mins
-
Tools:Screw drivers
3 of 3 people
found this instruction helpful.
Was this instruction helpful to you?
Thank you for voting!
No spark at top burners
Shut off gas supply
Pulled stove away from wall removed spark ignigtor box .
Installed new one .
No problem.
Good for another 10 years
Pulled stove away from wall removed spark ignigtor box .
Installed new one .
No problem.
Good for another 10 years
Parts Used:
-
Joseph from East Freetown, MA
-
Difficulty Level:Really Easy
-
Total Repair Time:15 - 30 mins
-
Tools:Screw drivers
7 of 15 people
found this instruction helpful.
Was this instruction helpful to you?
Thank you for voting!
Oven igniter went out of my oven.
Took the bottom out of oven then removed and replaced with the new part. VERY EASY! I'm a 70-year-old woman and do quite a few home repairs myself.
Parts Used:
-
Doreen from DOUGLAS, WY
-
Difficulty Level:Really Easy
-
Total Repair Time:15 - 30 mins
-
Tools:Nutdriver, Screw drivers, Socket set
3 of 3 people
found this instruction helpful.
Was this instruction helpful to you?
Thank you for voting!
Oven door hinge was broken.
1. Open oven door to first detent, then pull it up off the hinges.
2. Pull oven out from counter 10-12 inches.
3. Hinges are accessible from the outside of the oven.
4. Remove 2 screws on each hinge and remove old hinges.
5. Put new hinges in place and try to insert mounting screws.
6. Wonder why screws won't start in threads.
7. Examine new hinges and notice they are not threaded for the screws.
8. Screws are not self-tapping, so go to basement and get tap & die set.
9. Use 10-24 tap to make threads in new hinges.
10. Put new hinges in place and insert mounting screws. Tighten.
11. Pull hinges to first detent and put oven door on hinges.
12. Push oven back into place in counter.
2. Pull oven out from counter 10-12 inches.
3. Hinges are accessible from the outside of the oven.
4. Remove 2 screws on each hinge and remove old hinges.
5. Put new hinges in place and try to insert mounting screws.
6. Wonder why screws won't start in threads.
7. Examine new hinges and notice they are not threaded for the screws.
8. Screws are not self-tapping, so go to basement and get tap & die set.
9. Use 10-24 tap to make threads in new hinges.
10. Put new hinges in place and insert mounting screws. Tighten.
11. Pull hinges to first detent and put oven door on hinges.
12. Push oven back into place in counter.
Parts Used:
-
Jim from INDIANAPOLIS, IN
-
Difficulty Level:A Bit Difficult
-
Total Repair Time:15 - 30 mins
-
Tools:Nutdriver
3 of 3 people
found this instruction helpful.
Was this instruction helpful to you?
Thank you for voting!
Crazy codes and not heating the oven properly at desired temp settings
1. Turn power off and loosen and remove screws. Pull out sensor from mounting hole and expose wire connector. Remove old sensor. Select appropriate wire adaptor and reconnect the sensor. Carefully push connector through hole and secure with screws removed previously. Turn power back on and cycle oven to make sure oven operates properly. If you have an oven thermometer it can be used to compare set point of oven to thermometer to make sure readings are the same. All done! Happy wife can now bake cookies again and now I can go back to man cave for other projects!
Parts Used:
-
Stan from CHICAGO RIDGE, IL
-
Difficulty Level:Really Easy
-
Total Repair Time:Less than 15 mins
-
Tools:Screw drivers
3 of 3 people
found this instruction helpful.
Was this instruction helpful to you?
Thank you for voting!
Gasket was worn out.

-
Michael from VALLEJO, CA
-
Difficulty Level:Really Easy
-
Total Repair Time:Less than 15 mins
-
Tools:Pliers
3 of 3 people
found this instruction helpful.
Was this instruction helpful to you?
Thank you for voting!
door seal contaminated by a boil-over, not flexible
From reading other reviews i thought I would have to dis-assemble the door but when I saw the new part I realized I would not have to, simply pop the beveled clips w/pocket knife and pop in the new seal clips. the ends tucked very nicely, an 80+ yr. old would have no trouble if they had their wits.
Parts Used:
-
Rob from Yakima, WA
-
Difficulty Level:Really Easy
-
Total Repair Time:Less than 15 mins
3 of 3 people
found this instruction helpful.
Was this instruction helpful to you?
Thank you for voting!
Oven heat loss, door gasket needed replacement
The entire "project" took me less than 3 minutes, and required no tools at all! First, the saleswoman over the phone pointed me to the correct product for my problem ($30 less than what I thought I needed), and it arrived at my home within 4 days. Then, it was just a matter of pulling off the old gasket, and snapping the new one in place! Simple!
Parts Used:
-
Stephen from Chapell Hill, NC
-
Difficulty Level:Really Easy
-
Total Repair Time:Less than 15 mins
3 of 4 people
found this instruction helpful.
Was this instruction helpful to you?
Thank you for voting!
range burner igniter not functioning
Removed grill and set aside, then removed burner with a 1/4 counter clock twist. Removed ground wire and igniter wire from burner. Set to side in order taken off. Remove the two screws on the panel that is on the back of the unit and slide it up and set it aside. Removed screws from side decorative panels each side (one top and one bottom) and slide panel toward the rear to remove from notch slot. Then removed the two screws on each side and back to remove top of range. On the side there are two screws together towards the rear, the one towards the front of the range need to be removed. Then removed four screws that held the pan under the range top that were screwed into the gas line supports. Then removed the two screws from rear that held the pan in place. Remove the pan and set aside. Lift the right gas line burner support up. Remove ground bottom, hot wires upper and igniter wires from spark module. Pop module out and replace with new one. Reverse process to complete repair. Cause that the wires do not get under the pan when reinstalling same
Parts Used:
-
Patrick from Greeneville, TN
-
Difficulty Level:Easy
-
Total Repair Time:15 - 30 mins
-
Tools:Screw drivers
6 of 13 people
found this instruction helpful.
Was this instruction helpful to you?
Thank you for voting!
Temp out of wack
-
Peter from Montello, WI
-
Difficulty Level:Really Easy
-
Total Repair Time:More than 2 hours
-
Tools:Nutdriver
3 of 4 people
found this instruction helpful.
Was this instruction helpful to you?
Thank you for voting!