















LSE9900ACW Maytag Washer Dryer Combo - Instructions
Keep searches simple. Use keywords, e.g. "leaking", "pump", "broken" or "fit".
My dryer - which is about 20 years old - was starting to make some rubbing/scraping sounds from the drum area.
This was pretty much as easy as most other folks had described on this site.
1. Removed the two screws at the front bottom that are holding on the fromt panel, and then lift up and remove the panel.
2. Disconnect the door-open-safety-switch, remembering which color of wire goes on which connection.
3. Remove the four screws (two on each side) on the front bracket that supports the drum and tthat contains the front glides.
4. Remove support bracket and lint trap, letting the drum rest gently on the stuff underneath.
5. Remove the screws holding the lint trap to the support bracket. (My model had five screws.) Remove lint trap from support bracket.
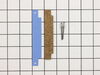
6. Drill out the two pop rivets on each of the two glides, noting the orientation of the teflon pad and mounting strip.
7. Secure - and here is where I had a little problem - new glides in place with pop rivets. (I hadn't use a rivet gun in a while, so I messed up the first pop rivet and had to go to the hardware store to get a replacement. I didn't hold the pop rivet in all the way while I was accuating the gun!)
8. Reverse the process for assembly, and you are all done.
It's simple.
1. Removed the two screws at the front bottom that are holding on the fromt panel, and then lift up and remove the panel.
2. Disconnect the door-open-safety-switch, remembering which color of wire goes on which connection.
3. Remove the four screws (two on each side) on the front bracket that supports the drum and tthat contains the front glides.
4. Remove support bracket and lint trap, letting the drum rest gently on the stuff underneath.
5. Remove the screws holding the lint trap to the support bracket. (My model had five screws.) Remove lint trap from support bracket.
6. Drill out the two pop rivets on each of the two glides, noting the orientation of the teflon pad and mounting strip.
7. Secure - and here is where I had a little problem - new glides in place with pop rivets. (I hadn't use a rivet gun in a while, so I messed up the first pop rivet and had to go to the hardware store to get a replacement. I didn't hold the pop rivet in all the way while I was accuating the gun!)
8. Reverse the process for assembly, and you are all done.
It's simple.
Parts Used:
-
Richard from Loretto, MN
-
Difficulty Level:Really Easy
-
Total Repair Time:1- 2 hours
-
Tools:Nutdriver, Screw drivers
7 of 7 people
found this instruction helpful.
Was this instruction helpful to you?
Thank you for voting!
Washer made screeching sound during spin cycle. Also, the clothes were still very wet at end of spin cycle.
I used two vise grip wrenches in place of specialized tool that is no longer available. I put the vice grip wrenches on the brake assembly and hit them alternately with a hammer. I also used penetrating oil.
Note, the parts package stated made in USA but the bearings had China stamped on them.
Note, the parts package stated made in USA but the bearings had China stamped on them.
Parts Used:


-
Edward from EUCLID, OH
-
Difficulty Level:Difficult
-
Total Repair Time:More than 2 hours
-
Tools:Nutdriver, Pliers, Screw drivers, Socket set, Wrench (Adjustable), Wrench set
7 of 8 people
found this instruction helpful.
Was this instruction helpful to you?
Thank you for voting!
water leaking from machine during spin cycle
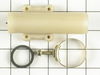
I initially could not figure out how to open the machine so I checked the internet for a repair manual. After getting it open I found the source of the problem. The siphon break was missing the diaphragm and was spitting water when the tub was draining. I did not know what a siphon break was or did. I am non mechanically inclined. So I sealed the top of the siphon break with a sandwich bag and a zip tie, put in a load and went to work. I now know what the siphon break does after it ran all day filling and draining for over 8 hrs. That is when I found this site, ordered the part and received it the next day as promised. It took about 10 minutes to put the part in and close the washer back up. It has been a week now and the garage is almost dry . HA , and my wife wanted a new washer ! This part and delivery was under $25. A new machine around $800 if I am lucky. The ability for me to be smug as long as she never finds out about the sandwich bag incident, PRICELESS !
Parts Used:
-
Franz from Woodcrest, CA
-
Difficulty Level:Easy
-
Total Repair Time:Less than 15 mins
-
Tools:Nutdriver, Screw drivers, Socket set
7 of 8 people
found this instruction helpful.
Was this instruction helpful to you?
Thank you for voting!
Latch was broken over 15 years
Old latch and door striker were pried out with a flat blade screwdriver. New components popped right in. Repair was less than two minutes.
Parts Used:

-
Ken from Rochester, NY
-
Difficulty Level:Really Easy
-
Total Repair Time:Less than 15 mins
-
Tools:Screw drivers
7 of 8 people
found this instruction helpful.
Was this instruction helpful to you?
Thank you for voting!
Controller board display showed error F for both dryers on running mode but it wouldn't accept any command; went into the set up and here display showed F5. C
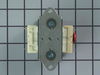
The difficult part was to find what component was bad. Maytag does not sell the manual for this machine any more. We could not figure out what the problem was until we decided to check the voltage on the board and compare it to a second machine that we have. The second machine showed different readings so we decided to compare voltages on the transformer (main) that is at the bottom of the machine. There is a Primary (110 volts) and two secondaries; one which output is about 26 VAC and the other is above 10 VAC. The bad transformer had no output in one of the secondaries. Replacing the transformer was pretty simple. Make sure to disconnect the machine please before doing the repair.
Parts Used:
-
Luis from Naperville, IL
-
Difficulty Level:Easy
-
Total Repair Time:15 - 30 mins
-
Tools:Pliers, Screw drivers
7 of 8 people
found this instruction helpful.
Was this instruction helpful to you?
Thank you for voting!
Washer was shaking and not balanced
The instructions were clear. Did every step. Did 2 loads so far and everything works like new.
Parts Used:

-
Dean from New Lenox, IL
-
Difficulty Level:A Bit Difficult
-
Total Repair Time:More than 2 hours
-
Tools:Nutdriver, Pliers, Screw drivers, Socket set, Wrench set
8 of 12 people
found this instruction helpful.
Was this instruction helpful to you?
Thank you for voting!
Washer making high pitched squeal at stopping of spin cycles
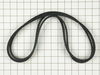
My washer is apparently 37 years old. I bought it used in the 90’s and have had to do little or nothing to it repair wise. It started to make a loud squeal/squeak when the spin cycle stopped. I watched a couple videos showing the brake assembly, bearings and belt replacement and was able to find parts. However, one bearing appears to no longer be made (just repacked with heavy duty grease) and the special tool is nonexistent. I read others using a chain clamp vise to remove the brake assembly and bought a 20 inch chain clamp vise and a 3 set variety of vise grip pliers for about $20. They make an 18 inch chain vise but glad I got the 20 inch. I used two vise grip pliers to clamp chain around notch two notches that the specialty tool would normally grab. It was a cumbersome getting in there to whack the pliers with a small sledge hammer so I got a approx 18 inch 2x4 and cut a notch at the end to keep chain vise from digging into bottom of washer and whacked the end of the 2x4. Seemed to work ok and did the same to tighten back after replacing break assembly. Got it out back together and no more squeal.
Parts Used:
-
Chad from BOERNE, TX
-
Difficulty Level:A Bit Difficult
-
Total Repair Time:1- 2 hours
-
Tools:Screw drivers, Socket set
7 of 9 people
found this instruction helpful.
Was this instruction helpful to you?
Thank you for voting!
Oil leak from lower lip seal
I didn’t have special tool for brake but punch and hammer worked. Seal was easy to replace. Several videos online to show you how. It wasn’t worth it to tear apart the transmission and buy more parts/seals (if they were even available). But I didn’t know how much oil was in it. I drilled a hole in the side to somewhat check level and added 80-90 gear oil. It was almost empty and added almost a quart. Used a self taping screw/bolt with gasket sealer to plug the hole. I got 34 yrs out of this washer. If it fails, oh well. Just hate to buy a new one that only last 10yrs if im lucky.
Parts Used:

-
Anthony from CHESANING, MI
-
Difficulty Level:Easy
-
Total Repair Time:1- 2 hours
-
Tools:Nutdriver, Screw drivers, Socket set, Wrench set
6 of 6 people
found this instruction helpful.
Was this instruction helpful to you?
Thank you for voting!
Worn belts
All I had to do is tilt the machine to expose the bottom and replace the belts. It was fast, easy and the machine works fine now.
Parts Used:
-
Ronald from Birmingham, MI
-
Difficulty Level:Really Easy
-
Total Repair Time:Less than 15 mins
8 of 12 people
found this instruction helpful.
Was this instruction helpful to you?
Thank you for voting!
water leaking when filling with water
I was lucky to find a youtube video that showed every step. The hardest part was removing the front of the machine only because the screws were a little tough to access. Part replacement was quick and easy. It saved me approx $150.00
Parts Used:

-
John from Downers Grove, IL
-
Difficulty Level:Easy
-
Total Repair Time:15 - 30 mins
-
Tools:Nutdriver, Screw drivers, Socket set
6 of 6 people
found this instruction helpful.
Was this instruction helpful to you?
Thank you for voting!
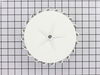
Blower fan was broken and spinning on the motor shaft
Removed front cover, removed housing cover, took old fan off, installed new fan, put covers back on.
Your instructional video was very helpful. He told which screws to remove to get the covers off. I was unsure about how access the fan until I watched. Well done!
Your instructional video was very helpful. He told which screws to remove to get the covers off. I was unsure about how access the fan until I watched. Well done!
Parts Used:

-
Roger from Owatonna, MN
-
Difficulty Level:Easy
-
Total Repair Time:15 - 30 mins
-
Tools:Screw drivers, Socket set
6 of 6 people
found this instruction helpful.
Was this instruction helpful to you?
Thank you for voting!
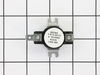
Dryer ran hot
Took off door, then removed front of dryer to access the internal controls. Project went pretty darn well
Parts Used:
-
Larry from Swanton, OH
-
Difficulty Level:A Bit Difficult
-
Total Repair Time:30 - 60 mins
-
Tools:Screw drivers, Socket set
7 of 9 people
found this instruction helpful.
Was this instruction helpful to you?
Thank you for voting!
broken siphon elbow
I thought it was going to be next to impossible to find a replacement part for an older washer. So my first attempt was to try to epoxy the original part, but the epoxy didn't hold up to the stress. I began thinking about what I might need to make a replacement part which was possible but not very practical. Although I dreaded trying to find this part online, I was very surprised and elated to happen upon PartSelect! Oh, by the way, this washer belongs to my daughter and I nave tossed the paper I wrote the model number on, so the model number was entered as the part number, sorry. At any rate, the the part was reasonable priced, and shipping about standard, but I still saved a lot by doing it myself rather than having a repair person for something this simple. Partselect online lookup made it easy to find the model and drawings to help me find the correct part nomenclature. AND, the part was in stock! So I am pleased with how this venture worked out.
Parts Used:
-
Larry from Chippewa Lake, OH
-
Difficulty Level:Easy
-
Total Repair Time:1- 2 hours
-
Tools:Nutdriver
7 of 10 people
found this instruction helpful.
Was this instruction helpful to you?
Thank you for voting!
Trying to install the drum belt by reaching in from the front over the top of the blower & motor.
I observed that the top of the dryer was affixed by two screws at each front corner. With these removed the top of the dryer could be easily lifted and with the front support panel removed the drum, drive motor and idler pulley could be accessed. This allowed the installation of a new drum belt in a short period of time. Installing the belt from the front lower left hand side proved very difficult for me but with the top raised and coming in from the top it was accomplished in short order. Thank you, Wesley Harmon
Parts Used:
-
Wesley from Tulsa, OK
-
Difficulty Level:A Bit Difficult
-
Total Repair Time:1- 2 hours
-
Tools:Nutdriver, Pliers, Screw drivers, Socket set, Wrench set
7 of 10 people
found this instruction helpful.
Was this instruction helpful to you?
Thank you for voting!
Washer Leaked Water From Bottom Seal
Removed washer tubs inner and outer nut (part # 10 ) on inner was hard to remove and is a reverse thread used hammer to loosen once off removed 1st tub - then removed set screw #17 and then unscrewed mounting s item #29 this again required some hammer tapping to loosen - once off used flat head screwdriver to pry & remove the rubber piece on bottom of outer or 2nd tub -but keep going as the leak will probably be from part #20 tub bearing ( this will save you the time to test and find out it still leaks and have to take apart again after only replacing #29 removed 3 bolts holding tub - disconnected hoses and removed 2nd tub - used rubber hammer to knock out and install #20 tub bearing - reasembled and wow no leaks to cost about $120 - time worked on 3 hrs - only because took apart 2 times - down time on washer 10 days as we didn't order all parts to start with no beer needed but did enjoy a nice red wine - good luck
Parts Used:
-
JACLYN from RICE LAKE, WI
-
Difficulty Level:Difficult
-
Total Repair Time:More than 2 hours
-
Tools:Pliers, Screw drivers, Socket set, Wrench set
6 of 7 people
found this instruction helpful.
Was this instruction helpful to you?
Thank you for voting!