















LEB116GT2WH General Electric Range - Instructions
Keep searches simple. Use keywords, e.g. "leaking", "pump", "broken" or "fit".
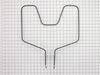
Oven bake element burned out (literally!)
Removed oven door & shelves. Removed the 2 mounting screws & compared parts to verify I ordered the right one, then plugged it right in! Managed to drop & lose one of the screws while re-installing them. Got a stainless sheet metal screw from the hardware store that fits, but will probably order an exact replacement because the size & thread are slightly different. All in all, other than losing the screw, it was a quick, easy task.
Parts Used:
-
Robert from Dumfries, VA
-
Difficulty Level:Really Easy
-
Total Repair Time:Less than 15 mins
-
Tools:Socket set
0 of 1 people
found this instruction helpful.
Was this instruction helpful to you?
Thank you for voting!
plastic canister melted on burner
-
Joel from Avon, OH
-
Difficulty Level:Really Easy
-
Total Repair Time:Less than 15 mins
0 of 1 people
found this instruction helpful.
Was this instruction helpful to you?
Thank you for voting!
Burned out element
Turned off circuit breaker, removed the two screws, pulled out the wires, unhooked the connections and hooked up the new element. Put the two screws back in, turned on the power and it worked! So, so easy! I wouldn't have attempted it had it not been for the other stories associated with the part I purchased.
Parts Used:
-
Ellen from Carmichael, CA
-
Difficulty Level:Really Easy
-
Total Repair Time:Less than 15 mins
-
Tools:Socket set
0 of 1 people
found this instruction helpful.
Was this instruction helpful to you?
Thank you for voting!
coil burned out
-
william from east stroudsburg, PA
-
Difficulty Level:Really Easy
-
Total Repair Time:Less than 15 mins
-
Tools:Pliers
0 of 1 people
found this instruction helpful.
Was this instruction helpful to you?
Thank you for voting!
Bake element burnt apart
I removed the 2 screwws inside the oven cavity and pulled the element towards me. I unplugged the wires from the element and plugged in the new one and secured it in place with the 2 screws.
Parts Used:
-
Roger from Barnesville, OH
-
Difficulty Level:Really Easy
-
Total Repair Time:Less than 15 mins
-
Tools:Nutdriver, Pliers
0 of 1 people
found this instruction helpful.
Was this instruction helpful to you?
Thank you for voting!
Broken bake element
Shut off electrical supply to stove.Remove 2 screws.
Slide element out enough to remove connectors from element.
Position new element.Slide connectors onto new element.
Slide element back into position.Replace 2 screws.Turn on electrical supply.
Slide element out enough to remove connectors from element.
Position new element.Slide connectors onto new element.
Slide element back into position.Replace 2 screws.Turn on electrical supply.
Parts Used:
-
Harvard Folding Box Co from Lynn, MA
-
Difficulty Level:Really Easy
-
Total Repair Time:Less than 15 mins
-
Tools:Nutdriver
0 of 1 people
found this instruction helpful.
Was this instruction helpful to you?
Thank you for voting!
Bake element had broke and caught fire
It was real easy all I had to do was turn the breaker off,Undo two srews and disconnect the two wires. Then repeated the process to install
Parts Used:
-
Joey from barto, PA
-
Difficulty Level:Really Easy
-
Total Repair Time:Less than 15 mins
-
Tools:Wrench (Adjustable)
0 of 1 people
found this instruction helpful.
Was this instruction helpful to you?
Thank you for voting!
Heating element worn-out
Turned off the breaker to the stove, removed oven racks, used small pair of plyers to remove bolts (2) holding defective element in place. Pulled (2) wires that had a snap connection apart. Old element was not removed. Connected (2) snap wires, pushed them back into the oven wall, used plyers to re-connect the element to oven. Installation DONE!
Turned on breaker and then the oven; we are now baking again.
Turned on breaker and then the oven; we are now baking again.
Parts Used:
-
Mary from Bivalve, MD
-
Difficulty Level:Really Easy
-
Total Repair Time:Less than 15 mins
-
Tools:Pliers
0 of 1 people
found this instruction helpful.
Was this instruction helpful to you?
Thank you for voting!
bake element in oven burned out
Using a wrench, removed old element and simply installed new one - took less than 10 minutes and the oven was working again! Best part was how quickly the item reached us - ordered it on a Wednesday afternoon and had it by Friday afternoon, with no expedited shipping - Great Service!
Parts Used:
-
Amy from Etna, CA
-
Difficulty Level:Easy
-
Total Repair Time:Less than 15 mins
-
Tools:Wrench set
0 of 1 people
found this instruction helpful.
Was this instruction helpful to you?
Thank you for voting!
Bake element burns out heating up easter dinner
Uplugged the oven and undid the back contact cover, removed the nuts inside the oven and slid out the element. Pushed the new element into place and secured it. Attached the contacts and replaced the cover. Plugged it in and got cookin'.
Parts Used:
-
joseph from mastic, NY
-
Difficulty Level:Really Easy
-
Total Repair Time:Less than 15 mins
0 of 1 people
found this instruction helpful.
Was this instruction helpful to you?
Thank you for voting!
bake element burned out, lower unit
removed nuts from inside, removed rear panel, pulled old
part out, slipped new part in.
DONE
SHIPPING AHEAD OF TIME, YOUR COMPANY SAVED ME THE PURCHASE
OF A NEW STOVE. THANK YOU FOR FAST & GOOD SERVICE.
NO ONE HAD THE PART BUT YOU FOLKS.
part out, slipped new part in.
DONE
SHIPPING AHEAD OF TIME, YOUR COMPANY SAVED ME THE PURCHASE
OF A NEW STOVE. THANK YOU FOR FAST & GOOD SERVICE.
NO ONE HAD THE PART BUT YOU FOLKS.
Parts Used:
-
Murray from Franklin Square, NY
-
Difficulty Level:Really Easy
-
Total Repair Time:Less than 15 mins
-
Tools:Nutdriver, Screw drivers
0 of 1 people
found this instruction helpful.
Was this instruction helpful to you?
Thank you for voting!
oven was not heating properly
took out the old element after cutting the circuit breaker, put in the new one, it was that easy
Parts Used:
-
Susan from SAlisbury, NC
-
Difficulty Level:Really Easy
-
Total Repair Time:Less than 15 mins
-
Tools:Screw drivers
0 of 1 people
found this instruction helpful.
Was this instruction helpful to you?
Thank you for voting!
10-yr old Baking Element gave out
This repair was idiot-proof. Removed 2 screws, unplugged the old part, plugged in the new one, and replaced the 2 screws.
Literally a 2 minute repair!!
Literally a 2 minute repair!!
Parts Used:
-
Timothy from Boise, ID
-
Difficulty Level:Really Easy
-
Total Repair Time:Less than 15 mins
-
Tools:Nutdriver
0 of 1 people
found this instruction helpful.
Was this instruction helpful to you?
Thank you for voting!
Bottom element cracked/split - open circuit
Removed oven shelves (30 seconds). Removed 2 screws holding broken element to oven (2 minutes). Pulled broken element assembly out & removed 2 wires attached to element (1 minute). Connected wires to new element (just push them into place) and mounted new element with the 2 screws (1 1/2 minutes). Turned on oven element to test & since I was so tired from all of this 5-minute activity, I rested.
Al S.
Al S.
Parts Used:
-
Al from Charlotte, NC
-
Difficulty Level:Really Easy
-
Total Repair Time:Less than 15 mins
-
Tools:Nutdriver
0 of 1 people
found this instruction helpful.
Was this instruction helpful to you?
Thank you for voting!
old bake element broke
This is how I did it--but I would strongly recommend you do step 4 first, and skip step 3! Remember, because 240V circuits have 2 "hot" wires, they may be "hot" (120V to ground) even when switched off!
1. Removed the mounting screws with a nut driver.
2. Pulled out the old element. BARE lug connectors on loose wires came out with it.
3. Watched an impressive show of sparks.
4. TURNED OFF THE CIRCUIT BREAKER.
5. Separated the connectors. Had to use pliers on the one I "fried".
6. Connected new element (connectors pushed together easily.
7. Reattached with screws
8. Turned breaker back on.
1. Removed the mounting screws with a nut driver.
2. Pulled out the old element. BARE lug connectors on loose wires came out with it.
3. Watched an impressive show of sparks.
4. TURNED OFF THE CIRCUIT BREAKER.
5. Separated the connectors. Had to use pliers on the one I "fried".
6. Connected new element (connectors pushed together easily.
7. Reattached with screws
8. Turned breaker back on.
Parts Used:
-
Andrew from Cary, MS
-
Difficulty Level:Easy
-
Total Repair Time:Less than 15 mins
-
Tools:Nutdriver, Pliers
0 of 1 people
found this instruction helpful.
Was this instruction helpful to you?
Thank you for voting!