















LEB116GT2WH General Electric Range - Instructions
Keep searches simple. Use keywords, e.g. "leaking", "pump", "broken" or "fit".
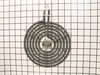
Electric stove 8" burner needed to be replaced
Installation took 30 seconds. Your website was easy to use & the part received was just as described. It arrived beautifully wrapped & in just a few days. ABSOLUTELY AWESOME!I will recommend your site to everyone.
Parts Used:
-
LISA from GLENDALE, CA
-
Difficulty Level:Really Easy
-
Total Repair Time:Less than 15 mins
0 of 1 people
found this instruction helpful.
Was this instruction helpful to you?
Thank you for voting!
Burner heating coil element would not get hot.
I pulled out the heating coil and pushed in the new coil. I turned the stove top on and heard a sound like "dzzzt". I immediately turned off the burner and waited for it to cool, then pulled it out. The part had a burn melt on one side of the end prong. It turns out that the part that the burner plugs into needs to be replaced. Actually, the stove top is over 20 years old and my landlord will have to replace the whole unit. So it turns out that I didn't need to order a surface element after all, but it was very easy to install!
Parts Used:
-
Jeannette from Haskell, NJ
-
Difficulty Level:Really Easy
-
Total Repair Time:Less than 15 mins
0 of 1 people
found this instruction helpful.
Was this instruction helpful to you?
Thank you for voting!
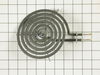
element broken at contact point
ordered new surface element and pushed in to conector turned on switch to test and works fine thanks
Parts Used:
-
MARLENE from EUGENE, OR
-
Difficulty Level:Really Easy
-
Total Repair Time:Less than 15 mins
0 of 1 people
found this instruction helpful.
Was this instruction helpful to you?
Thank you for voting!
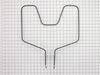
wasn't heating anymore
orderd a replacement part. recieved it two days later then that evening installed it. there was a video online to show how to replace it. very useful if your not a do it yourselfer.
Parts Used:
-
nelson from milan, IN
-
Difficulty Level:Really Easy
-
Total Repair Time:Less than 15 mins
-
Tools:Nutdriver
0 of 1 people
found this instruction helpful.
Was this instruction helpful to you?
Thank you for voting!
A few days before Christmas, my lower oven heat element went out.
I went on-line, found Partselect.com, they gave me the part number, showed me a video on the repair details, shipped the part overnight, and within ten minutes of the arrival of the part, I was up and running. EXCELLENT SERVICE! Thanks for saving Christmas at our house!!
Parts Used:
-
Patsy from Rosharon, TX
-
Difficulty Level:Really Easy
-
Total Repair Time:Less than 15 mins
-
Tools:Socket set
0 of 1 people
found this instruction helpful.
Was this instruction helpful to you?
Thank you for voting!
Small burners would not work
ordered parts and disassembled old burners and installed new ones. All the parts were in the box when delivered.
Helping my 80 yr old mother-in-law very happy.
Got parts in for one of her 81st birthday present she was thrilled.
Helping my 80 yr old mother-in-law very happy.
Got parts in for one of her 81st birthday present she was thrilled.
Parts Used:
-
David from Goodyear, AZ
-
Difficulty Level:Really Easy
-
Total Repair Time:Less than 15 mins
-
Tools:Screw drivers
0 of 1 people
found this instruction helpful.
Was this instruction helpful to you?
Thank you for voting!
Bake element was broken
Remove the oven racks, remove the two retaining screws, unplugged the wires. Install wires on new bake element, insert element into opening, install & tighten retaining screws, replace oven rack's & there you have it.
Parts Used:
-
Shane from Roy, UT
-
Difficulty Level:Really Easy
-
Total Repair Time:Less than 15 mins
-
Tools:Nutdriver
0 of 1 people
found this instruction helpful.
Was this instruction helpful to you?
Thank you for voting!
old burned caught on fire
I've been looking for an 8" replacement burner for my GE stove after my original burner caught on fire over a year ago. I had all but given up on finding a replacement after searching at all the stores in my area and also searching on the net. After cooking sides for Thanksgiving dinner this year and the pain of cooking with only 1 large burner, I decided to search again for a burner on line and thank goodness I found this site! All I did was put in the model number of my range/stove and the site directed me to the replacement burner. The picture of the burner looked like mine, so I decided to purchase it but I still wasn't convinced it would fit and work because of my failed previous burner purchases. I really thought my burner was too old and the part was no longer made. Well the part shipped very quickly and lo and behold it fit and worked! Installing was a breeze...I just snapped it in...thanks so much!
Parts Used:
-
Nilgun from Springfield, VA
-
Difficulty Level:Really Easy
-
Total Repair Time:Less than 15 mins
0 of 1 people
found this instruction helpful.
Was this instruction helpful to you?
Thank you for voting!
Bake element set itself on fire and burned in half
First - really check that the part you order will fit. Our oven is 30 years old and the first part we ordered was not correct, but it came the very next day after we ordered it which is amazing. We were more careful about measuring for the second one and it came almost as quickly. It only took a few seconds to unscrew the old element and then reattach the wires to the new one and screw it back into the oven. Very simple. I highly recommend PartSelect.
Parts Used:
-
Cynthia from Okeana, OH
-
Difficulty Level:Really Easy
-
Total Repair Time:Less than 15 mins
-
Tools:Screw drivers
0 of 1 people
found this instruction helpful.
Was this instruction helpful to you?
Thank you for voting!
heating element burnt through
Very easy repair. Part came wrong the first time (my fault for ordering the wrong one). Called and ordered the correct one after a closer match to the original part. Delivered much quicker than promised (one day) and installation very easy. Will use this site for all future repairs.
Parts Used:
-
Michele from Columbia, IL
-
Difficulty Level:Really Easy
-
Total Repair Time:Less than 15 mins
0 of 1 people
found this instruction helpful.
Was this instruction helpful to you?
Thank you for voting!
Oven Bake element broken
Well...you'll notice in other tools I put Tweezers. Now you really don't need tweezers if you do it right in the first place. Here's what I did: 1) unscrewed the nuts that hold the element in on the back of the unit. 2) Then pulled the terminals out of the holes in the back of the oven. OOPS...there were sparks as the right terminal wire hit the metal frame of the back of the oven. Scared me. I jumped. the terminal wire burned/broke off and fell back into the hole. Yep...Too late I remembered that the VERY first step of this repair is 1)CUT OFF THE POWER TO THE OVEN. I repeat...THE FIRST STEP IS TO CUT OFF THE POWER TO THE OVEN. I couldn't reach the wire with the needle nose pliers so I had to go get the tweezers. Couldn't see the wire but I just put the tweezers in about two times and it finally caught on the wire and I was able to pull it out. Luckily the terminal end was still connected to the wire so I didn't have to replace it. From there it was 3)remove the old terminal posts from the wires (used the needle nose here to wiggle the ends off - been on a long time), 4)insert the new ones, 5) push the terminal posts back in the holes, 6) screw the nuts back on, 7) bake the cornbread. A very quick job -- plus the element from PartSelect was almost half the price of any other I found (due to this I was able to upgrade the shipping a little to get it sooner and still saved money over any other price I found. Just remember to CUT OFF THE JUICE BEFORE YOU START this repair and it will be done in 5 mins or less.
Parts Used:
-
Joy from Leesburg, GA
-
Difficulty Level:Really Easy
-
Total Repair Time:Less than 15 mins
-
Tools:Nutdriver, Pliers
0 of 1 people
found this instruction helpful.
Was this instruction helpful to you?
Thank you for voting!
oven bake element broken
I actually don't remember if instructions came with purchase. I have purchased appliance parts from here before and they did on previous times. I watched a couple of YouTube videos because I'm a visual guy (as I think most guys are) and the only difference between my reality and the video was I had nuts holding the element in place and the video had screws holding it in place. Extremely easy!! TURN OFF POWER TO STOVE.....PLEASE. Confirm power is OFF (clock not working...range wont turn on....something like that) Take oven door off hinges (mine just slid off without any problem). Remove defective element from oven. In the back there are two screws or bolts, take them out. SLOWLY pull old element out. Be careful and look for the insulation that will try to come out of the hole and watch for the wires that are attached to the element. The wires will come out far enough for you to work with them (about 6" or so). Be very careful NOT to jerk wires through holes too much or damage them. Remove wires from element. I used two pliers, one on element and one on wire crimp...I also sprayed wd40 on the connection prior and let it set for a short time before to loosen it up. Once separated, discard old element. Get new element and reverse the process. I reconnected wires, making sure to put them back in the exact same side they came off of. Ease the element power prongs back through the holes (VERY CAREFULLY, DON'T RUSH AND TEAR IT UP). The new element will fit exactly where the old one came off and just put the screws or bolts back in place and be VERY CAREFUL NOT TO STRIP THE SCREWS OR BOLTS. Turn power back on at breaker and turn on oven to check and see that it works. It should work great. This is the second part I've purchased from these guys and both jobs went flawlessly. I HIGHLY RECOMMEND these guys...plus it's almost the only place I could find to get the parts, but still they are great.
Parts Used:
-
Greg from Baytown, TX
-
Difficulty Level:Really Easy
-
Total Repair Time:Less than 15 mins
-
Tools:Nutdriver, Pliers
0 of 1 people
found this instruction helpful.
Was this instruction helpful to you?
Thank you for voting!
Heating element broke and not working
-
brad from flatwoods, KY
-
Difficulty Level:Really Easy
-
Total Repair Time:Less than 15 mins
-
Tools:Socket set
0 of 1 people
found this instruction helpful.
Was this instruction helpful to you?
Thank you for voting!
bake element burnt out
-
Ronald from MAHWAH, NJ
-
Difficulty Level:Really Easy
-
Total Repair Time:Less than 15 mins
-
Tools:Socket set
0 of 1 people
found this instruction helpful.
Was this instruction helpful to you?
Thank you for voting!
Heating element broke and not working
-
brad from flatwoods, KY
-
Difficulty Level:Really Easy
-
Total Repair Time:Less than 15 mins
-
Tools:Nutdriver
0 of 1 people
found this instruction helpful.
Was this instruction helpful to you?
Thank you for voting!