















LDE22CT Maytag Dryer - Instructions
Keep searches simple. Use keywords, e.g. "leaking", "pump", "broken" or "fit".
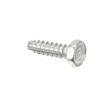
Idler pulley arm mounting screw stripped
This should have been a simple repair, but turned out to be time consuming and moderately difficult. I hope these instructions will help anyone who encounters the problems described here.
After a period of the dryer not being used, the idler pulley wheel froze on the shaft of the idler pulley arm, so I needed to replace both parts. After mounting the new wheel and two washers on the new arm and securing with a retaining ring, I went to install this assembly by going in through the small access panel at the rear of the dryer. I slid the belt off the old idler pulley wheel and unhooked the spring from the idler pulley arm; the arm was mounted on a sleeve fastened to the motor bracket by one screw. All that should have been necessary was to back out that screw and replace the old idler pulley assembly with the new one.
That is where the trouble started. Backing out the screw with a socket driver, I found it would go a few turns, then start to bind. I tried turning it in and out to get the threads to engage, but it kept binding. Eventually I gave the screw a hard turn, and then it would turn freely but not move in or out.
Looking on the internet for advice, I found a video that asserts for another model Maytag dryer using the same type of mounting for the idler arm, that there is a design flaw. You can find the video by searching for “Maytag dryer idler pulley defect”. According to the video, the sheet metal screw used to mount the idler pulley arm can gradually loosen due to the pressure and vibration, and begins to “waggle” which eventually damages the threads. I believe this is what happened to my dryer. The video suggests replacing the sheet metal screw with a machine screw and nut for a more durable union.
So now I understood how the screw could be stripped just sitting in the dryer, but that didn’t help me get the screw out. Working through the rear access panel, I tried pulling on the screw head with several types of pliers, pushing the point from behind with a piece of wood while turning the head with a socket driver; eventually I was able to use a pry bar under the screw head and sleeve to apply pressure while turning the head, and with that method the screw backed out. With the screw removed, it could be seen that the threads in the middle part of the thread length were almost completely worn away.
The screw sleeve got somewhat deformed in this process so I ordered a new one, along with an exact replacement sheet metal screw, hoping the threads in the hole were still intact. With the old idler pulley arm now removed, I could transfer the old idler bracket spacer to the new idler pulley arm. When the ordered parts arrived and I tried to mount the idler pulley arm, the new screw would go in only a couple of turns before binding. Rather than risk winding up in the same situation by forcing the screw, I decided to use a machine screw and nut instead.
The original sheet metal screw was a #10. A machine screw the same size would not fit through the hole, and I could not fit my drill into the dryer cabinet in a position to enlarge the hole, so I used a #8 machine screw with a nut and lock washer. First I put some grease on the contact areas of the screw sleeve and idler bracket spacer, then inserted the machine screw through the hole and put the lock washer and nut on the other side of the mounting. The space around the nut is very limited, and most of my tools were too large to hold the nut while the screw was tightened. It was too small for a socket or adjustable wrench, and the clearance from the exhaust duct was too small for the handles of most tools. Eventually, I found a needle nose pliers with short handles that did the job. A thin open end wrench might also work. Then I reconnected the spring and belt to the idler pulley assembly, and closed the access panel. So far the dryer works, but if the #8 screw turns out to be not strong enough, I could get an extension for my drill and enlarge the hole to fit a #10 machine screw and nut.
Looking back on the job, the most difficult part of this repair was removing the damaged screw. This and several other steps might have been a lot easier if I had removed the motor bracket (where the idler pulley arm is mounted) from the dryer and worked outside the cabinet. Part Select has an excellent video “Replacing the Drive Motor” that shows how to do this. It would be a lot of disassembly work, but for someone with good assembly skills could be easier in the long run.
Hopefully most folks out there who replace the idler pulley arm on a dryer will find an easier situation than I did. But for any who have to deal with a stripped mounting screw, I hope this summary will help you resolve it.
After a period of the dryer not being used, the idler pulley wheel froze on the shaft of the idler pulley arm, so I needed to replace both parts. After mounting the new wheel and two washers on the new arm and securing with a retaining ring, I went to install this assembly by going in through the small access panel at the rear of the dryer. I slid the belt off the old idler pulley wheel and unhooked the spring from the idler pulley arm; the arm was mounted on a sleeve fastened to the motor bracket by one screw. All that should have been necessary was to back out that screw and replace the old idler pulley assembly with the new one.
That is where the trouble started. Backing out the screw with a socket driver, I found it would go a few turns, then start to bind. I tried turning it in and out to get the threads to engage, but it kept binding. Eventually I gave the screw a hard turn, and then it would turn freely but not move in or out.
Looking on the internet for advice, I found a video that asserts for another model Maytag dryer using the same type of mounting for the idler arm, that there is a design flaw. You can find the video by searching for “Maytag dryer idler pulley defect”. According to the video, the sheet metal screw used to mount the idler pulley arm can gradually loosen due to the pressure and vibration, and begins to “waggle” which eventually damages the threads. I believe this is what happened to my dryer. The video suggests replacing the sheet metal screw with a machine screw and nut for a more durable union.
So now I understood how the screw could be stripped just sitting in the dryer, but that didn’t help me get the screw out. Working through the rear access panel, I tried pulling on the screw head with several types of pliers, pushing the point from behind with a piece of wood while turning the head with a socket driver; eventually I was able to use a pry bar under the screw head and sleeve to apply pressure while turning the head, and with that method the screw backed out. With the screw removed, it could be seen that the threads in the middle part of the thread length were almost completely worn away.
The screw sleeve got somewhat deformed in this process so I ordered a new one, along with an exact replacement sheet metal screw, hoping the threads in the hole were still intact. With the old idler pulley arm now removed, I could transfer the old idler bracket spacer to the new idler pulley arm. When the ordered parts arrived and I tried to mount the idler pulley arm, the new screw would go in only a couple of turns before binding. Rather than risk winding up in the same situation by forcing the screw, I decided to use a machine screw and nut instead.
The original sheet metal screw was a #10. A machine screw the same size would not fit through the hole, and I could not fit my drill into the dryer cabinet in a position to enlarge the hole, so I used a #8 machine screw with a nut and lock washer. First I put some grease on the contact areas of the screw sleeve and idler bracket spacer, then inserted the machine screw through the hole and put the lock washer and nut on the other side of the mounting. The space around the nut is very limited, and most of my tools were too large to hold the nut while the screw was tightened. It was too small for a socket or adjustable wrench, and the clearance from the exhaust duct was too small for the handles of most tools. Eventually, I found a needle nose pliers with short handles that did the job. A thin open end wrench might also work. Then I reconnected the spring and belt to the idler pulley assembly, and closed the access panel. So far the dryer works, but if the #8 screw turns out to be not strong enough, I could get an extension for my drill and enlarge the hole to fit a #10 machine screw and nut.
Looking back on the job, the most difficult part of this repair was removing the damaged screw. This and several other steps might have been a lot easier if I had removed the motor bracket (where the idler pulley arm is mounted) from the dryer and worked outside the cabinet. Part Select has an excellent video “Replacing the Drive Motor” that shows how to do this. It would be a lot of disassembly work, but for someone with good assembly skills could be easier in the long run.
Hopefully most folks out there who replace the idler pulley arm on a dryer will find an easier situation than I did. But for any who have to deal with a stripped mounting screw, I hope this summary will help you resolve it.
Parts Used:
-
Alan from BETHESDA, MD
-
Difficulty Level:A Bit Difficult
-
Total Repair Time:More than 2 hours
-
Tools:Nutdriver, Pliers, Screw drivers, Socket set
3 of 3 people
found this instruction helpful.
Was this instruction helpful to you?
Thank you for voting!
Much noise when drying clothes.
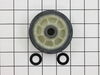
Installation of drum support kit was difficult because my snap ring pliers would not fit in the snap ring holes. Had to use pliers and screw driver to get them off and to put them back on. That took much patience and time. Installation of front guides was a bit difficult because the rivets were loose and turned when trying to drill them out. Also they were bigger and I needed a larger drill bit than the 1/8 told about in the video. Used drill, screw driver and pliers to get the rivets out. Also took more time and patience to do this. Belt did not need replacement but felt it a good idea to do it as long as I was in there. Belt installation was easy because my dryer has a rear view opening and I could use it to thread the belt. Tried it from the front as shown in the video just to see if I could and found it impossible. Could not even get my hands to hold the belt. Also vacuumed out 20 years of lint and dust that was inside the dryer. The videos were excellent in showing what to do and how to do it. Not sure how well I would have done without them.
Parts Used:
-
Roger from RALEIGH, NC
-
Difficulty Level:A Bit Difficult
-
Total Repair Time:1- 2 hours
-
Tools:Pliers, Screw drivers, Socket set
5 of 9 people
found this instruction helpful.
Was this instruction helpful to you?
Thank you for voting!
Dryer No longer shuts off When Door Opened
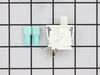
All you need for a Maytag is a snub nose Philips screw driver. The screws on the front panel are at the bottom angled down, so a regular length Phillip's won't work. Just unscrew the 2 screws, then lift the panel up and out. Careful not to pull out too far, there are 2 wires attached to the switch. The replacement switch is NOT an exact copy of the old one. My Maytag is over 30 years old and it only had 2 prongs on the switch. The new one has 3. Don't let that throw you. It is the same size. Just attach, 1 wire to the bronze connector & the other to the silver. Push the switch into the door opening, re-attach the door. Total time 20 minutes. Saved well over $100 in a service call. Anyone with an IQ above freezing can do it.
Parts Used:
-
Conrad from CHESAPEAKE, VA
-
Difficulty Level:Really Easy
-
Total Repair Time:15 - 30 mins
-
Tools:Screw drivers
3 of 3 people
found this instruction helpful.
Was this instruction helpful to you?
Thank you for voting!
dryer filter screen broken
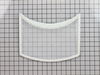
I didn't think it would fit as it looked bigger then the old one, I called the service department and they were very helpful. They made note of the fact that I had called with questions in case I had to call again, but it worked, and no one laughed at me. It was very nice of them. Thank you for all the help
Parts Used:
-
suzanne from Ottawa, IL
-
Difficulty Level:Really Easy
-
Total Repair Time:Less than 15 mins
3 of 4 people
found this instruction helpful.
Was this instruction helpful to you?
Thank you for voting!
Button to start dryer
Per instructions I printed off online: took off door, then the front panel. Pulled out the old switch/button, connected the new switch/button, made sure the new button was working; put the panel back on then the door and DONE!
Parts Used:
-
Loretta E. from Miamisburg, OH
-
Difficulty Level:Easy
-
Total Repair Time:Less than 15 mins
-
Tools:Screw drivers
4 of 7 people
found this instruction helpful.
Was this instruction helpful to you?
Thank you for voting!
Squeaking noise
I had replaced belt, but the noise continued. Ordered new rollers and washer. Removed the front panel by tipping the dryer back against the wall and removing two screws at the bottom of the panel. Tipping the dryer makes it easy to remove the front panel. Removed the front drum support by removing four (4) screws. I was then able to just move the drum enough to have access to the rollers. Didn't even have to remove the belt. Replaced the rollers. Needed special pliers to remove and replace the retaining rings. Put the drum back into position and mounted the front drum support. Tightened four screws and then put the front panel back on. Plugged it in and tested it. Problem solved. Took about 35 minutes. Thanks
Parts Used:


-
Charles from Daphne, AL
-
Difficulty Level:Easy
-
Total Repair Time:30 - 60 mins
-
Tools:Pliers, Screw drivers, Socket set
3 of 4 people
found this instruction helpful.
Was this instruction helpful to you?
Thank you for voting!
One of the roller shafts was worn
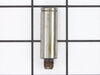
Replaced both rollers,shafts, bearings and snap rings.
Parts Used:
-
William from Springfield, OH
-
Difficulty Level:Really Easy
-
Total Repair Time:15 - 30 mins
-
Tools:Nutdriver, Screw drivers
3 of 4 people
found this instruction helpful.
Was this instruction helpful to you?
Thank you for voting!
Squealling clothes dryer.
Undid two screws in lower front of dryer and popped off front. Removed screws holding lint screen duct and brackets supporting tumbler and removed duct and tumbler quite easily. Pulled, cleaned and oiled rear rollers, replaced front glides, and thoroughly cleaned exhaust duct of lint. Put new belt into position on the roller before sliding tumbler back in, then pulled belt over tumbler as it went in. Be careful to follow belt path directions correctly.
Key to this repair was obtaining the parts so easily from Parts Select.com. Ordered at 2pm and had them 2pm the following day. Unbelievable! These machines are relatively simple to keep running when the parts are available so easily. Thanks for great service.
Key to this repair was obtaining the parts so easily from Parts Select.com. Ordered at 2pm and had them 2pm the following day. Unbelievable! These machines are relatively simple to keep running when the parts are available so easily. Thanks for great service.
Parts Used:
-
Stephen from Port Jefferson, NY
-
Difficulty Level:Easy
-
Total Repair Time:1- 2 hours
-
Tools:Screw drivers, Socket set, Wrench set
3 of 4 people
found this instruction helpful.
Was this instruction helpful to you?
Thank you for voting!
Initially the dryer made a loud rumble during startup, It progressed until the noise was continuous during operation.
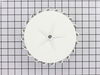
Because of the nature of the noise, and knowing nothing of appliance repair, I assumed that there was a loose belt. I figured that the belt would be accessible from the rear of the machine. After much disassembly, I discovered that the belt was in fine shape and not the problem. But every time I spun the drum, I could still hear the rumbling sound. Eventually, I discovered that the from paned of the dryer is the easiest to remove. Once I removed that, I discovered the blower fan housing. A few screws later and I could see that the plastic fan center was worn out. I had a part number so I simply did a quick internet search and found several sites that stocked it. PartSelect had the best price and the best shipping prices as well. I placed the order on Saturday afternoon. I got the confirmation immediately, and the shipping information on Monday. On Wednesday the part was waiting at my door! It took about 15 minutes to re-assemble the dryer and now, about 18 loads later, it's perfect!
Thank you PartSelect!!!!
Joe G
Thank you PartSelect!!!!
Joe G
Parts Used:
-
Joseph from Ontario, NY
-
Difficulty Level:Easy
-
Total Repair Time:1- 2 hours
-
Tools:Nutdriver, Screw drivers, Socket set
2 of 2 people
found this instruction helpful.
Was this instruction helpful to you?
Thank you for voting!
blower fan central stem broke off. was making a bad noise.
We had trouble getting the front of the dryer off; we tried to pry the top off. It works better if you remove the screws at the bottom of the front panel ;) Once we had the front off, we used a 1/4" ratchet wrench to take the front off the fan housing. We took off the compression clamp off easily with a pair of priers. Removing the retainer clip was harder; we ddn't have the right tool. We removed the broken fan. We ordered the part, easy peasy, from this website. Had to buy a $9 tool to put the retainer washer back on. We reassembled the fan housing and put the fron back on. It worked! Total cost: ~$30.00. Actual time (excluding waiting for parts and buying tools): 2 hours.
Parts Used:
-
David from EASTPOINTE, MI
-
Difficulty Level:A Bit Difficult
-
Total Repair Time:1- 2 hours
-
Tools:Socket set
2 of 2 people
found this instruction helpful.
Was this instruction helpful to you?
Thank you for voting!
old lint filter had a tear in it.
Just pulled out the old filter and inserted the new one. went great and fit good.
Parts Used:
-
Farrell from Le Mars, IA
-
Difficulty Level:Really Easy
-
Total Repair Time:Less than 15 mins
2 of 2 people
found this instruction helpful.
Was this instruction helpful to you?
Thank you for voting!
Lint Filter had a hole on it.
-
Eduardo from Miami, FL
-
Difficulty Level:Really Easy
-
Total Repair Time:Less than 15 mins
2 of 2 people
found this instruction helpful.
Was this instruction helpful to you?
Thank you for voting!
Rumbling when dryer was running and also for about 5 seconds after dryer stopped
Removed the two lower screws holding front of dryer assembly in place and "unhinged" it and stood it up on floor. Then I unclipped the two wire leads on inside of dryer door assembly and moved assembly completely out of work area. Next I removed the four screws holding the tumbler frame in place and removed that frame from the work area. Now you can access the blower wheel "frame" and remove 5 or 6 hex screws to get that off and out of your way. You DO NOT have to remove the dryer drum and/or drum belt to complete this repair, so save yourself some work and leave it in place!! Once the blower wheel frame is off, use pliers and a flatheaded screwdriver to get the small outer retaining clip off, and then just pliers to get the wheel retaining ring off the wheel shaft. Put on the new blower wheel, use pliers to replace the aforementioned wheel retaining ring, and then the small outer retaining clip...VIOLA! You're finished! Dryer will run like new with a smooth purr instead of that dreaded rumbling sound.
Parts Used:
-
Stephen from Gibraltar, MI
-
Difficulty Level:Really Easy
-
Total Repair Time:15 - 30 mins
-
Tools:Pliers, Screw drivers, Socket set, Wrench set
2 of 2 people
found this instruction helpful.
Was this instruction helpful to you?
Thank you for voting!
Loud squeaking noise
I removed the front of the dryer and the drum support plate. I drilled out the old rivets and installed the Glides with the enclose rivets. The Glides came loose in a few days! The holes in the glides are larger than in the old Glides. I disassembled the dryer again and reassembled with my rivets. This time I held the rivet gun inside the perimeter of the dryer so that the head of the rivet is opposite the initial installation. So far, so good, except the dryer still squeaks. The idler pulley is now the culprit. White grease burned up. I reassembled with high temperature grease. If that does not work, I will need another idler pulley. The journal looks very worn. the dryer is 30+ years old.
Parts Used:
-
William from ORANGE, CA
-
Difficulty Level:Really Easy
-
Total Repair Time:30 - 60 mins
-
Tools:Socket set
2 of 2 people
found this instruction helpful.
Was this instruction helpful to you?
Thank you for voting!
Belt broke...drum would not turn but there was heat.
Removed front cover.removed 4 screws holding drum in place. Cleaned out lint from everywhere. Placed new belt over drum looping it over idler arm & motor pulley. Pushed drum back ; rotated drum to see that belt was engaged. Put front drum bracket in place. Put front panel in place with 2 screws at the bottom. Tested motor & rotation of drum; then checked heat. All worked fine. Took 1 hr. but most time spent cleaning lint.
Parts Used:
-
Dirk from CHESWICK, PA
-
Difficulty Level:Really Easy
-
Total Repair Time:30 - 60 mins
-
Tools:Nutdriver
2 of 2 people
found this instruction helpful.
Was this instruction helpful to you?
Thank you for voting!