















KDTE104ESS0 KitchenAid Dishwasher - Instructions
Keep searches simple. Use keywords, e.g. "leaking", "pump", "broken" or "fit".
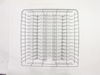
transfer wheel racks, rack height adjuster and upper wash arm to new rack
The repair was similar to the very good video provided by PartSelect. However, I did make a few changes. The new rack was slightly different in the front side compared to the old rusted rack. After I removed the old rack from the dishwasher, I placed the two racks side-by -side to make sure they were compatible. They were identical in the rear structure and overall size, so I proceeded to change out the wheel racks, rack height adjusters and upper wash arm to the new rack. I suggest transferring each part one at a time so you can get the spacing correct. Also, in my case, many of the items needed to be washed with water to remove soap buildup in these parts before moving to the new rack. I would also suggest putting the upper wash arm (needed in this case) on the new rack last. The total job took me about an hour including washing or rinsing all parts and reassembly. This is an easy job, just take your time and do one item at a time so nothing gets mixed up. I used a drill driver to remove a total of 4 Phillip head screws for the rack height adjusters but a regular Phillip head screw driver would work as well.
Parts Used:
-
Paul from WILMINGTON, DE
-
Difficulty Level:Really Easy
-
Total Repair Time:30 - 60 mins
-
Tools:Nutdriver
4 of 4 people
found this instruction helpful.
Was this instruction helpful to you?
Thank you for voting!
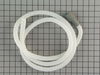
A mouse was chewed through the hose and ate part of it. Di
Disconnected the damaged hose extension from the dishwasher outlet drain hose and the connection to the sink drain. Removed two clamps. One a spring clamp and the other a screw clamps. Connected the new extension hose with a spring clamp to the dishwasher outlet drain hose. Connected the other end to the sink drain with a screw clamp. Checked for leaks. Good to go!
Parts Used:
-
Michael from NEW HOPE, PA
-
Difficulty Level:Really Easy
-
Total Repair Time:Less than 15 mins
-
Tools:Pliers, Screw drivers, Wrench (Adjustable)
5 of 7 people
found this instruction helpful.
Was this instruction helpful to you?
Thank you for voting!
What a Difference
The rinse aid cap fixed the problem of leaking rinse aid sta9n9ng the dishwasher every time. What an easy and cheap fix.
Parts Used:
-
Darlene from SAVAGE, MN
-
Difficulty Level:Very Easy
-
Total Repair Time:Less than 15 mins
4 of 4 people
found this instruction helpful.
Was this instruction helpful to you?
Thank you for voting!
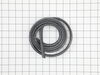
Dishwasher door leaking
Pull the old seal out and push the new seal in. Done. Easy. The only issue is the door is still leaking and I have to replace the seal and the plate that goes across the bottom of the door.
Order both this seal and the seal for the bottom of the door at the same time.
Order both this seal and the seal for the bottom of the door at the same time.
Parts Used:
-
Paul from HGHLNDS RANCH, CO
-
Difficulty Level:Really Easy
-
Total Repair Time:30 - 60 mins
4 of 4 people
found this instruction helpful.
Was this instruction helpful to you?
Thank you for voting!
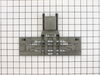
The left front tab holding Rack Adjuster to slide out rail snapped off
I did a Youtube search and discovered there were a couple that showed the replacement in detail. I watch the entire process once and then had my laptop beside the upper rack and paused the video after each step. That worked well
Parts Used:
-
Keith from BRECKENRIDGE, CO
-
Difficulty Level:A Bit Difficult
-
Total Repair Time:30 - 60 mins
-
Tools:Screw drivers
5 of 8 people
found this instruction helpful.
Was this instruction helpful to you?
Thank you for voting!
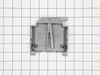
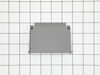
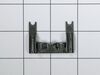
Housing outer piece was broken
Removed old housing parts and replaced them with the new parts I ordered. Very easy
Parts Used:
-
Larry from MANCHESTER, NJ
-
Difficulty Level:Very Easy
-
Total Repair Time:Less than 15 mins
4 of 5 people
found this instruction helpful.
Was this instruction helpful to you?
Thank you for voting!
A plastic retainer pin for the bottom kick panel was missing.
simply line up the new pin with the rectangular slot in the kick panel and metal panel behind, slide the pin in and turn it with a flat blade screw driver.
NOTE: the original pin was black. A black replacement part cost $29 plus shipping! A knock-off pin was only $6 plus shipping. I got the cheap one and colored it with a black Sharpee marker before installation.
NOTE: the original pin was black. A black replacement part cost $29 plus shipping! A knock-off pin was only $6 plus shipping. I got the cheap one and colored it with a black Sharpee marker before installation.
Parts Used:

-
Todd from ROTONDA WEST, FL
-
Difficulty Level:Really Easy
-
Total Repair Time:Less than 15 mins
-
Tools:Screw drivers
4 of 5 people
found this instruction helpful.
Was this instruction helpful to you?
Thank you for voting!
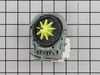
Would not drain water
Pulled washer out far enough to put 2x4’s under front feet. Removed front panel, I clipped wire connector and unplugged it. Pushed plastic locking lever in and twisted unit counterclockwise. Wiped inner rim and reversed above procedure to assemble.
Parts Used:
-
Maynard from WISDOM, MT
-
Difficulty Level:Really Easy
-
Total Repair Time:15 - 30 mins
-
Tools:Nutdriver
3 of 3 people
found this instruction helpful.
Was this instruction helpful to you?
Thank you for voting!
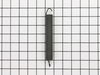
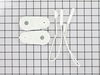
Original door balance cord broke on one side
pulled the dishwasher out (took the most time-1 hour) and 30 min. to install new door balance kit and springs. Replace both sides while the unit was out.
Parts Used:
-
Jerry from BOALSBURG, PA
-
Difficulty Level:Very Easy
-
Total Repair Time:15 - 30 mins
-
Tools:Nutdriver
3 of 3 people
found this instruction helpful.
Was this instruction helpful to you?
Thank you for voting!
Plastic peg that holds the upper main rack failed and broke off left side allowing the rack to droop and not usable.
In looking at the parts catalog the part I needed didn’t state left or right side piece. I understood that the same part was used on both sides. Knowing the other side may fail also I ordered (2) pieces. Once they arrived I took apart the surrounding element using a screw driver to pop the enclosure apart carefully. I noted where each clip went and re-assembled the enclosure.
Parts Used:
-
Harold from OMAHA, NE
-
Difficulty Level:Really Easy
-
Total Repair Time:15 - 30 mins
-
Tools:Screw drivers
3 of 3 people
found this instruction helpful.
Was this instruction helpful to you?
Thank you for voting!
drain pump noisy, broken piece of glass caught in pump.
removed kick panel with screwdriver, 90 degree turn of screw. Put towel under drain pump. Disconnect drain hose by loosening spring clip with pliers to provide access to pump. released spring clip on old motor while turning counterclockwise to separate pump from drain reservoir. inspect drain reservoir from inside machine to remove any foreign objects. Installed new pump by indexing attachment flanges to notches in reservoir and turning pump clockwise until locking tab makes audible click. reattach drain hose insuring hose is contacting "stop" ribs on drain hose pipe. Run wash cycle on machine to insure there are no leaks. Re-attached kick panel.
Parts Used:
-
David from OXFORD, MI
-
Difficulty Level:Really Easy
-
Total Repair Time:15 - 30 mins
-
Tools:Pliers, Screw drivers
4 of 6 people
found this instruction helpful.
Was this instruction helpful to you?
Thank you for voting!
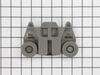
Wheels would not stay on
I took the old wheel assembly off and snapped the new wheel assembly on. It’s that simple. Note the dishwasher rack needs to be empty. Very pleased with this site. Parts came super fast.
Parts Used:
-
Dominic from AURORA, IL
-
Difficulty Level:Very Easy
-
Total Repair Time:Less than 15 mins
3 of 3 people
found this instruction helpful.
Was this instruction helpful to you?
Thank you for voting!
Water filter needed replacing
-
Martha from SAN DIEGO, CA
-
Difficulty Level:Very Easy
-
Total Repair Time:Less than 15 mins
4 of 6 people
found this instruction helpful.
Was this instruction helpful to you?
Thank you for voting!
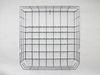
Rack tines were corroded
Took off the old wheels and placed them on the new rack - fast and easy if you watch the video.
Parts Used:
-
J Kevin from Pittsburg, CA
-
Difficulty Level:Very Easy
-
Total Repair Time:Less than 15 mins
-
Tools:Screw drivers
4 of 6 people
found this instruction helpful.
Was this instruction helpful to you?
Thank you for voting!
Replaced lower dishrack wheel assembly
No instructions were given but I found a YouTube video of the repair and it took less than a minute to install.
Parts Used:
-
Jeff from WEST CHESTER, OH
-
Difficulty Level:Very Easy
-
Total Repair Time:Less than 15 mins
-
Tools:Screw drivers
3 of 3 people
found this instruction helpful.
Was this instruction helpful to you?
Thank you for voting!