















JMS27G2J2 General Electric Range - Instructions
Keep searches simple. Use keywords, e.g. "leaking", "pump", "broken" or "fit".
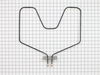
Oven Heating element broken
Turned off power to the oven at the circuit breaker. Pulled the old heating element from the back lower wall of the oven. Noted the position of the wires (right terminal attached to the red wire, left to the black wire). Removed small bolts holding the element to the wires using pliers. Attached the new element using screw driver. New element came with screws, not bolts. Pushed the element back into place and restored power. Tested to make sure everything worked. Everything works and I ran an oven cleaning cycle. Noticed that indicator light above the temperature selctor is always on now even when oven is in the OFF position. Not sure if that's related to the change or to the oven cleaning cycle I ran. In any case, oven seems to work normally.
Parts Used:
-
James from Hanover, MA
-
Difficulty Level:Really Easy
-
Total Repair Time:Less than 15 mins
-
Tools:Pliers, Screw drivers
2 of 3 people
found this instruction helpful.
Was this instruction helpful to you?
Thank you for voting!
element burned out
Took off the door, took out the two screws in the back of the element. Then pulled the element forward, then removed the two wires. Then put it all back together with the new element.
Parts Used:
-
Jeff from Westport, IN
-
Difficulty Level:Really Easy
-
Total Repair Time:Less than 15 mins
-
Tools:Nutdriver, Screw drivers
2 of 3 people
found this instruction helpful.
Was this instruction helpful to you?
Thank you for voting!
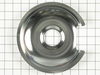
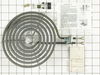
Guest melted a nylon cutting board on the burner
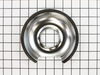
Ordered new burner and drip pan. New parts arrived within 3 days. Removed screw holding the hinge, removed clips from porcelain insulator, removed old burner, then installed new burner, reinstalled tilt lock hinge, replaced drip pan and ring and set burner in place. The whole installation took less than 10 minutes, and it works perfectly.
Parts Used:
-
Kay from Austin, TX
-
Difficulty Level:Really Easy
-
Total Repair Time:Less than 15 mins
-
Tools:Screw drivers
2 of 3 people
found this instruction helpful.
Was this instruction helpful to you?
Thank you for voting!
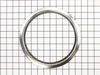
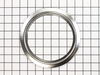
Bake Element was bad and Drip bowls needed replaced
First I turned the breaker off the Range. Second I removed the two screws that held the element inplace. Then I pulled element front until I could get to the two screw which connected the wires and removed then. Removed old Bake element. Installed new element by connecting the two wires and then pushed the element into place and secured it by reinstalling the two screws. Turned the breaker back on and tested. This is a very easy item to replace and takes very little time.
Parts Used:
-
Randall from Lititz, PA
-
Difficulty Level:Really Easy
-
Total Repair Time:15 - 30 mins
-
Tools:Nutdriver
2 of 3 people
found this instruction helpful.
Was this instruction helpful to you?
Thank you for voting!
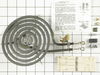
Replacement of broken element
Read and follow the instructions. Be careful when stripping old wires to attach to new element. Fit the element to ceramic casing prior to attaching wires. If new element does not seem level after replacement heat a large pot of water. The element will expand and the weight of the pan of water will settle the element. "Physics 101"
Parts Used:
-
Thomas from Boulder Creek, CA
-
Difficulty Level:Easy
-
Total Repair Time:30 - 60 mins
-
Tools:Pliers, Screw drivers, Socket set
2 of 3 people
found this instruction helpful.
Was this instruction helpful to you?
Thank you for voting!
All burners on stove needed to be replaced due to age
Followed instruction that came in the new parts. Each element took about 10 minutes to remove, inspect the wires, clean the connections and reconnect the new elements. The element covers that came with the kit were easy to install, and everything fit just fine. Most important thing is to turn of the electrical power to the unit BEFORE you start.
Parts Used:
-
ROY from CULPEPER, VA
-
Difficulty Level:Easy
-
Total Repair Time:30 - 60 mins
-
Tools:Nutdriver, Pliers, Screw drivers
2 of 4 people
found this instruction helpful.
Was this instruction helpful to you?
Thank you for voting!
Worn out burner element
1. Turn off power to range and remove element.
2. Remove clips from ceramic guards.
3. Disconnect wiring.
4. Connect wires to new element.
5. Install ceramic guards and clips
6. Attached element to range.
7. Restore power.
2. Remove clips from ceramic guards.
3. Disconnect wiring.
4. Connect wires to new element.
5. Install ceramic guards and clips
6. Attached element to range.
7. Restore power.
Parts Used:
-
Art from SEATTLE, WA
-
Difficulty Level:Really Easy
-
Total Repair Time:15 - 30 mins
-
Tools:Nutdriver, Screw drivers
1 person
found this instruction helpful.
Was this instruction helpful to you?
Thank you for voting!
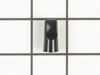
tabs soldered on end of coils (2) into which wire connectors are fitted are oversize
file/grind inner corners to fit into ceramic blocks correctly
Parts Used:
-
william from BOWIE, MD
-
Difficulty Level:A Bit Difficult
-
Total Repair Time:30 - 60 mins
-
Tools:Nutdriver
1 person
found this instruction helpful.
Was this instruction helpful to you?
Thank you for voting!
bake element disintegrated
At 76 I no longer do my repairs so I asked my daughter's friend to do it for me.
Parts Used:
-
Susan from New Lebanon, NY
-
Difficulty Level:Really Easy
-
Total Repair Time:15 - 30 mins
1 person
found this instruction helpful.
Was this instruction helpful to you?
Thank you for voting!
bake element burned out
took cover off back of stove. Removed two screws and wires that were attached to the element. Removed old element and installed new element. An easy repair.
Parts Used:
-
Dave from Maryville, OH
-
Difficulty Level:Easy
-
Total Repair Time:15 - 30 mins
-
Tools:Nutdriver, Screw drivers
1 person
found this instruction helpful.
Was this instruction helpful to you?
Thank you for voting!
One burner was not level and the otherone I burned out tea kettle on it and when I pulled the kettle off the burner it was also not level not to mention part of the kettle was burned onto the burner.
I didn't turn the power off which was risky and dangerous, however it was very easy just removing one screw a couple of wires and installing the new one. VERY EASY!
Parts Used:
-
Jenean from San Jose, CA
-
Difficulty Level:Really Easy
-
Total Repair Time:15 - 30 mins
-
Tools:Screw drivers
2 of 4 people
found this instruction helpful.
Was this instruction helpful to you?
Thank you for voting!
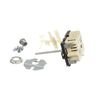
The small element blew out consequently shorting out the infinite switch.
The very first thing we did was turned the circuit breaker off and unplugged the range.
My husband removed the back panel and unplugged the switch. Drew a diaghram of the color coded wires. When we received the new one he broke the extension bar off to fit the knob, plugged it in and we were back in business. It was very easy for my husband as he is a mechanic (millwright). However, if you are mechanically inclined it is an easy fix.
My husband removed the back panel and unplugged the switch. Drew a diaghram of the color coded wires. When we received the new one he broke the extension bar off to fit the knob, plugged it in and we were back in business. It was very easy for my husband as he is a mechanic (millwright). However, if you are mechanically inclined it is an easy fix.
Parts Used:
-
Susan from Bend, OR
-
Difficulty Level:Really Easy
-
Total Repair Time:15 - 30 mins
-
Tools:Screw drivers
3 of 7 people
found this instruction helpful.
Was this instruction helpful to you?
Thank you for voting!
Broiler and Baking elements replacement
Unplug range from its 220V source. Make sure range is not hot from recent usage. You’ll need a #2 Philips driver, preferably one with 14-18 inch length. The old screws will likely be very stubborn about coming loose. Two of them hold bottom element in. Remove the back panel so access to the two connectors on the bottom element are easily removable. Be very careful not to the let the wire connectors from the heating element drop down into the insulation. For the top element, there are four screws holding it in place, I found it was easier to access these two screws leaning the range backward at a slight angle. Take special care again not to let the wires drop down into the insulation. The connectors to the old element will likely need some extra effort to remove. The reconnection to the new elements should be ok. Make sure all screws go back in that were removed. The new elements will be amazing, and baking and broiling will be like new again.
Parts Used:
-
Joseph from Buford, GA
-
Difficulty Level:A Bit Difficult
-
Total Repair Time:1- 2 hours
-
Tools:Pliers, Screw drivers
1 person
found this instruction helpful.
Was this instruction helpful to you?
Thank you for voting!
elememt not working
Hi, First unplug appliance ,remove the oven door by pulling it up from the hinges, giving room to work deep inside , remove the two screws that hold the element in place. then pull the element out carefully not to stress the wires and replace the element . Note after all is done test with an oven thermometor :)
Parts Used:
-
ROBERT from ORWELL, VT
-
Difficulty Level:Really Easy
-
Total Repair Time:30 - 60 mins
-
Tools:Screw drivers
1 person
found this instruction helpful.
Was this instruction helpful to you?
Thank you for voting!
Heating Unit had seperated from my coils.
A friend had stopped by and insisted on replacing the heating element on my 32 year old range. It took him all of 45 minutes to replace it, and now it works like a charm.
Parts Used:
-
Rosemary from New Port Richey, FL
-
Difficulty Level:Easy
-
Total Repair Time:30 - 60 mins
-
Tools:Screw drivers, Socket set
1 person
found this instruction helpful.
Was this instruction helpful to you?
Thank you for voting!