We're sorry, but our Q&A experts are temporarily unavailable.
Please check back later if you still haven't found the answer you need.
2 questions answered by our experts.
< Prev
1
Next >
Sort by:
Search filter:
Clear Filter
Your search term must have 3 or more characters.
Keep searches simple. Use keywords, e.g. "leaking", "pump", "broken" or "fit".
Sorry, we couldn't find any existing answers that matched.Try using some different or simpler keywords, or submit your new question by using the "Ask a Question" button above!
David
November 19, 2019
Do you have 2 6inch and 2 8inch chrome plated trim rings
For model number JSP27J
Hello David and thanks for writing.
Yes, we do 6 inch part # PS244475, 8 inch PS244479. If you wish to place an order with our company, you will have to contact our customer service. They also will be able to tell you about availability and shipping options and pricing. You can do so one of two ways: email: customerservice@partselect.com, or telephone: 888-738-4871. Thank you.
I'm looking for replacement burner rings and bowls. Not sure if your 8 in bowl is actually 8. The bowl on there now is 8.5. Please send part numbers for both large and small, bowls and rings asap. Thanks! Barb
For model number JBP220F3AD
Hello Barb and thank you for writing.
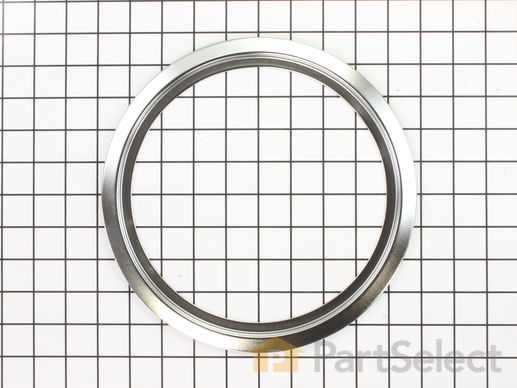
Large trim ring PS244479
Small trim ring PS244475
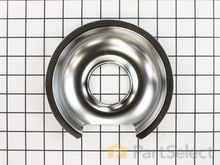
Small drip bowl PS244677
Large drip bowl PS244680
We hope this helps. Please contact us anytime if you require further assistance.
Replacing your General Electric Range Trim Ring - 8 Inch
Customer Repair Stories
Average Repair Rating: 4.7 / 5.0, 37 reviews.
What's this?
< Prev
1
2
3
Next >
Sort by:
Search filter:
Clear Filter
Your search term must have 3 or more characters.
Keep searches simple. Use keywords, e.g. "leaking", "pump", "broken" or "fit".
Sorry, we couldn't find any existing installation instruction that matched.
Needed to replace Drip Pans and Trim Rings for old stove
Repair was simple (just lift off the old and put on the new). What was pleasantly surprising was how quickly I received the parts (amazing)!
Lastly, I've been looking for the correct parts/sizes in stores for years (yes, I should have tried this sooner). I was delighted to finally find a place that actually had the correct parts.
1. Pulled out drawer 2. Vacuumed dust, etc. under stove 3. Reached under stove to rear and pulled plug 4. Pulled the stove out away from wall so I could get to back 5. Removed 5 screws that retained the back of the control panel 6. One by one, I removed each wire from an old control and pushed it onto the same pin on the new control - did same for all 4 burner controls 7. Removed the knobs 8. Removed 2 screws from the front panel for each old control and removed the old controls 9. Pushed each of the new controls into place on the panel and reused screws to secure them in place 10. Cut the long control stems using 2 pliers per instructions to match length of old controls. 11. Used knob adapters provided to mate the old knobs to the new control stems 12. Plugged the stove in and tested the burners 13. Unplugged and replace the panel back with original screws 14. Moved stove back into place 15. The right front burner was the one most used, so I replaced the connector for that burner. 16. That connector came with instructions that I followed - cut the wires to the old connector, splice the wires to the new connector wires using supplied wire nuts and shrink tubing. 17. Plugged the stove back in 18. Replaced drawer - job complete - stove like new
Received the Drip bowls and Rings very quickly. Opened the box and then cut open the plastic wrap that the individual rings and drip bowls were in. Lifted the burner on the stove top, took out the old ring and drip bowl. Installed the shiny new drip bowl and ring, then lowered the stove top element back into place. I was able to replace all 4 of them within 5 minutes. Made the 30 year old stove look brand new.Thank you for perfect fit parts and fast delivery.
So this ancient stove we inherited when we bought our house had the drip bowls wrapped in tin foil. We've searched EVERY (not joking) store in our area for drip bowls that would fit it, but apparently Hotpoint wanted to make sure you could never do this - well, at least not easily. No one, not one store carries drip bowls to fit it. I finally searched online and partselect.com came up first on the list. I was amazed they had the right part! Better yet, ordering was beyond easy, and they came super quick. Popped in the parts in less than 2 minutes, and we're good to go - makes this old stove look new! (well, if this was the 80's, lol) When I clicked on the part it said which stoves it would fit, which was also very helpful. Thank goodness for Part Select! Otherwise we would've had to rewrap those disgusting old bowls... I'd recommend this site in a heartbeat!
Trim Ring - 8" didn't fit right and Drip Bowls were not cleanable any more
Replaced all the ordered parts, and straightened a bent "rest piece" (one of three) on the element os the large burner, which made it rest perfectly on the new Trim Ring. It doesn't easily fall down into the bowl now while I am using the burner. The new Bowls look so nice, and the stove looks nearly new!
I now know where to go for help when I need to repair appliances. You seem to have everything that could possibly be needed. Thank you!
I had called GE for the part numbers from the 1970's GE range. Then entered the part number on this web site. The cost from GE for four reflector pans/rings would have been $130. The price I paid here was $60. Both prices included the shipping. I received the order in a few days from Fed Ex. Wrapped in original GE plastic.
Moved into a house built in 1976 about 7 years ago that came with an old but nice looking GE electric stove. Stove worked well until about a year ago when the switch for the 8" element became erratic. Having been raised where DIYS was SOP I didn't even consider calling for help instead, armed with the stove model number, I went to the internet (How on earth did I ever survive before internet?) and found this site where I quickly found the exploded view of my stove, IDed the switch, ordered and received it within a day or so. Fantastic turn around time!
Now I've never ever worked on an electric stove so I was quite methodical in my approach.
First I read the instructions (you know, when all else fails…) that came with the new switch, then I pulled the stove out, unplugged it and removed the tin back that covers the switches. I drew a diagram of the old switch orientation and which wires attached to what. Then I disconnected the wires, removed the knob and the two screws hiding behind it that hold the switch to the stove.
Oops, the new switch was not identical to the old!!
First: I noticed was that the stem for the knob was longer BUT they proved break off notches so that it can be shortened. Second: the stem on the old switch was a half round while the new stem was square. I tried the 'half round' knob on the square stem and it went on firmly. Nothing ventured nothing gained. Third: the terminal orientation did not match. So armed with my diagram and the instructions I made sure I knew which terminal was which (they are labeled). Once assured I knew what went where (I made notes) I installed the new switch and attached the wires (following my notes).
Being an optimist I reinstalled the tin back, plugged the stove in and pushed it back into position before (with my legs, arms and fingers crossed) I tested the switch (which was not easy considering the position I was in). Lo and behold, no puff of smoke and…ta-da…everything worked as it should.
All in all, upon receiving the switch the whole thing took less than 30 minutes.
Recent.
Less than two weeks ago one of the 6" elements fell apart, still worked but lost the supports that rest on the trim ring. Back to the internet to ordered a new element and new trim rings (just for the cosmetics). Again great service, I think I received my order the second day.
Along with the element they also supply new screws plus the spring clips which hold the ceramic insulator together. There's only two wires to contend with so its easy to determine which is the left wire and which is the right. The old terminal screws were locked in pretty good so I used pliers to hold the terminal while loosening them. There's very little slack in the wires so it was a tad awkward reattaching them to the new element. I did notice that the threaded hole on the new element seemed to be slightly larger than the old. I noticed this when I used the old screws, one would tighten, the other did not so I replaced with the screws they supplied (Duh!). Well I do have an excuse, the new screws were longer which I feared would prevent the insulator from 'closing'. I probably spent the most time attaching the insulator. I found I needed to fiddle with position of the terminals before the two halves of the insulator would meet. I splayed the wires out slightly then cocked the wire ends slightly so that the wires would neatly leave the side of the insulator. I also adjusted the terminals and the bendable wire part on the element so that they were parallel to each other.
The support brackets on one of the burner coils had broken. Also needed new burner pans
I removed the broken coil, took out the old burner pan, put in the new burner pan, and plugged in the new coil. Worked like a dream! Replacing the other burner pans went just as smoothly.
Small elements were losing heating power and large elements did not work.
I unplugged each element from the terminal it was plugged into and then plugged the new element in. I also replace the drip pans and trim rings while I was at it.
The Fix App makes it easy to manage all your stuff in one place. Just snap a photo and we'll find and store your user manuals, receipts, and product information in one easy-to-find place!
"Like magic. I took a picture of the model number on my refrigerator, and the app identified it right away … Very convenient. I'm impressed." ★★★★★ - Clever Jeff