















JGD8348BDP Jenn-Air Cooktop - Instructions
Keep searches simple. Use keywords, e.g. "leaking", "pump", "broken" or "fit".
Replacement
This down draft filter was just what I was looking for. The big box stores (Home Depot and Lowe's) do not carry this size filter. Thanks,
Parts Used:

-
Barb from Holladay, UT
-
Difficulty Level:Really Easy
-
Total Repair Time:Less than 15 mins
-
Tools:Screw drivers
Was this instruction helpful to you?
Thank you for voting!
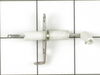
Replacement of top burner igniter
Twisted and lifted off the burner, loosened in a previous repair; removed electrical wires from igniter; undid two screws holding igniter in place; rotated igniter 90 degrees and lifted it out; reversed process with new igniter.3
Parts Used:
-
Godfrey from Las Cruces, NM
-
Difficulty Level:Really Easy
-
Total Repair Time:Less than 15 mins
-
Tools:Screw drivers
Was this instruction helpful to you?
Thank you for voting!
Broken Burner Head,
Take your time and remove items carefully and replace with new items. Very easy but you definately cant rush and possibly need new screws to make it even easier.
Parts Used:
-
Harry from Brookeville, MD
-
Difficulty Level:Really Easy
-
Total Repair Time:30 - 60 mins
-
Tools:Screw drivers
Was this instruction helpful to you?
Thank you for voting!
Broke the insulator on the ignitor while cleaning the cooktop.
Unscrew the bottom cover, remove the old ignitor. Reverse the process to install. Hardest part was getting the bottom cover screws out because of rust. Otherwise, very simple.
Parts Used:
-
David from Shelley, ID
-
Difficulty Level:Really Easy
-
Total Repair Time:30 - 60 mins
-
Tools:Screw drivers
Was this instruction helpful to you?
Thank you for voting!
Burner heads were rusting through and letting flame leak out
Lots of small metal screws to remove on the housing, gas supply and electric igniters. The only challenge for me was getting the old burner heads out of the trays- they ere rusted up and needed a little penetrating oil and time to break free. I re-used my old igniters- had to bend open the little metal rod at the tip a half of a millimeter to get them to fit back thru the new heads. Keep track of how things come apart and the way the gas lines assemble and it's an easy project. Be careful not to over-tighten old screws in rusty holes in the trays.
Parts Used:
-
Steve from Townshend, VT
-
Difficulty Level:Easy
-
Total Repair Time:1- 2 hours
-
Tools:Screw drivers
Was this instruction helpful to you?
Thank you for voting!
Igniter not working
Removed old igniter. Porcelain was broken. Replaced with new igniters. Really simple to do. Took 10 minutes to replace all 4
Parts Used:
-
Casey from Soledad, CA
-
Difficulty Level:Really Easy
-
Total Repair Time:Less than 15 mins
-
Tools:Screw drivers
Was this instruction helpful to you?
Thank you for voting!
2 burners rusted apart, 1 gas valve frozen up.
Removed burner pan screws,igniters, gas tubes & burners. Changed 2 igniters, removed rust & repainted ends of 2 of the tubes (heatproof paint). New burners were made a hair smaller than original but locked in O.K...Now, the hard part...disconnected all four tubes from gas valve assembly. (Had to shut off gas to house in order to remove main gas line to stovetop.) Had to remove valve box in order to remove/replace frozen valve. Unit is 25 years old, works as and looks new...Rust was caused by boil-overs.
Parts Used:
-
robin from saint marys, GA
-
Difficulty Level:A Bit Difficult
-
Total Repair Time:1- 2 hours
-
Tools:Nutdriver, Screw drivers, Wrench (Adjustable)
Was this instruction helpful to you?
Thank you for voting!
Burner igniter was not lighting the pilot. Needed replacement.
We replaced 3 of 4 igniters on the stove top according to the previously submitted recommendations. Easy to do butt after putting one of the modules back together, we found one igniter still didn't function. We discovered the solution was to run the connecting wire under the gas tubing. Apparently it was compressed when it was over the top of the tube and not under it.
Parts Used:
-
Arthur from South Burlington, VT
-
Difficulty Level:Easy
-
Total Repair Time:30 - 60 mins
-
Tools:Screw drivers
Was this instruction helpful to you?
Thank you for voting!
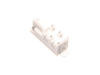
Replacement of a Dead Spark Module
The spark module pulses a stepped up voltage to all four burner sparks at the same time regardless of which burner you want to ignite. I read that this part lasts about 10 years. I don't cook much and it lasted 13 years. On my Magic Chef the part is behind the right side wall panel. Lift the range top,remove all the screws that hold the right side panel in place. This replacement can done without opening any gas fittings.
Parts Used:
-
Cor F. from Pasadena, TX
-
Difficulty Level:A Bit Difficult
-
Total Repair Time:More than 2 hours
-
Tools:Nutdriver, Screw drivers
Was this instruction helpful to you?
Thank you for voting!
broken insulator for top burner igniter
I have a Magic Chef gas stove, The top burner came off with ease, just a quarter turn then pull up to expose igniter. Only two wires to remove and two phillips head screws to remove to release igniter. I was done in 5 minutes.
Parts Used:
-
Paul from Block Island, RI
-
Difficulty Level:Really Easy
-
Total Repair Time:Less than 15 mins
-
Tools:Screw drivers
Was this instruction helpful to you?
Thank you for voting!