















JGD8348BDP Jenn-Air Cooktop - Instructions
Keep searches simple. Use keywords, e.g. "leaking", "pump", "broken" or "fit".
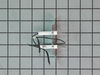
Only two burners lit
Removed old igniter set replaced with new one. Hardest part was using the screw driver to removing the backing. Saved us having to buy a new stove since we just bough the house.
Parts Used:
-
Inga from Petaluma, CA
-
Difficulty Level:Easy
-
Total Repair Time:15 - 30 mins
-
Tools:Screw drivers
Was this instruction helpful to you?
Thank you for voting!
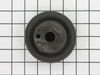
burner head rusted out
undid about 7 screws to get access to underside of burner, unscrewed 4 screws that held on gas feed pipe and ignitor. twisted out old burner and gently removed ignitor from burner. cleanded up area where burner was and installed new one. took a little bit of tweeking to reinsert ignitor but did slide in nicely. reattached gas pipe and all screws. slide burner case back into position. turned on and worked nicely.
Parts Used:
-
jon from bartlett, TN
-
Difficulty Level:Easy
-
Total Repair Time:15 - 30 mins
-
Tools:Pliers, Screw drivers
Was this instruction helpful to you?
Thank you for voting!
Gas burner would not light-had to use lighter
As described for the part. Easy repair. Easy to diagnose thanks to feedback from another customer of yours. Part was received super fast.
Parts Used:
-
James from Osage Beach, MO
-
Difficulty Level:Really Easy
-
Total Repair Time:15 - 30 mins
-
Tools:Screw drivers
Was this instruction helpful to you?
Thank you for voting!
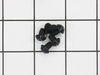
Burner grate pads worn off or missing
I took a jewelers screwdriver and completely cleaned out what was left of the old pads. Then applied a small amount of heat resistant rtv sealant to each hole, slid in the new pads and wiped off the excess. I let everything set overnight. The next day everything was solid. Job was complete. Note I've done this before and did not get the results I did this time. I believe it was the instruction that came with the pads and the tip-off to use the rtv. Thank you PartSelect T.Garr
Parts Used:
-
Thomas from Dayton, OH
-
Difficulty Level:Really Easy
-
Total Repair Time:15 - 30 mins
-
Tools:Screw drivers
Was this instruction helpful to you?
Thank you for voting!
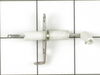
The igniter on my stove wouldn't ignite.
Watched a video on replacing igniter. Removed old igniter and replaced it with new igniter.
Parts Used:
-
keith from massillon, OH
-
Difficulty Level:Really Easy
-
Total Repair Time:Less than 15 mins
-
Tools:Screw drivers
Was this instruction helpful to you?
Thank you for voting!
range- top four burners will not light
-
Rick from Brockway, PA
-
Difficulty Level:Really Easy
-
Total Repair Time:Less than 15 mins
-
Tools:Screw drivers
Was this instruction helpful to you?
Thank you for voting!
feet on gas stove top grates were gone
Very simple, cleaned out what was remaining of the old rubber feet and just pushed these in. I didn't bother glueing them in as I didn't feel they would fall out. If they do, I'll go out and obtain the glue that is mentioned by others in this thread. Very satisfied.
Parts Used:
-
Steve from Tyngsborough, MA
-
Difficulty Level:Really Easy
-
Total Repair Time:Less than 15 mins
Was this instruction helpful to you?
Thank you for voting!
One of the pads on the bottom of the grate kept falling off.
I was able to order the part I needed. The faulty pad had a broken stem.Several pads came in a bag so if I have the problem again I will have the parts on hand. I bought some RTV glue suitable for items at high temperatures; used a probe to make sure the hole in the grate was clear and clean and glued the new pad in place.
Parts Used:
-
Geri from Brand Haven, MI
-
Difficulty Level:Really Easy
-
Total Repair Time:Less than 15 mins
Was this instruction helpful to you?
Thank you for voting!
Holes in the air filter of our Jenn-Air grill

-
Janice from Ocala, FL
-
Difficulty Level:Really Easy
-
Total Repair Time:Less than 15 mins
Was this instruction helpful to you?
Thank you for voting!
Broken cooktop knob
-
Christine from Jefferson, MD
-
Difficulty Level:Really Easy
-
Total Repair Time:Less than 15 mins
Was this instruction helpful to you?
Thank you for voting!
gas burner had rusted out
-
John from Nashville, TN
-
Difficulty Level:Really Easy
-
Total Repair Time:15 - 30 mins
-
Tools:Pliers, Screw drivers
Was this instruction helpful to you?
Thank you for voting!
Burner head was rusted through
This is the second burner head I have replaced. It was easier than the first time but the burner head I received did not have the screw holes to reattach the gas tube to the burner head. I was able to drill my own without too much trouble using a standard bit and electric drill. I used the old burner head to determine what size drill bit to use. Even so, it was still an easy fix.
Parts Used:
-
Joellen from Castro Valley, CA
-
Difficulty Level:Easy
-
Total Repair Time:15 - 30 mins
-
Tools:Screw drivers
Was this instruction helpful to you?
Thank you for voting!
Filter was very old and falling apart.
The grease filter was 20+ yrs old and the mesh was falling of the frame. I was very pleased to find this replacement filter (the first filter I received was damaged....placed a call to PartSelect and have a new one the next day). Can't beat service like that!! Thank you, June Patten
Parts Used:
-
June S from San Antonio, TX
-
Difficulty Level:Really Easy
-
Total Repair Time:Less than 15 mins
Was this instruction helpful to you?
Thank you for voting!
Filter worn out, exhasut fan kept going off
Old filter allowed too much air flow causing exhaust fan to go off....installed new filter in exhaust chamber...release clip on old filter and install new filter (at an angle) in the exhaust box....clamp down clip on edge of filter and job is complete
Parts Used:
-
John from Cayce, SC
-
Difficulty Level:Really Easy
-
Total Repair Time:Less than 15 mins
Was this instruction helpful to you?
Thank you for voting!
The original filter was decomposing each time I washed it
I removed the protective grid over the filter and fan, turned the clip that held the filter in place and removed it. I placed the new intact filter for my antiquated Jenn-aire in its place, replaced the protective grid, and am happily continuing to cook on my functional cook top.Thank you.
Parts Used:
-
Sharon from Kenai, AK
-
Difficulty Level:Really Easy
-
Total Repair Time:Less than 15 mins
Was this instruction helpful to you?
Thank you for voting!