















JCBP350ST1SS General Electric Range - Instructions
Keep searches simple. Use keywords, e.g. "leaking", "pump", "broken" or "fit".
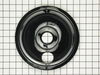
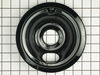
The burner bowls were encrusted with grease and spills.
I easily took out the old ones and put in the new ones sent by Part Select. As promised they fit perfectly. Now when my wife cooks there is no more smoke and it does not set off the smoke detector.
Parts Used:
-
Ed from Canyon City, CO
-
Difficulty Level:Really Easy
-
Total Repair Time:15 - 30 mins
Was this instruction helpful to you?
Thank you for voting!
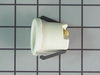
broken light socket
The only tool needed was a nutdriver to remove the lamp socket. I needed my head mounted light to see what I was doing, and everything went smoothly from there. Simple job.
Parts Used:
-
James from Monterey, TN
-
Difficulty Level:Easy
-
Total Repair Time:15 - 30 mins
-
Tools:Nutdriver
Was this instruction helpful to you?
Thank you for voting!
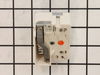
burners would go to full high heat& not reduce down.
Hubby did the job..all went well except for the arthritis & having to bend pull stove out from wall ,pushing back..ha-ha.
Parts Used:
-
Sandra from Chipley, FL
-
Difficulty Level:Easy
-
Total Repair Time:15 - 30 mins
-
Tools:Pliers, Screw drivers, Wrench set
Was this instruction helpful to you?
Thank you for voting!
oven continued to get F2, F3 and F5 error messages when ovewn got hot
This repair was quite a bit more difficult then what had been described on the web site. First off, I have a double wall oven that is built in. Sliding it out of the cabinet was difficult and because oven was hard wired, I had to disconnect the actual wiring from the oven back. . Positioning the oven and allowing for it to rest on a support bench was the most difficult part The oven is heavy. Eventually, removing the back and top panels of the oven revealed the sensor connection. I was then able to feed it through the oven and reconnect all the wiring harnesses.. Getting the oven back in the cabinet was equally a challenge. But it did seem to fix the problem with over heating.
Parts Used:
-
Ralph from Redding, CA
-
Difficulty Level:Difficult
-
Total Repair Time:1- 2 hours
-
Tools:Nutdriver, Screw drivers, Socket set
Was this instruction helpful to you?
Thank you for voting!
The burner would not work.
I pulled the range out, unplugged it, took the back off, unplugged the old terminal block and removed it. Attached the new block and ran the wires through to the back and plugged them in. Reattached the cover on the back of the range, plugged the range back in and pushed it back into place.
Parts Used:
-
Sue from Fort Oglethorpe, GA
-
Difficulty Level:Easy
-
Total Repair Time:15 - 30 mins
-
Tools:Screw drivers
Was this instruction helpful to you?
Thank you for voting!
none to occasional power to burner elements
Exactly followed the instructional video and my installation was flawless. Now the burners power up and function like new. The whole repair was smooth and easy.
Parts Used:
-
Mohammed from San Jose, CA
-
Difficulty Level:Really Easy
-
Total Repair Time:15 - 30 mins
-
Tools:Nutdriver, Pliers
Was this instruction helpful to you?
Thank you for voting!
Burner Would Not Turn Off
-
BILLY from WEBSTER, FL
-
Difficulty Level:Really Easy
-
Total Repair Time:30 - 60 mins
-
Tools:Nutdriver
Was this instruction helpful to you?
Thank you for voting!
Burner bowls had been used and abused for year gone by in this rental.
Replaced them all. Next I want to replace the burners.
Parts Used:
-
Diane from Rio Rancho, NM
-
Difficulty Level:Really Easy
-
Total Repair Time:Less than 15 mins
Was this instruction helpful to you?
Thank you for voting!
6" and 8" burner bowl replacement
Slide out burner elements. Remove old burner bowls. Insert new burner bowls and reinstall burner elements.
Parts Used:
-
Shawn from Lubbock, TX
-
Difficulty Level:Really Easy
-
Total Repair Time:Less than 15 mins
Was this instruction helpful to you?
Thank you for voting!
Wall oven: light flickered or did not work in a loose poreclain socket.
Shut off power at the panel to the electric oven. Removed 2 phillips screws holding bulb unit in place in the top of teh oven chamber. One wire was so frayed it came out of the push on connector. Stripped off insulation and reinstalled onto the connector, using pliers to snug the wires down. Installed the new porcelain socket from Parts Select, replaced the unit in the top of the oven unit. Installed a new bulb, then snapped the new glass housing into place with the existing retaining wire clip. Presto: works like it's brand new. Thanks to Parts Select for the right parts, and for such quick delivery. I will use them again!
Parts Used:
-
Robert from Owings Mills, MD
-
Difficulty Level:Really Easy
-
Total Repair Time:30 - 60 mins
-
Tools:Pliers, Screw drivers
Was this instruction helpful to you?
Thank you for voting!
Burner switch shorted out
This burner is on a Monarch wood and electric range. The 8in burner shorted out and fried the switch. I had to remove the cover over the switch's. I marked each lead with paper and stapled the paper to the leads. When the switch came in I just had to reattach the leads.
Parts Used:
-
Robert from Blairsville, GA
-
Difficulty Level:Really Easy
-
Total Repair Time:15 - 30 mins
-
Tools:Screw drivers
Was this instruction helpful to you?
Thank you for voting!
Burner went to high heat at any setting
Thanks to Partselect's instructions the repair went very easy. When I was done and the wife finished cleaning the sides of the stove and the floor behind it, I was surprised after I plugged the stove back in and noticed the clock was only 18 minutes off! Awesome company to deal with, Thanks!
Parts Used:
-
Robert W from Whitehall, PA
-
Difficulty Level:Really Easy
-
Total Repair Time:15 - 30 mins
-
Tools:Nutdriver, Screw drivers
Was this instruction helpful to you?
Thank you for voting!
Burner wouldnt heat
Watched video,and used it as guideline.Biggest problem was removing tape from old wires.
Parts Used:
-
Mary from Leon, KS
-
Difficulty Level:Easy
-
Total Repair Time:30 - 60 mins
-
Tools:Nutdriver
Was this instruction helpful to you?
Thank you for voting!