















JCBP350ST1SS General Electric Range - Instructions
Keep searches simple. Use keywords, e.g. "leaking", "pump", "broken" or "fit".
eye wouldnt come on
removed the top section on stove and removed the wires off swtitch and put on new one then put new switch in
Parts Used:
-
daniel from valentines, VA
-
Difficulty Level:Really Easy
-
Total Repair Time:15 - 30 mins
-
Tools:Nutdriver
0 of 2 people
found this instruction helpful.
Was this instruction helpful to you?
Thank you for voting!
burner was inoperative
verified switch operation , checked continuity of burner element found open ordered new part and installed next day
after extremely fast
service from partselect thank you
after extremely fast
service from partselect thank you
Parts Used:
-
bryan from cocoa, FL
-
Difficulty Level:Really Easy
-
Total Repair Time:15 - 30 mins
-
Tools:Nutdriver, Pliers, Screw drivers
0 of 2 people
found this instruction helpful.
Was this instruction helpful to you?
Thank you for voting!
light keep burning out in oven.
Remove the door. Just open a little and pull up. Removed racks. Removed 3 screws with nutdriver. Pulled out housing. Disconnected 2 wires. Assembled new housing with with bulb receptacle and gasket. Reconnected wires and crimped a little to make them snug. Pushed housing back into hole. Put 3 screws back in, inserted bulb and cover. Slid door back on and done. 30 minutes at most.
Parts Used:


-
john from Mc Kees Rocks, PA
-
Difficulty Level:Really Easy
-
Total Repair Time:30 - 60 mins
-
Tools:Nutdriver
2 of 8 people
found this instruction helpful.
Was this instruction helpful to you?
Thank you for voting!
Burner not heating.
Isolated to control switch.
Replaced
Replaced
Parts Used:
-
Jack from Greensboro, GA
-
Difficulty Level:Really Easy
-
Total Repair Time:30 - 60 mins
-
Tools:Screw drivers
1 of 5 people
found this instruction helpful.
Was this instruction helpful to you?
Thank you for voting!
2 mounting bracket included, wires too long
I couldn't tell which one work best till I installed 2 units and I liked the other bracket for stability.The wired were too long and there is not a given way to strap them and keep them away from the heat source.
Parts Used:
-
Fuad from Sarsota, FL
-
Difficulty Level:A Bit Difficult
-
Total Repair Time:30 - 60 mins
-
Tools:Nutdriver, Pliers
Was this instruction helpful to you?
Thank you for voting!
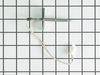
Oven Sensor Replacement
The part was just like the old one and would have been an easy fix except our range suffered from a lighting hit. The clips had melted together. Called a dealer and asked about a new wiring harness. He said in those cases just cut the clip off and hard wire with wire clips,or firecrackers. We used wire nuts and taped all together and the oven works just great. Nothing is ever as easy as it should be.
Parts Used:
-
Barbara from Edwardsville, IL
-
Difficulty Level:A Bit Difficult
-
Total Repair Time:30 - 60 mins
-
Tools:Nutdriver
Was this instruction helpful to you?
Thank you for voting!
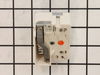
Burner was always on high when on.
Disconnected the power. Removed hex head screws from top and lower rear panel. I think there were 8 all together. Pull the knob of the burner control, removed two screws that held the switch in place. Moved the wires one at a time to the new switch, re-assembled. Burner worked properly. Very easy to find the right part from this web-site, and the instructions from others like this were helpful. Easy fix!
Parts Used:
-
David from Jericho, VT
-
Difficulty Level:Easy
-
Total Repair Time:Less than 15 mins
-
Tools:Nutdriver, Screw drivers
Was this instruction helpful to you?
Thank you for voting!
Burner light would not shut off
Checked each burner switch by disconnecting the light indicator wire. Located the switch, replaced the switch and the indicator light operated as it should.
Parts Used:
-
Curt from Maple Grove, MN
-
Difficulty Level:Really Easy
-
Total Repair Time:Less than 15 mins
-
Tools:Nutdriver, Screw drivers
Was this instruction helpful to you?
Thank you for voting!
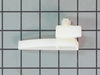
Plastic glide broke
The person I spoke to knew exactly what I was trying to describe. The part arrived in 2 days. 5 minutes later the drawer was back in place. I was glad I save the screw as the part did not come with one.
Parts Used:
-
Mary Ann from Granby, CT
-
Difficulty Level:Really Easy
-
Total Repair Time:Less than 15 mins
-
Tools:Screw drivers
Was this instruction helpful to you?
Thank you for voting!
Burner Switch Went Out
Turn off power at main electric panel/ move stove away from wall and unplug cord from outlet. Take knob off the front take two screws off the panel, take back panel off and remove the used switch and take and replace the wiring to the new one , one at a time wire for wire. Then put back tighter in reverse of the way you took it off. Plug in cord and move stove back to the wall. Easy
Parts Used:
-
Jim from Prosser, WA
-
Difficulty Level:Really Easy
-
Total Repair Time:Less than 15 mins
-
Tools:Nutdriver, Pliers
Was this instruction helpful to you?
Thank you for voting!
surface burner would not work
watched it on parts select this is a real fast and simple install took longer to pull the range out of its position well started by shuting off the power then double checked that the range was deenergized removed the knob then the 2 screws then on the rear of the range removed the back panel about 8 screws used a nut driver then removed the old switch removed each wire one by one and pluged each wire into the new switch just as they were on the old switch the new switch was exactly the same so every thing matched up perfect installed the screws to the front which hold the swich in place then the back cover turned on the power and tested the switch every thing working ok done shut off power slid range back into its place turned power back on everything still ok
Parts Used:
-
julio from hobbs, NM
-
Difficulty Level:Really Easy
-
Total Repair Time:Less than 15 mins
-
Tools:Nutdriver
Was this instruction helpful to you?
Thank you for voting!
GE Electric Range rear left burner quit coming on
Removed the back top cover with 1/4" nutdriver. Removed the burner terminal block with 1/4" nutdriver. Within 15 minutes had the terminal block kit removed and installed and in service.
Parts Used:
-
Richard from Richmond, TX
-
Difficulty Level:Really Easy
-
Total Repair Time:Less than 15 mins
-
Tools:Nutdriver, Pliers
Was this instruction helpful to you?
Thank you for voting!
Oven light wire broken, damaged socket
Remove light bail, glass cover held by two nut screws. Pull socket, removed clips in back, replaced wire connectors, placed new socket in, then glass cover and bail. Wire connected in back, cover plate replaced.
Parts Used:
-
Patricia from Brandenburg, KY
-
Difficulty Level:Really Easy
-
Total Repair Time:Less than 15 mins
-
Tools:Nutdriver, Pliers
Was this instruction helpful to you?
Thank you for voting!
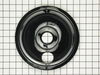
bowls were worn out
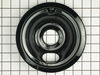
-
frances from winston salem, NC
-
Difficulty Level:Really Easy
-
Total Repair Time:Less than 15 mins
Was this instruction helpful to you?
Thank you for voting!
Burner light would not go out.
Identified the switch that went bad. Order a new one and replaced it. The part came in a timely fashion and I am pleased with the result.
Parts Used:
-
Creed from Topsham, ME
-
Difficulty Level:Really Easy
-
Total Repair Time:Less than 15 mins
-
Tools:Pliers, Screw drivers, Socket set
Was this instruction helpful to you?
Thank you for voting!