















JBS86SP4SS General Electric Range - Instructions
Keep searches simple. Use keywords, e.g. "leaking", "pump", "broken" or "fit".
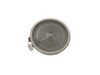
Outside portion of Element broken
First unplug range from electrical outlet!
Removed screws under front edge of stove top, propped it open with long paint stick, pried clips off of the element, unplugged and plugged in new element, push element back into clips, closed top on stove, plug back into socket, tested new burner, put screws back in under top front edge of stove top!!!
Removed screws under front edge of stove top, propped it open with long paint stick, pried clips off of the element, unplugged and plugged in new element, push element back into clips, closed top on stove, plug back into socket, tested new burner, put screws back in under top front edge of stove top!!!
Parts Used:
-
Tiffany from Lexington, OH
-
Difficulty Level:Really Easy
-
Total Repair Time:30 - 60 mins
-
Tools:Pliers, Screw drivers, Socket set
1 person
found this instruction helpful.
Was this instruction helpful to you?
Thank you for voting!
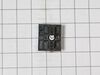
when turn on the larger element would not come on, as the switch moves to the different settings it would light but not staying up.
remove the 4 screw from the back of the control panel take the knob from the front and remove the two screws then raise the rear panel cover up. you can pull the switch from there make picture note of where the plug ups are for replacement its cool
Parts Used:
-
ivan from SNELLVILLE, GA
-
Difficulty Level:Really Easy
-
Total Repair Time:15 - 30 mins
-
Tools:Screw drivers, Socket set
1 person
found this instruction helpful.
Was this instruction helpful to you?
Thank you for voting!
Switch broke and stayed on.
Shut off breaker, pulled the stove out,unplugged it,removed the knob, removed the screws from back top panel. I unplugged the switch, removed the 2 screws holding it in place. Then exchanged it. Re assembled it.
Parts Used:

-
Harold from SANGERVILLE, ME
-
Difficulty Level:Really Easy
-
Total Repair Time:15 - 30 mins
-
Tools:Screw drivers
1 person
found this instruction helpful.
Was this instruction helpful to you?
Thank you for voting!
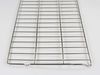
Needed another rack for my oven
Really no repair. Just slid it in my oven and was so happy to have it. It was nice to find just what I needed!
Parts Used:
-
Betty J from Anacortes, WA
-
Difficulty Level:Very Easy
-
Total Repair Time:Less than 15 mins
1 person
found this instruction helpful.
Was this instruction helpful to you?
Thank you for voting!
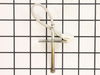
Not Reaching Temperature above 300 Degrees
Take off 6 screws of back cover of the range, unplug the white wire. Go to the inside of oven, pull out racks. At the top of the oven is your Broiler element, in the center you will see a rod sticking out with one screw holding it in place. Take out screw and pull temperature sensor out toward you. Reverse steps to put it back together.
Parts Used:
-
Ron from SAN TAN VLY, AZ
-
Difficulty Level:Very Easy
-
Total Repair Time:Less than 15 mins
-
Tools:Nutdriver
1 person
found this instruction helpful.
Was this instruction helpful to you?
Thank you for voting!
Only one Burner was heating
Disconnect plug from outlet from stove.Remove nob from control switch rem 2 small screws to release switch.Go to the back and proceed to rem back panel with 1/4 nut driver.Pull out switch and replace one lead a time.
Parts Used:
-
David from RIVERVIEW, FL
-
Difficulty Level:Really Easy
-
Total Repair Time:15 - 30 mins
-
Tools:Nutdriver, Screw drivers
1 person
found this instruction helpful.
Was this instruction helpful to you?
Thank you for voting!
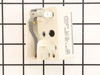
Element blew hole in self then no power to burner.
Replaced burned element, did not fix no power problem. Ordered receptor replacement, replaced it, took less than 10 mminutes, but still no power to burned. Then ordered replacement switch, replacement too less than 10 minutes again and burner works fine.
Parts Used:
-
Melvin from Portland, TN
-
Difficulty Level:Easy
-
Total Repair Time:Less than 15 mins
-
Tools:Screw drivers, Socket set
2 of 4 people
found this instruction helpful.
Was this instruction helpful to you?
Thank you for voting!
Remove back panel or access sensor, replace sensor and panel
-
Mike from Glencoe, NM
-
Difficulty Level:Very Easy
-
Total Repair Time:Less than 15 mins
-
Tools:Nutdriver
1 person
found this instruction helpful.
Was this instruction helpful to you?
Thank you for voting!
Light burnt out.
Turned the wire protector to the side. Turned out the old bulb and replaced it with the new. Turned the wire protector back in place and I'm like new.
Parts Used:

-
Roscoe G from ROCHESTER, NY
-
Difficulty Level:Very Easy
-
Total Repair Time:Less than 15 mins
2 of 4 people
found this instruction helpful.
Was this instruction helpful to you?
Thank you for voting!
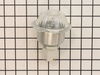
shortage in wiring cause the housing to burn out
Replaced new light housing.
Thanks to you guys for the prompt response
Thanks to you guys for the prompt response
Parts Used:
-
fred from PALM COAST, FL
-
Difficulty Level:Really Easy
-
Total Repair Time:Less than 15 mins
1 person
found this instruction helpful.
Was this instruction helpful to you?
Thank you for voting!
Bake and convection cycles quit working after a10 minutes
Unbolted temperature sensor from back of oven. Disconnect cable connector. Replaced and reconnected new sensor and bolted back in place. Haven’t had to replace bake element yet, but it’s a major job being this GE Profile oven has the bake element hidden. That’s a new one on me.
Parts Used:
-
Stephen from Zachary, LA
-
Difficulty Level:Very Easy
-
Total Repair Time:Less than 15 mins
-
Tools:Nutdriver
1 person
found this instruction helpful.
Was this instruction helpful to you?
Thank you for voting!
Lower element in the upper oven was not heating.
Prep: You need a 1/4” nut driver to remove the screws in the oven. Approx. $6.00 at the hardware store. Flashlight. Two small chip clips or clothespins.
1. Turn off power at the breaker.
2. Remove oven rack.
3. Use nut driver to remove screws and pull element to expose wires. Attach chip clips to each wire to prevent the wires from slipping behind. Remove old element.
4. Plug in the new element and make sure secure. Turn on breaker to test.
While this was a simple repair, turned out the element was not my problem. I needed a new relay board. The relay board part is not readily available, so you have to dig around the web to find one.
1. Turn off power at the breaker.
2. Remove oven rack.
3. Use nut driver to remove screws and pull element to expose wires. Attach chip clips to each wire to prevent the wires from slipping behind. Remove old element.
4. Plug in the new element and make sure secure. Turn on breaker to test.
While this was a simple repair, turned out the element was not my problem. I needed a new relay board. The relay board part is not readily available, so you have to dig around the web to find one.
Parts Used:

-
Bunny from COLUMBIA, SC
-
Difficulty Level:Very Easy
-
Total Repair Time:15 - 30 mins
-
Tools:Nutdriver
1 person
found this instruction helpful.
Was this instruction helpful to you?
Thank you for voting!
main banner was burnt out.
simply followed the instructions. I marked each wire and were to go on new burner. put the burner back in place and it worked.
Parts Used:
-
clinton from SAN JOSE, CA
-
Difficulty Level:Really Easy
-
Total Repair Time:30 - 60 mins
-
Tools:Nutdriver
1 person
found this instruction helpful.
Was this instruction helpful to you?
Thank you for voting!
Change bulb
-
Louis from LEAGUE CITY, TX
-
Difficulty Level:Really Easy
-
Total Repair Time:30 - 60 mins
-
Tools:Nutdriver
3 of 8 people
found this instruction helpful.
Was this instruction helpful to you?
Thank you for voting!
Water dumped over in in my overhead microwave, which dripped down on, & shorted out a burner switch.
My husband had already removed the back plate form the stove and detached the wires from the old burner switch because it was keeping the burner on. He unscrewed the old switch and removed it. He then popped in the new switch, attached the wires to the correct contacts, and put the back plate back on. We plugged in the stove, and that burner works good as new.
Parts Used:
-
Deanna from Buckeye, AZ
-
Difficulty Level:Really Easy
-
Total Repair Time:Less than 15 mins
-
Tools:Pliers, Screw drivers
1 of 3 people
found this instruction helpful.
Was this instruction helpful to you?
Thank you for voting!