















JBP26AY7 General Electric Range - Instructions
Keep searches simple. Use keywords, e.g. "leaking", "pump", "broken" or "fit".
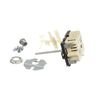
Plastic Insert for knob to long, had to use my bench grinder to cut it down
(Turn off the Power) Pull stove out, remove the 2 screws that holds switch in place, remove one wire at a time and install on new switch. Slip switch in replace 2 screws. Snap off about 3/4 of the shaft cut down plastic insert for knob, install knob turn on power and it works.
Parts Used:
-
Floyd from Warren, OR
-
Difficulty Level:Really Easy
-
Total Repair Time:15 - 30 mins
-
Tools:Pliers, Screw drivers
Was this instruction helpful to you?
Thank you for voting!
Light Lens damaged
Required new light lens for oven this type has five (5) of them; only the oven temp light lens was damaged. Ordered from Parts Select.com received item fast in seven days. removed rear guard plate, than oven temperture switch than slid the neon light switch off of the light lens.Lens is removed from the front panel. Installation is reverse order.
Parts Used:
-
THOMAS J from Las Vegas, NV
-
Difficulty Level:Easy
-
Total Repair Time:15 - 30 mins
-
Tools:Nutdriver
Was this instruction helpful to you?
Thank you for voting!
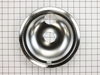
Needed to replace drip bowls
Husband just snapped in place in about 8 seconds! Thanks for the fast delivery and pleasant staff assistant.
Parts Used:
-
Gloria from Dallas, TX
-
Difficulty Level:Really Easy
-
Total Repair Time:Less than 15 mins
Was this instruction helpful to you?
Thank you for voting!
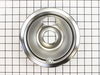
Disgusting looking burner drip bowls.
Just had to change out the drip bowls, easy. But, I wanted to comment on the quick delivery on the new bowls. I was impressed. Thank you.
Parts Used:
-
Constance L from Woodhull, NY
-
Difficulty Level:Really Easy
-
Total Repair Time:Less than 15 mins
Was this instruction helpful to you?
Thank you for voting!
none
Took the old pans out and put the new ones in. Simple as pie
Parts Used:
-
Leslie N from Carson City, NV
-
Difficulty Level:Really Easy
-
Total Repair Time:Less than 15 mins
Was this instruction helpful to you?
Thank you for voting!
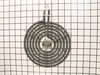
Stove Burners did not work.
The repair is simple, pull out the old, plug in the new. The most difficult aspect of the repair is to make sure that you have the right part. As this is an old stove, and it was a builder model, the model number did not match exactly, and I got the wrong part which I had to return. Look at the pictures carefully as many of the parts look similar.
Parts Used:
-
Dennis from Cerritos, CA
-
Difficulty Level:Really Easy
-
Total Repair Time:Less than 15 mins
Was this instruction helpful to you?
Thank you for voting!
Scorched Element
It wasn't so much the repair that was needed as how impressed I was with the fast delivery. Without a fourth burner & a holiday weekend coming up I was in desperate need of my element. I ordered it around 1:00 pm on a friday & it was delivered the next day before noon! Very impressed with the ease of ordering & receiving. Thanks again.
Parts Used:
-
Jilan from South Milwaukee, WI
-
Difficulty Level:Really Easy
-
Total Repair Time:Less than 15 mins
Was this instruction helpful to you?
Thank you for voting!
element burnt out
-
Howard from Fort Bragg, CA
-
Difficulty Level:Really Easy
-
Total Repair Time:Less than 15 mins
Was this instruction helpful to you?
Thank you for voting!
No Problems
I removes the old element and drip bowl, then replaced the drip bowl, then replaced with the new element. Approximatly 3 minutes. . .
Parts Used:
-
Jerry from Copperas Cove, TX
-
Difficulty Level:Really Easy
-
Total Repair Time:Less than 15 mins
Was this instruction helpful to you?
Thank you for voting!
Burned out surface element
This is an easy repair and for anyone thinking that they might have trouble effecting it, you all have my assurance that all the heat related elements are easily replaced. These elements are basically plug in and there is a shielded area (usually placed in the northeast quadrant of the burner unit. With everything turned off, pull the burnt out surface element up and toward the southwest. It should unplug from the female receptacle. Installing a new element involves performing this in reverse by coming into the surface with the prongs facing downward towards the receptacle and then pushing towards the northeast and downward at the same time The element should click into place. The entire time necessary to effect this repair should be less than ten minutes.
Parts Used:
-
Michael from Scituate, MA
-
Difficulty Level:Really Easy
-
Total Repair Time:Less than 15 mins
Was this instruction helpful to you?
Thank you for voting!
needed "original style" on older stove
I needed to replace all stovetop bowls and found all after-market bowls "just a little off" effecting how flat the burner rested so called PartSelect's hotline and was assured that if I were using the actual model number found on the stove the parts would definitely fit and not almost fit, guaranteed, and they did!
Parts Used:
-
David from N. Fort Myers, FL
-
Difficulty Level:Really Easy
-
Total Repair Time:Less than 15 mins
Was this instruction helpful to you?
Thank you for voting!
Found out Drip Bowls can not be added to self-clean
Dropped in new bowls. I was surprised how in-expensive new ones were.
Parts Used:
-
Gary from Renton, WA
-
Difficulty Level:Really Easy
-
Total Repair Time:Less than 15 mins
Was this instruction helpful to you?
Thank you for voting!
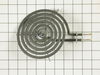
I needed to replace the 6" surface unit.
My GE range is 20 years old, and still going strong. All I needed was to replace the 6" surface unit. After making slight adjustments, it was just a matter of placing the new unit. After finding this Co. on the internet, and checking others, I will certainly order from Part Select again!Dorothy Trakshel
Parts Used:
-
Dorothy from South Daytona, FL
-
Difficulty Level:Really Easy
-
Total Repair Time:Less than 15 mins
Was this instruction helpful to you?
Thank you for voting!
older element losing heat
really easy, remove old and replace with new...easy, once you have ordered and received the correct part.
Parts Used:
-
Joan from Wilmington, DE
-
Difficulty Level:Really Easy
-
Total Repair Time:Less than 15 mins
Was this instruction helpful to you?
Thank you for voting!
I could not find a dealer who could tell me what part I needed because the model was discontinued
I just went to your web page and indicated I needed an 8' surface element and up popped a picture; I ordered it and plugged it in and it works perfectly. I didn't need a model number, or a part number. Three cheers for a simple solution and a 1st class web page!
Parts Used:
-
June from Merritt Island, FL
-
Difficulty Level:Really Easy
-
Total Repair Time:Less than 15 mins
Was this instruction helpful to you?
Thank you for voting!