















JBP26AY7 General Electric Range - Instructions
Keep searches simple. Use keywords, e.g. "leaking", "pump", "broken" or "fit".
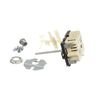
Burner only worked on High and very low temperature setting.
Your "virtual repairman" was fantastic. I would have purchased the wrong part without trhe diagnostic service. It said that 53% of the time the infinite switch was the problem. In my case it was 100%. Why I put up with this problem for 6 years I will never know.
Repair job was easy but longer than the 15 minutes that it said it would take.
Repair job was easy but longer than the 15 minutes that it said it would take.
Parts Used:
-
William from Duvall, WA
-
Difficulty Level:Easy
-
Total Repair Time:30 - 60 mins
-
Tools:Nutdriver, Pliers
2 of 6 people
found this instruction helpful.
Was this instruction helpful to you?
Thank you for voting!
Switch - and the connection wire to the burner
First of all I did this repair because the wire to the burner shorted out. I did the wire portion first - only then did I know I needed the switch kit. (The burner was operating while my old swithch was OFF). The first (wire replacement) repair took about 10 minutes - I followed the guidance on this web-site. The second repair (The switch) took about 20 minutes. The switch ws not the same as the original. Just be careful to mark each wire as you remove them from the old switch's posts. The posts on the switch are marked and you need to place them on the like-marked corresponding posts on the new switch. All is well, my burner is operational.
Parts Used:
-
andrew from langdon, ND
-
Difficulty Level:Easy
-
Total Repair Time:30 - 60 mins
-
Tools:Pliers
2 of 6 people
found this instruction helpful.
Was this instruction helpful to you?
Thank you for voting!
Light burnt out.
Turned the wire protector to the side. Turned out the old bulb and replaced it with the new. Turned the wire protector back in place and I'm like new.
Parts Used:

-
Roscoe G from ROCHESTER, NY
-
Difficulty Level:Very Easy
-
Total Repair Time:Less than 15 mins
2 of 6 people
found this instruction helpful.
Was this instruction helpful to you?
Thank you for voting!
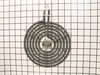
I ruined old unit
Removed old, and replaced with new, heating element! Maybe 10 seconds.
Parts Used:
-
Arthur E. from St. Louis, MO
-
Difficulty Level:Really Easy
-
Total Repair Time:Less than 15 mins
0 of 1 people
found this instruction helpful.
Was this instruction helpful to you?
Thank you for voting!
burned out surface element
simply by inserting new replacement into electrical socket ...very satisfied in new replacement price and quick delivery date Thank you
Parts Used:
-
Eugene from Crescent City, CA
-
Difficulty Level:Really Easy
-
Total Repair Time:Less than 15 mins
0 of 1 people
found this instruction helpful.
Was this instruction helpful to you?
Thank you for voting!
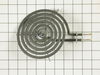
Surface element didn't heat. Cracked.
I simply pulled out the old element. Plugged in
the replacement, which arrived very quickly, and
that was it. I couldn't believe that was all there
was to it. I really loved being able to order the
replacement part online. Intend to order more
replacement parts just to have my stovetop
looking like new again.
the replacement, which arrived very quickly, and
that was it. I couldn't believe that was all there
was to it. I really loved being able to order the
replacement part online. Intend to order more
replacement parts just to have my stovetop
looking like new again.
Parts Used:
-
Darlene from New Berlin, WI
-
Difficulty Level:Really Easy
-
Total Repair Time:Less than 15 mins
0 of 1 people
found this instruction helpful.
Was this instruction helpful to you?
Thank you for voting!
plastic canister melted on burner
-
Joel from Avon, OH
-
Difficulty Level:Really Easy
-
Total Repair Time:Less than 15 mins
0 of 1 people
found this instruction helpful.
Was this instruction helpful to you?
Thank you for voting!
Needed new electric element
A breeze! Part was perfect replacement, snapped in place without tools, and heated almost immediately.
Parts Used:
-
Barbara from Richmond, VA
-
Difficulty Level:Really Easy
-
Total Repair Time:Less than 15 mins
0 of 1 people
found this instruction helpful.
Was this instruction helpful to you?
Thank you for voting!
burned-out six inch electric stove- top burner
Removed the old and slipped in the new.No problem and it works fine.
Parts Used:
-
Harold from Gloversville, NY
-
Difficulty Level:Really Easy
-
Total Repair Time:Less than 15 mins
0 of 1 people
found this instruction helpful.
Was this instruction helpful to you?
Thank you for voting!
Electric stove 8" burner needed to be replaced
Installation took 30 seconds. Your website was easy to use & the part received was just as described. It arrived beautifully wrapped & in just a few days. ABSOLUTELY AWESOME!I will recommend your site to everyone.
Parts Used:
-
LISA from GLENDALE, CA
-
Difficulty Level:Really Easy
-
Total Repair Time:Less than 15 mins
0 of 1 people
found this instruction helpful.
Was this instruction helpful to you?
Thank you for voting!
Burner heating coil element would not get hot.
I pulled out the heating coil and pushed in the new coil. I turned the stove top on and heard a sound like "dzzzt". I immediately turned off the burner and waited for it to cool, then pulled it out. The part had a burn melt on one side of the end prong. It turns out that the part that the burner plugs into needs to be replaced. Actually, the stove top is over 20 years old and my landlord will have to replace the whole unit. So it turns out that I didn't need to order a surface element after all, but it was very easy to install!
Parts Used:
-
Jeannette from Haskell, NJ
-
Difficulty Level:Really Easy
-
Total Repair Time:Less than 15 mins
0 of 1 people
found this instruction helpful.
Was this instruction helpful to you?
Thank you for voting!
element broken at contact point
ordered new surface element and pushed in to conector turned on switch to test and works fine thanks
Parts Used:
-
MARLENE from EUGENE, OR
-
Difficulty Level:Really Easy
-
Total Repair Time:Less than 15 mins
0 of 1 people
found this instruction helpful.
Was this instruction helpful to you?
Thank you for voting!
Small burners would not work
ordered parts and disassembled old burners and installed new ones. All the parts were in the box when delivered.
Helping my 80 yr old mother-in-law very happy.
Got parts in for one of her 81st birthday present she was thrilled.
Helping my 80 yr old mother-in-law very happy.
Got parts in for one of her 81st birthday present she was thrilled.
Parts Used:
-
David from Goodyear, AZ
-
Difficulty Level:Really Easy
-
Total Repair Time:Less than 15 mins
-
Tools:Screw drivers
0 of 1 people
found this instruction helpful.
Was this instruction helpful to you?
Thank you for voting!
old burned caught on fire
I've been looking for an 8" replacement burner for my GE stove after my original burner caught on fire over a year ago. I had all but given up on finding a replacement after searching at all the stores in my area and also searching on the net. After cooking sides for Thanksgiving dinner this year and the pain of cooking with only 1 large burner, I decided to search again for a burner on line and thank goodness I found this site! All I did was put in the model number of my range/stove and the site directed me to the replacement burner. The picture of the burner looked like mine, so I decided to purchase it but I still wasn't convinced it would fit and work because of my failed previous burner purchases. I really thought my burner was too old and the part was no longer made. Well the part shipped very quickly and lo and behold it fit and worked! Installing was a breeze...I just snapped it in...thanks so much!
Parts Used:
-
Nilgun from Springfield, VA
-
Difficulty Level:Really Easy
-
Total Repair Time:Less than 15 mins
0 of 1 people
found this instruction helpful.
Was this instruction helpful to you?
Thank you for voting!
Burner not heating properly
1. The infinite switch had several knobs which would fit the switch shaft. Read the directions included with the switch in order to have the shaft fit the proper knob. You can break the shaft with two pairs of pliers. 2. Move the stove away from the wall and unplug it. 3. Remove the 1/4 screws from the back side of the stove and remove the back panel, exposing the switch. 4. Remove the wires one at a time and put them on the new switch. The terminals are L1, L2, P, H1 & H2. The Pilot (p) has a smaller terminal so you don't get it mixed up. Generally L1 is black, L1 is red, P is yellow, H1 and H2 can be blue, brown, yellow, orange or one of these colors striped on a white wire. 5. Remove the old switch from the stove and be sure to save the two mounting screws. 6. Position the new switch so that the side of the switch marked "top" is on top. 7. Install the screws on the new switch and put the knob on it. 8. Carefully test the burner. 9. Unplug the stove and put the back cover on.
Parts Used:
-
Stephen from Kokomo, IN
-
Difficulty Level:Easy
-
Total Repair Time:30 - 60 mins
-
Tools:Nutdriver, Pliers, Screw drivers
0 of 1 people
found this instruction helpful.
Was this instruction helpful to you?
Thank you for voting!