















GS26HSZDPW6 Frigidaire Refrigerator - Instructions
Keep searches simple. Use keywords, e.g. "leaking", "pump", "broken" or "fit".
Motor had failed due to ice ejector frozen to tray.
Removed the ice maker. Took off the cover and proceed to remove the motor. The only trick was to dis-assemble the electrical connector to replace the wires. I chose to do this rather than splice the new motor into the existing system and it was simple with a little patience.
Easiest repair to make and half / third the money for a new ice maker. The in-laws have ice again (it was over a year).
Easiest repair to make and half / third the money for a new ice maker. The in-laws have ice again (it was over a year).
Parts Used:

-
Christopher from Middletown, CT
-
Difficulty Level:Really Easy
-
Total Repair Time:15 - 30 mins
-
Tools:Nutdriver, Screw drivers
10 of 12 people
found this instruction helpful.
Was this instruction helpful to you?
Thank you for voting!
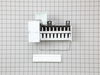
ice maker motor shorted out
loosen 2 screws
unplug connector
remove
replug
replace
tighten 2 screws
done
unplug connector
remove
replug
replace
tighten 2 screws
done
Parts Used:
-
Robert from DeFuniak Spgs, FL
-
Difficulty Level:Really Easy
-
Total Repair Time:15 - 30 mins
-
Tools:Nutdriver
9 of 10 people
found this instruction helpful.
Was this instruction helpful to you?
Thank you for voting!
My son pulled on the meat pan & cracked the right support.
The old support just unscrewed & then the new one screwed right on with two screws.
Parts Used:

-
Tina from Baroda, MI
-
Difficulty Level:Really Easy
-
Total Repair Time:Less than 15 mins
-
Tools:Screw drivers
9 of 10 people
found this instruction helpful.
Was this instruction helpful to you?
Thank you for voting!
door didn't seal good
Pulling the old seal was the easy part. The problem became dificult when I opened the seal package. Either Part Select or UPS had folded the seal in half. Witch caused the wire inside the seal to become crimped up. I used a pair of pliers "carefully" to straighten the wire as best I could. Luckly it worked, after pressing it firmly all the way aroud about 5 or 6 times. I'll still keep an eye on it for the next couple of weeks.
Parts Used:
-
jerimy from greenbrier, TN
-
Difficulty Level:A Bit Difficult
-
Total Repair Time:30 - 60 mins
-
Tools:Pliers, Screw drivers
9 of 10 people
found this instruction helpful.
Was this instruction helpful to you?
Thank you for voting!
crisper drawer supports broke
The parts supplied were made to fit. The hardest part was getting the original broken tabs out of the internal walls of the fridge with out damaging the internal insulation. I punched the center locking pin through completely, dug out the broken tabs and then reached into the hole with a dental pick and pulled out the center pin. The new parts fit perfectly and with a plastic mallet, tapped the new locking pin into place.
Parts Used:

-
Timothy C. from Aberdeen, MD
-
Difficulty Level:Really Easy
-
Total Repair Time:15 - 30 mins
-
Tools:Pliers, Screw drivers
20 of 43 people
found this instruction helpful.
Was this instruction helpful to you?
Thank you for voting!
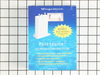
Ice/water filter needs replacement after 7 months
I just took the old filter off and replaced with the new one, after I run the water for about 15 minutes and tossed the old ice and cleaned the tray.
Parts Used:
-
Paulo from Round Lake, IL
-
Difficulty Level:Really Easy
-
Total Repair Time:Less than 15 mins
10 of 14 people
found this instruction helpful.
Was this instruction helpful to you?
Thank you for voting!
Freezer and refrigerator stopped cooling
The site offers a video for this part which worked perfectly. In addition to replacing the part, since the cardboard panel was off, we also cleaned all the dust off of the coils which someone recommended to do annually.
Parts Used:
-
Amy from PITTSBURGH, PA
-
Difficulty Level:Easy
-
Total Repair Time:Less than 15 mins
-
Tools:Screw drivers
8 of 8 people
found this instruction helpful.
Was this instruction helpful to you?
Thank you for voting!
Ice maker malfunctioned
We followed the video instructions and it went fairly smooth. After turning off the water at the street we found that the faucet at the wall had it's own "on/off" valve. When finished, we turned on the power and heard the gears going through their revolutions, but no ice was made. We waited 24 hours and still no ice. I removed the cover on the ice maker and adjusted the amount of water to see if that was malfunctioning. Still no ice was created. Waited another 24 hours - nothing. Waited another 24 hours (the site said that sometimes the ice maker would take time to reset itself) - nothing. Then on the fourth day after changing out the triple water valve we heard water being dispensed and later that day it put out the first ice in weeks. Another hour later another batch of ice cubes were ready and deposited into the bin. Since that time, we have had a full bin. I moved the set screw back to it's original setting because a little too much water was being delivered. The cubes weren't separating to individual cubes. That cleared up the problem. This was easily completed - we recommend others do their own work. Just be patient for the system to reset itself.
Parts Used:
-
Myron from Tumwater, WA
-
Difficulty Level:Easy
-
Total Repair Time:1- 2 hours
-
Tools:Nutdriver, Pliers, Screw drivers, Wrench (Adjustable)
9 of 12 people
found this instruction helpful.
Was this instruction helpful to you?
Thank you for voting!
Ice Would Not Dispence
Took the ice storage bin out. Took the unit apart,and disamble the augar unit. Ordered parts from manufacture, which arrived in two days. As soon as I got the parts, I reassambled it. Work perfect. Good job!
Parts Used:

-
Jerry Baten from Pampa, TX
-
Difficulty Level:Really Easy
-
Total Repair Time:15 - 30 mins
-
Tools:Nutdriver, Pliers, Screw drivers, Wrench (Adjustable)
17 of 36 people
found this instruction helpful.
Was this instruction helpful to you?
Thank you for voting!
Snapping noise from bottom of refridgerator door bottom hinge.
First I looked up and called Fridgedaire. They were absolutely no help at all. No diagrams and no intelligent help.
When I found your site there was an IPB (Illustrated Parts Breakdown) diagram that helped me find the parts that I suspected as being the problem. When I found them and added them to my cart I found several comments from people who had the same problem and the same remedy to the problem. I ordered the parts, I could have got away with just replacing the door closure bearing, but I figured that the prudent thing to do while ordering parts and disassembling the door was to replace both.
I was extremley pleased with the parts service as within three days of ordering the parts they were at my home and the repair was completed.
The repair was very easy. Removed the items from the door storage, removed the upper hinge pulled the door, removed the door stop, replaced the door closure bearing reinstalled the pieces and then reinstalled the door. Piece of cake. Spent more time getting the tools together and emptying the items stored on the door then replacing the parts.
When I found your site there was an IPB (Illustrated Parts Breakdown) diagram that helped me find the parts that I suspected as being the problem. When I found them and added them to my cart I found several comments from people who had the same problem and the same remedy to the problem. I ordered the parts, I could have got away with just replacing the door closure bearing, but I figured that the prudent thing to do while ordering parts and disassembling the door was to replace both.
I was extremley pleased with the parts service as within three days of ordering the parts they were at my home and the repair was completed.
The repair was very easy. Removed the items from the door storage, removed the upper hinge pulled the door, removed the door stop, replaced the door closure bearing reinstalled the pieces and then reinstalled the door. Piece of cake. Spent more time getting the tools together and emptying the items stored on the door then replacing the parts.
Parts Used:

-
Dennis from Crossville, TN
-
Difficulty Level:Really Easy
-
Total Repair Time:15 - 30 mins
-
Tools:Screw drivers, Socket set
8 of 9 people
found this instruction helpful.
Was this instruction helpful to you?
Thank you for voting!
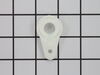
plastic closer plate broken
First removed food from the refrigerator door.
Second removed plastic cover plate and metal plate assembly from top of door.
Third lifted door of metal pin on bottom.
Fourth removed broken closer plate and replaced
with new closer plate.
Set door back in place.
Re secured the metal plate and plastic cover plate.
Replaced the door shelves and food. DONE.
Second removed plastic cover plate and metal plate assembly from top of door.
Third lifted door of metal pin on bottom.
Fourth removed broken closer plate and replaced
with new closer plate.
Set door back in place.
Re secured the metal plate and plastic cover plate.
Replaced the door shelves and food. DONE.
Parts Used:
-
Sandra from Alto, NM
-
Difficulty Level:Easy
-
Total Repair Time:15 - 30 mins
8 of 9 people
found this instruction helpful.
Was this instruction helpful to you?
Thank you for voting!
water filter
-
MIKE from MELBOURNE, KY
-
Difficulty Level:Really Easy
-
Total Repair Time:Less than 15 mins
9 of 12 people
found this instruction helpful.
Was this instruction helpful to you?
Thank you for voting!
Ice maker and water were not working.
Ordered new water filter. It arrived, I opened it and took out the old one and put in the new one. I worked perfectly
as soon as I realized I had to remove the protective caps.
as soon as I realized I had to remove the protective caps.
Parts Used:
-
Carolyn D from Rescue, CA
-
Difficulty Level:Really Easy
-
Total Repair Time:Less than 15 mins
9 of 12 people
found this instruction helpful.
Was this instruction helpful to you?
Thank you for voting!
The drum ice maker broke in half so it couldn't dependent the ice.
I had removed the housing that the drum was in and taken the screws out to get to the broken drum. I removed it there was a set of 6 blades that crushed the ice that had to go back on the same order when I removed these I put them on a piece of wire in the order they came off (so I would get them back I the correct order). Then I reversed the order and reassembled it in the opposite direction . It was fairly easy to do. I'm a 68 year old disabled woman so if I could do it I'm sure you could to. Good luck. It cost me $14.00 if I had bought the whole assembly it would have been $150.00. So it was well worth my time and effort.
Parts Used:

-
ROWENA from WIGGINS, MS
-
Difficulty Level:Really Easy
-
Total Repair Time:30 - 60 mins
-
Tools:Screw drivers, Socket set
8 of 9 people
found this instruction helpful.
Was this instruction helpful to you?
Thank you for voting!
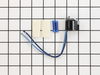
Frost buildup in freezer
I followed the video tutorial published here. The step I altered was setting the shrink wrap; I did not have a heat gun to safely shrink it, so I folded it tightly onto itself and wrapped it in electrical tape. No more frost buildup.
Parts Used:
-
William from MIAMI, FL
-
Difficulty Level:Really Easy
-
Total Repair Time:15 - 30 mins
-
Tools:Nutdriver, Pliers
7 of 7 people
found this instruction helpful.
Was this instruction helpful to you?
Thank you for voting!