















GMR05BLHCSCA General Electric Washer - Instructions
Keep searches simple. Use keywords, e.g. "leaking", "pump", "broken" or "fit".
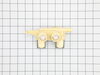
Leaking water
Unplug electricity, unscrew 3 bolts with nutdriver from rear of top panel, expose triple valve, remove 2 screws from existing valve, turn water off & remove hose from triple valve, remove outlet hose attached to the valve,install new valve with 2 screws & replace outlet hose, attach hot/cold hoses, replace top part of washer with the 3 screws,plug in electricity & turn on the hot & cold water, that's it.
Parts Used:
-
Paul from LUBBOCK, TX
-
Difficulty Level:Very Easy
-
Total Repair Time:15 - 30 mins
-
Tools:Nutdriver, Pliers
16 of 17 people
found this instruction helpful.
Was this instruction helpful to you?
Thank you for voting!
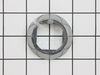
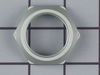
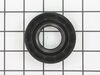
Excessive agitator side movement
Bought all of the parts to remedy this. It ended up being the top transmission seal/bearing which is not a replaceable part. I could see the shaft moving side to side. But the parts diagrams are not detailed enough to show that when assembled.
She led a good life.
My new side loader is SO MUCH BETTER AND INSANELY EFFICIENT. I highly recommend making the change if you need a transmission..
She led a good life.
My new side loader is SO MUCH BETTER AND INSANELY EFFICIENT. I highly recommend making the change if you need a transmission..
Parts Used:



-
Richard from Spring City, PA
-
Difficulty Level:A Bit Difficult
-
Total Repair Time:1- 2 hours
-
Tools:Nutdriver, Pliers, Screw drivers, Socket set, Wrench (Adjustable), Wrench set
17 of 22 people
found this instruction helpful.
Was this instruction helpful to you?
Thank you for voting!
Water was leaking
My husband was unavailable and already overloaded, so I took a screw driver and removed the front cover of the washer. After I discovered where the leak was coming from, I used a screw driver to remove one end of the hose and pliers to remove the other end. I went online, found the part and ordered it. It came in surprisingly fast. My husband put it back in about 5 minutes.
Parts Used:
-
Christine from Tempe, AZ
-
Difficulty Level:Really Easy
-
Total Repair Time:15 - 30 mins
-
Tools:Pliers, Screw drivers
14 of 14 people
found this instruction helpful.
Was this instruction helpful to you?
Thank you for voting!
Dish washer not heating water not drying dishes.
Parts Select has excellent video instruction. they are way better than I could describe. the repair went smoothly. the heating element wasn't the issue. and it's may not be yours either. I found that the flood switch was the problem part number PS8690623. It's located under the filter screen in the bottom Yes that long grey plastic thing under the screen. It's held in by two 1/4 inch screws. Use a wet dry vacuum or towels to dry up the water in the sump. ABOVE ALL don't drop the screws. You'll be taking the pump apart if you do. Gently lift out the flood switch. There will be wires plugged into the base. With a flat screwdriver gently pop off the white plug from the green base. The plug only goes on one way reassemble in reverse order.
Parts Used:

-
Richard from SPRING HILL, FL
-
Difficulty Level:Very Easy
-
Total Repair Time:15 - 30 mins
-
Tools:Nutdriver, Pliers, Screw drivers, Wrench set
14 of 14 people
found this instruction helpful.
Was this instruction helpful to you?
Thank you for voting!
Hose and clip were broken in moving
The parts were here in 3 days and the repair went very quickly .Quality item would do business again.
Parts Used:

-
DARYLD from SCHOFIELD, WI
-
Difficulty Level:Easy
-
Total Repair Time:Less than 15 mins
-
Tools:Screw drivers
17 of 23 people
found this instruction helpful.
Was this instruction helpful to you?
Thank you for voting!
Two paddles on the agitator broke off.
After reading how others have done this and how easy it was, I decided to give it a try. And, sure enough, it was really easy. However, one concern I had was on lifting the old agitator off from the axle using both hands. I didn't want to have the agitator come crashing into my face as I pulled up. So I put a pillow on top of the agitator.
Parts Used:
-
Karen from Hamilton, NY
-
Difficulty Level:Really Easy
-
Total Repair Time:Less than 15 mins
16 of 20 people
found this instruction helpful.
Was this instruction helpful to you?
Thank you for voting!
Dry cycle was not working and dishes weren't getting dry.
Unplugged the dishwasher and turned off the water. In order to pull the dishwasher out I had to remove disconnect the waterline. Opened the dishwasher door to remove the screws attached under the counter holding the dishwasher in place. Once removed I pulled the dishwasher out of the under counter pocket far enough that I could access the rear connections to the heating element. Carefully disconnected the wires connected to the heating element and then loosened the large nuts securing the heating element. Once the nuts were removed I disengaged the element from the holders and removed it from the dishwasher. Installed the new element in place engaging it into the holders inside the dishwasher. Then moved back to the rear of the dishwasher installing the nuts that were removed earlier on the new element and reconnected the cables.
I ordered my new heating element prior to checking the continuity of the old one. I checked the continuity of the old one once it was removed and it was ok, not great but still acceptable so I knew the new element wasn't going to fix the issue, but installed it anyways. My issue was actually the float switch, so if you want to be sure of your issue, remove the current heating element from your dishwasher and check the continuity before ordering if you want to save some money.
I ordered my new heating element prior to checking the continuity of the old one. I checked the continuity of the old one once it was removed and it was ok, not great but still acceptable so I knew the new element wasn't going to fix the issue, but installed it anyways. My issue was actually the float switch, so if you want to be sure of your issue, remove the current heating element from your dishwasher and check the continuity before ordering if you want to save some money.
Parts Used:
-
Heath from PARKER, CO
-
Difficulty Level:Really Easy
-
Total Repair Time:30 - 60 mins
-
Tools:Screw drivers, Wrench (Adjustable)
13 of 14 people
found this instruction helpful.
Was this instruction helpful to you?
Thank you for voting!
Dishwash would not fill with water.
1. Remove lower dishwasher rack.
2. Remove flat course filter screen in bottom of dishwasher by unscrewing the 2 hand screws at the rear of the screen. Remove the round fine filter (at the front of the course screen) by rotating counter-clockwise by hand.
3. Remove both the fine and course screens exposing the 4 inch tall, skinny, round float valve. DO NOT rotate the float switch--remove the float switch by pulling it straight up.
4. Remove the electrical plug on the bottom of the float switch.
5. Install new float switch taking care to remove the old O-ring and ensuring the new O-ring is properly located at the bottom of the new float switch.
6. Follow instructions in reverse to complete the reinstallation.
2. Remove flat course filter screen in bottom of dishwasher by unscrewing the 2 hand screws at the rear of the screen. Remove the round fine filter (at the front of the course screen) by rotating counter-clockwise by hand.
3. Remove both the fine and course screens exposing the 4 inch tall, skinny, round float valve. DO NOT rotate the float switch--remove the float switch by pulling it straight up.
4. Remove the electrical plug on the bottom of the float switch.
5. Install new float switch taking care to remove the old O-ring and ensuring the new O-ring is properly located at the bottom of the new float switch.
6. Follow instructions in reverse to complete the reinstallation.
Parts Used:
-
Kirk from Parker, CO
-
Difficulty Level:Really Easy
-
Total Repair Time:Less than 15 mins
-
Tools:Socket set
11 of 11 people
found this instruction helpful.
Was this instruction helpful to you?
Thank you for voting!
Noticed 3 straps were broken when we replaced the hose
I removed the front cover, then unscrewed the top to expose the top. There are two screws that hold each strap, which turns out are different sizes, so I had to use two different sockets. I also had to remove the hose & plastic tube for the bleach. Once that was done, the replacement was easy, I replaced all 4 straps, reconnected the tube for the bleach, screwed the top back on and snapped the front cover into place. This took maybe 30 minutes - and I am female!
Parts Used:
-
Christine from Tempe, AZ
-
Difficulty Level:Easy
-
Total Repair Time:15 - 30 mins
-
Tools:Pliers, Socket set
14 of 20 people
found this instruction helpful.
Was this instruction helpful to you?
Thank you for voting!
Waher would not spin wet clothes.
Tipped washer over on to the front side. Removed back panel. Removed the flex coupling to the water pump. Removed the old belt. Installed the new belt and reversed the process to put components back together.
Parts Used:
-
Gerald L. from Las Cruces, NM
-
Difficulty Level:Easy
-
Total Repair Time:30 - 60 mins
-
Tools:Nutdriver, Screw drivers, Socket set
12 of 15 people
found this instruction helpful.
Was this instruction helpful to you?
Thank you for voting!
transmission leaking grease
removed front cover the agitater then cover over large nut then large nut then inner tub then split ring and tub bearing then disconnected the hardware around the outer tub then replaced transmission then put back together in reverse order.
Parts Used:
-
Dennis from Chilhowie, VA
-
Difficulty Level:Easy
-
Total Repair Time:1- 2 hours
-
Tools:Nutdriver, Pliers, Socket set, Wrench set
13 of 18 people
found this instruction helpful.
Was this instruction helpful to you?
Thank you for voting!
Dial Spins Too Freely
The grooves on the bottom of the control knob were worn away. I just pushed the timer knob clip off of the underside of the knob, removed it from the washer and put the new knob on and put the clip back on. It was a piece of cake!
Parts Used:

-
STEPHANIE from Bluefield, VA
-
Difficulty Level:Really Easy
-
Total Repair Time:Less than 15 mins
12 of 15 people
found this instruction helpful.
Was this instruction helpful to you?
Thank you for voting!
Washer Not spinning and motor buzzing
Most washers I looked at do not use a start capacitor but my model did and after testing the capacitor it showed open and was slightly deformed. If you have a this problem the capacitor is located behind the front panel about half way up on the right side zip tied to the side of the washer. It is always good to check the capacitor before spending big bucks for a motor you may not need.
Parts Used:
-
Mark from LEWISVILLE, TX
-
Difficulty Level:Really Easy
-
Total Repair Time:15 - 30 mins
-
Tools:Pliers
10 of 10 people
found this instruction helpful.
Was this instruction helpful to you?
Thank you for voting!
Purchased used washin machine w/o drain hose
After realizing I had purchased a used washing machine without a drain hose I thought I would never find one, but then I found partselect.com. After easily locating the part on the web site from the detailed diagrams and model number I then ordered it. Receiving the part quickly I used a socket to remove the plastic connector that prevents the hose from disconnecting once the washer is turned on. I fed the hose through the plastic connector and into the drain hole without any issues. I then used my one small socket to secruely fasten it back together. There was no additional tools or items needed to successfully attach the washer drain hose.
Parts Used:
-
Daniel from Oxford, GA
-
Difficulty Level:Really Easy
-
Total Repair Time:Less than 15 mins
-
Tools:Socket set
10 of 11 people
found this instruction helpful.
Was this instruction helpful to you?
Thank you for voting!
Upper arm had disconnected, and had fallen onto heating element at bottom of unit and melted.
-
Mary from EASTON, PA
-
Difficulty Level:Very Easy
-
Total Repair Time:Less than 15 mins
10 of 11 people
found this instruction helpful.
Was this instruction helpful to you?
Thank you for voting!