















GLHS269FPW0 Frigidaire Refrigerator - Instructions
Keep searches simple. Use keywords, e.g. "leaking", "pump", "broken" or "fit".
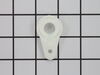
when opening door you would hear a loud thump.
Removed stuff on door, removed 2 screws on top of door, lifted door off replaced one door closure/hinge bearing and one door closing plate and put door back on and wala no more thump.
Parts Used:
-
James from Palm City, FL
-
Difficulty Level:Easy
-
Total Repair Time:Less than 15 mins
-
Tools:Screw drivers, Socket set
12 of 14 people
found this instruction helpful.
Was this instruction helpful to you?
Thank you for voting!
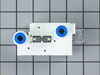
Water was leaking from the filter area when in-door water dispenser used
Silly me. It couldn't possibly be the filter because it's worked for the last 9 months with no problems. Decided to replace the water filter base first. Repair was easy. I saw someone had trouble removing tubes from old base and I gave it a couple of tries to no avail so decided to cut the lines instead. Made it even easier. After repair, water continued to leak. So, replaced the filter itself and voila - leak fixed. Make sure you check the filter first. My mistake turned a $40 - 10 second repair into a $100 - 20 minute repair. Good Luck!
Parts Used:
-
Todd from Gotha, FL
-
Difficulty Level:Easy
-
Total Repair Time:15 - 30 mins
-
Tools:Screw drivers, Socket set
13 of 17 people
found this instruction helpful.
Was this instruction helpful to you?
Thank you for voting!
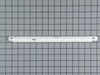
Too of the rail supports inside the fridge were broken
First I removed two screws per rail and removed the old rails. I replaced with the new rails and used a nutdriver to secure in place. This was extremely easy and I fell like my fridge is brand new again.
You can do it!!!
You can do it!!!
Parts Used:

-
Kristen from Payson, UT
-
Difficulty Level:Really Easy
-
Total Repair Time:Less than 15 mins
-
Tools:Nutdriver
13 of 18 people
found this instruction helpful.
Was this instruction helpful to you?
Thank you for voting!
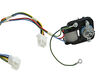
Food compartment not cooling, freezer working well.
Fantastic!
Sent in a brief description of problem and model number. Reply and description of other customers experiences guided us to the exact problem.
We ordered the part on Friday and it was here on Tuesday.
I prepared the freezer compartment for the removal of the old motor and on Sunday husband installed new Evaporator Fan Motor.
It works and is cooling like it did when it was new.
This has been a great experience as all repairmen wanted at least 60.00 to just come out and determine what the problem was. I can only imagine what the final bill would have been.
This was easy and inexpensive.
Thanks for all the help.
Sent in a brief description of problem and model number. Reply and description of other customers experiences guided us to the exact problem.
We ordered the part on Friday and it was here on Tuesday.
I prepared the freezer compartment for the removal of the old motor and on Sunday husband installed new Evaporator Fan Motor.
It works and is cooling like it did when it was new.
This has been a great experience as all repairmen wanted at least 60.00 to just come out and determine what the problem was. I can only imagine what the final bill would have been.
This was easy and inexpensive.
Thanks for all the help.
Parts Used:
-
Mary from Kenmore, WA
-
Difficulty Level:Easy
-
Total Repair Time:30 - 60 mins
-
Tools:Nutdriver, Screw drivers
13 of 19 people
found this instruction helpful.
Was this instruction helpful to you?
Thank you for voting!
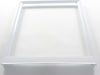
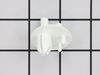
Broken shelf support studs and crisper drawer cover.
No problem, I Just pushed the plastic pin to the old support studs into the frig wall using a small screw driver and hammer and with pliers pulled the studs out to the wall of the frig being careful not to damage the wall. Then with pliers {needle nose} pulled the plastic pin out of the wall. Pushed the new support studs in the hole and tapped the plastic pin with a small hammer into the support stud. Replaced crisper drawer cover and glass shelf. Easy fix
Parts Used:
-
Timothy from Mount Wolf, PA
-
Difficulty Level:Really Easy
-
Total Repair Time:Less than 15 mins
-
Tools:Pliers, Screw drivers
11 of 13 people
found this instruction helpful.
Was this instruction helpful to you?
Thank you for voting!
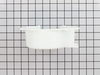
housing-crusher was broken
removed ice maker box and disassembled crusher unit on front of box and installed new housing.
Parts Used:
-
Bob from Milton, WV
-
Difficulty Level:Easy
-
Total Repair Time:15 - 30 mins
-
Tools:Screw drivers
12 of 16 people
found this instruction helpful.
Was this instruction helpful to you?
Thank you for voting!
Failed icemaker
First I loosened the two screws that hold the element in place. I then pulled the element out about 3 inches and disconnected the two wires...re-installed the new icemaker first attaching the wires and then fitting over the screw holders and tightened the screws. That was it!
Parts Used:
-
Jay from St louis, MO
-
Difficulty Level:Easy
-
Total Repair Time:15 - 30 mins
-
Tools:Pliers
11 of 13 people
found this instruction helpful.
Was this instruction helpful to you?
Thank you for voting!
Evavaporator making noises
Replaced an evaporator motor which had previouly been put in to replace original with an alternative which changed the original electrical connectors. Had to replace those replacements witn originals which extended the changeover.
Now works like the original and very quiet because your motor fit in the original rubber bushings. The alternative motor was put in by the Frigidaire repair man and at considerable expense because the warrenty date had been exceeded by one month.
Now works like the original and very quiet because your motor fit in the original rubber bushings. The alternative motor was put in by the Frigidaire repair man and at considerable expense because the warrenty date had been exceeded by one month.
Parts Used:
-
Henry from Jupiter, FL
-
Difficulty Level:Easy
-
Total Repair Time:30 - 60 mins
-
Tools:Pliers
12 of 16 people
found this instruction helpful.
Was this instruction helpful to you?
Thank you for voting!
water actuator broke due to extreme pressure in trying to make water run quicker
Remove the housing holding the sensors and actuador. The white sensor tape came off the command console, however this was easily replaced by removing the console cover and inserted the tape back. At first the fridge console (lights) did not respond, removed the tape again and re-installed the right way. The most difficult part was trying to push the small hose to fit through the housing and stay in place. In the beginning water was coming out through several places, but removed the housing again, fudgec with the little hose until it fitted snuggly into water dispensing opening. Replaced housing again, screwed all little screws and repair work was complete. The most difficult part was getting a tool that would allow you to guide the hose. Used a fine small plyer to pull through.
Works perfectly now.
Works perfectly now.
Parts Used:
-
GLORIA from MIAMI, FL
-
Difficulty Level:A Bit Difficult
-
Total Repair Time:30 - 60 mins
-
Tools:Pliers, Screw drivers
13 of 19 people
found this instruction helpful.
Was this instruction helpful to you?
Thank you for voting!
Water leaking from back of refrigerator
Followed instructions from others on the blog. Shut off water and electricity to the refrigerator. Removed the cardboard plate. Removed the old water valve. Cut the compression valves off and inserted the tubes into the new water valve. Attached the water valve bracket to the fridge. Tightened copper water supply.Turned on the water - no leaks. Plugged the fridge in. Tried the water and ice in the door. No leaks - everything worked perfectly. THANK YOU PARTS SELECT!
Parts Used:
-
Barbara from Bryan, TX
-
Difficulty Level:Easy
-
Total Repair Time:15 - 30 mins
-
Tools:Screw drivers, Wrench (Adjustable)
12 of 16 people
found this instruction helpful.
Was this instruction helpful to you?
Thank you for voting!
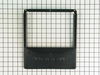
The module cover was broken when it was removed improperly
I simply unscrewed the original and replaced it with the replacement. It was very easy. I did have to order the label as the original one would not come off to be re-used. Hopefully, that will go on easily as well.
Parts Used:
-
Wendy from Columbus, OH
-
Difficulty Level:Easy
-
Total Repair Time:15 - 30 mins
-
Tools:Screw drivers
12 of 16 people
found this instruction helpful.
Was this instruction helpful to you?
Thank you for voting!
Ice make does not fill with water
I replaced the water valve, but it still did not fix the problem.The old water valve I took out I'm assuming worked fine, I think the real problem is ice building up in pipe or some other blockage.
Parts select was very fast in shipping, very positive experience with them.
I will definitely purchase again from this site.
Parts select was very fast in shipping, very positive experience with them.
I will definitely purchase again from this site.
Parts Used:
-
Amritpal from sacramento, CA
-
Difficulty Level:Easy
-
Total Repair Time:15 - 30 mins
-
Tools:Screw drivers, Socket set, Wrench set
12 of 16 people
found this instruction helpful.
Was this instruction helpful to you?
Thank you for voting!
Support rail broke
I recieved the part within 48 hours. I snapped the part in place and I was done in seconds.
Parts Used:
-
Karl from Bellaire, TX
-
Difficulty Level:Really Easy
-
Total Repair Time:Less than 15 mins
10 of 10 people
found this instruction helpful.
Was this instruction helpful to you?
Thank you for voting!
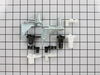
Right door makes loud poping sound when open and close
I followed step by step instruction in the hinge kit; Replacing the old hinge with a new hinge and two new plastic cams in the kit. The kit hinge has an adjustment to level the right door with the left door. Everything is done in 20 minutes for a senior guy like me. Very easy.
Parts Used:
-
HUNG from CARSON, CA
-
Difficulty Level:Really Easy
-
Total Repair Time:15 - 30 mins
-
Tools:Screw drivers, Socket set
12 of 16 people
found this instruction helpful.
Was this instruction helpful to you?
Thank you for voting!
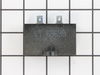
Coming from the refrigerator, there was an intermittent "clicking noise", occurring about every 30 seconds. The frig. eventually failed .
I removed the back cover and removed the clip holding the compressor- run capacitor and start relay. I replaced these 2 components and clean the dust from the frig., and from the bottom of the floor. I replaced the back cover ; Loss about $300 worth of meat when when the frig. failed. Then I thought that, during these turbulent times, there are many which don't have a refrigerator or any meat to place in it, The refrigerator is "running" normal again.
Parts Used:
-
winifred from LOUISVILLE, KY
-
Difficulty Level:Easy
-
Total Repair Time:30 - 60 mins
-
Tools:Nutdriver, Pliers
11 of 14 people
found this instruction helpful.
Was this instruction helpful to you?
Thank you for voting!