















GCA24KBBAFSS General Electric Refrigerator - Instructions
Keep searches simple. Use keywords, e.g. "leaking", "pump", "broken" or "fit".
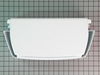
missing Door bin
-
Richard from Phoenix, AZ
-
Difficulty Level:Easy
-
Total Repair Time:Less than 15 mins
Was this instruction helpful to you?
Thank you for voting!
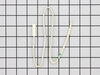
freezer would not defrost
There were only 3parts listed to check omed out the defrost heater and thermostat ....thermistor checked bad ordered replacement took less than 2 minutes to replace after I defrosted it again runs fine
Parts Used:
-
philip from cocoa, FL
-
Difficulty Level:Really Easy
-
Total Repair Time:Less than 15 mins
-
Tools:Nutdriver
Was this instruction helpful to you?
Thank you for voting!
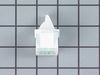
Light switch broken on inside of refrigerator door
The light switch was accidentally broken. I looked it up on your site and found the part. I ordered it and switched it out in a matter of minutes. It also helped having people who purchased their switches from the site explain how they repaired their switches with relative ease.
Parts Used:
-
Ron from Walnut Creek, CA
-
Difficulty Level:Really Easy
-
Total Repair Time:Less than 15 mins
-
Tools:Pliers
Was this instruction helpful to you?
Thank you for voting!
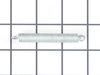
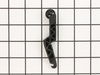
Broken Lever
Needle nose pliers will make the job easier to pull the spring over the notch
Parts Used:
-
Mike from Rocky River, OH
-
Difficulty Level:Really Easy
-
Total Repair Time:Less than 15 mins
-
Tools:Pliers, Screw drivers
Was this instruction helpful to you?
Thank you for voting!
Door shelf broke
Just snapped it in. I don't know the gentlemen's name that helped me on the phone, but, he was great!
Parts Used:

-
Elie from Sugar Land, TX
-
Difficulty Level:Really Easy
-
Total Repair Time:Less than 15 mins
Was this instruction helpful to you?
Thank you for voting!
Broken Handle
-
Danny from Fairhope, AL
-
Difficulty Level:Easy
-
Total Repair Time:15 - 30 mins
-
Tools:Screw drivers, Socket set
Was this instruction helpful to you?
Thank you for voting!
extreme frost build up inside in back of freezer,also veggies were freezing in the fridge draw
no brainer,watched the video,worst thing was to thaw the freezer,it was realy frosted,works like new,very happy thank you.
Parts Used:
-
larry from lisbon, ME
-
Difficulty Level:Really Easy
-
Total Repair Time:15 - 30 mins
-
Tools:Screw drivers
Was this instruction helpful to you?
Thank you for voting!
My fridge was colder than my freezer
I can't tell you how luck I feel after finding your website I ordered the temperature sensor after watching one of your videos on-line and the repair went just as on the video. I pulled the "bad" sensor out, and replaced it with the new one. Keep in mind that this is the first time I ever touch an appliance, needless to say I'm feeling pretty good about that! All in all it took me about 20 minutes to complete my repair and it now has been about 4 days and the refrigerator is working like new again!
Parts Used:
-
Marco from Fallbrook, CA
-
Difficulty Level:Easy
-
Total Repair Time:15 - 30 mins
-
Tools:Nutdriver, Pliers
Was this instruction helpful to you?
Thank you for voting!
refriger warm
-
chol from Glenview, IL
-
Difficulty Level:Easy
-
Total Repair Time:15 - 30 mins
-
Tools:Screw drivers
Was this instruction helpful to you?
Thank you for voting!
Food section of fridge always warm
Located temperature sensor on condenser in the freezer section( as per instructional video ). Cut off bad sensor with wire cutter then soldered on the new sensor and sealed with electrical shrink wrap.
Parts Used:
-
Troy from Dacula, GA
-
Difficulty Level:Easy
-
Total Repair Time:15 - 30 mins
-
Tools:Pliers, Socket set
Was this instruction helpful to you?
Thank you for voting!
freezer no cold enought
as per video- follow all of the videos and u r going to save a lot of money tx partselect im glad I found u guys ps only order from partselect.com they only ship the correct parts remember look at the video select the symptom and buy as per video tx again problemsolved
Parts Used:
-
John J. from Deland, FL
-
Difficulty Level:Really Easy
-
Total Repair Time:15 - 30 mins
-
Tools:Nutdriver, Pliers
Was this instruction helpful to you?
Thank you for voting!
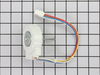
The refrigerator was making load and unusual noises.
I identified the noise was coming from the coils / and the fan. Cleaning the fan helped reduce the noise a bit but it still kept recurring. I ordered the part, which was really easy using the diagram on the website. The instructions and the video were really helpful and was able to remove the old motor and replace it with the new one with relative ease. While there I cleaned the fan blade and vacuumed the surrounding area. This whole repair went quite smoothly and has given me the confidence to take on other repairs before calling out the repairman.
Parts Used:
-
Ajaykumar from Plainsboro, NJ
-
Difficulty Level:Easy
-
Total Repair Time:15 - 30 mins
-
Tools:Pliers, Screw drivers
Was this instruction helpful to you?
Thank you for voting!
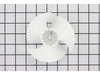
Rat chewed up fan blades in refrigerator at our camp.
We just pried off the fan blades and pushed on the new part. Could not have been easier. The rat has been permanently dipatched and, hopefully, that is that.
Parts Used:
-
Wendell from Baton Rouge, LA
-
Difficulty Level:Really Easy
-
Total Repair Time:Less than 15 mins
-
Tools:Screw drivers
Was this instruction helpful to you?
Thank you for voting!
Light Switch stopped working
Used screw driver to lightly remove the old switch. Disconnected the 2 electrical leads to the old switch, then I connected those leads to the new switch. The light immediately came back on and I placed the switch into its housing hole and popped it in place. It works perfectly now. My wife said "let there be light"! Very easy installation. Thanks.
Parts Used:
-
Ford Blunt from CEDAR HILL, TX
-
Difficulty Level:Really Easy
-
Total Repair Time:Less than 15 mins
-
Tools:Screw drivers
Was this instruction helpful to you?
Thank you for voting!
Installing light switch on refrigerator door
It couldn't be easier. Just pry out the old broken switch with a flat blade screwdriver. start at the bottom in case you scratch the door by accident. When the bottom is out - pull the switch out slowly and disconnect the two wires that are attached to the top, taking care to remember which color lead is connected to which wire. Then, take the new switch and connect the proper wires to their respective terminals and push the switch into the slot. Done!
Parts Used:

-
Martin from Santa Clarita, CA
-
Difficulty Level:Easy
-
Total Repair Time:Less than 15 mins
-
Tools:Screw drivers
Was this instruction helpful to you?
Thank you for voting!