















FRS26ZXHW - Instructions
Keep searches simple. Use keywords, e.g. "leaking", "pump", "broken" or "fit".
Side-by-side .. freezer working, fridge not cooling
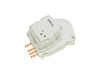
My freezer was frozen but my refrigerated side was not cooling, the temp was actually around 60-degrees. After inspecting i noticed no air was flowing through the vent from freezer side to fridge side. I removed everything from freezer and took the back wall panel off inside freezer section and immedietely noticed alot of ice on coils etc. After researching i found the defrost timer was not working and thus allowing frost and ice to build up on coils and block air flow. My defrost timer was located on the front bottom left behind kick panel, using a phillips screwdriver i removed 2 screws and then disconnected wire harness to the defrost timer. Then i inserted new defrost timer and connected wire harness and then put the 2 screws back in. My fridge is now working great and the ice build-up is gone and i am getting good air flow .. temps on fridge side are now between 32-34degrees. This was an easy project and saved me alot of money doing myself
Parts Used:
-
Tad from Lancaster, OH
-
Difficulty Level:Easy
-
Total Repair Time:15 - 30 mins
-
Tools:Screw drivers
46 of 50 people
found this instruction helpful.
Was this instruction helpful to you?
Thank you for voting!
Ice maker died!
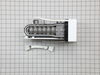
The repair for this was very simple, although it was a tight squeeze. The model I replaced the ice maker on was a side by side. First I removed the ice bucket so I could have more room to work with. Then I unscrewed 2 screws on the left side wall holding the ice maker in place. These screws had a 1/4" nut top on them so I used my socket driver for this. Then a quick disconnect of the wiring harness. Very Simple. I did the reverse to install the new unit. Total time was around 5 minutes or so. I now have ice again.
Parts Used:
-
John from Las Vegas, NV
-
Difficulty Level:Really Easy
-
Total Repair Time:Less than 15 mins
-
Tools:Socket set
45 of 49 people
found this instruction helpful.
Was this instruction helpful to you?
Thank you for voting!
Storage drawer glides broken
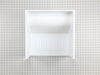
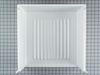
I slid the drawer fronts off by pulling out slightly on the bottoms and pulling up. The drawer fronts come right off. Then slide them onto the new drawers that matched perfectly. It took longer to empty the broken drawers than it did to replace them.
Parts Used:
-
J Matthew from Great Bend, KS
-
Difficulty Level:Really Easy
-
Total Repair Time:Less than 15 mins
47 of 56 people
found this instruction helpful.
Was this instruction helpful to you?
Thank you for voting!
Evaporator coil freezing up, freezer and refrigerator are warm
Danger: Replacing these parts requires working with electrical wiring, be certain to unplug the refrigerator before starting work.
1. Unplug appliance
2. Empty freezer section
3. Remove shelves and Ice storage tray
4. Remove 6 screws from evaporator cover.
Note: Remember where the screws with insulated washers go.
5. Use a hair dryer to melt all ice from coil
Danger: To prevent injury or death from electrocution always ensure that the hairdryer does not get wet while in operation.
6. Unplug defrost heater and defrost thermostat wires
Note: Thermostat is wired in series with the heater.
7. Remove screw from white plastic holder located on top of evaporator coil
8. Remove styrofoam pieces from top of coil
9. Grasp the bottom of the evaporator coil and carefully lift and pull out the bottom end a few inches
10. Remove old heater coil by pulling out from the bottom and replace with new coil
Note: Be very careful when moving the evaporator, it is made of aluminum and will be very costly to repair if you damage the tubing.
11. Replace old thermostat with new thermostat
12. Re-connect thermostat and heater wiring
Note: Remember to route wiring so that condensation does not gravitate to the electrical connections.
13. You can check if the heater is working by manually rotating the defrost timer clockwise. The timer dial is located on the bottom, front of the refrigerator on the freezer side. Be careful, the heater gets very hot.
14. Re-install evaporator cover
15. Re-install shelves and ice storage tray
16. Plug in the refrigerator
Note: Depending on how warm your refrigerator was it may take 24 hours to return to normal operating temperatures.
Note: Take your time and the job will go faster.
1. Unplug appliance
2. Empty freezer section
3. Remove shelves and Ice storage tray
4. Remove 6 screws from evaporator cover.
Note: Remember where the screws with insulated washers go.
5. Use a hair dryer to melt all ice from coil
Danger: To prevent injury or death from electrocution always ensure that the hairdryer does not get wet while in operation.
6. Unplug defrost heater and defrost thermostat wires
Note: Thermostat is wired in series with the heater.
7. Remove screw from white plastic holder located on top of evaporator coil
8. Remove styrofoam pieces from top of coil
9. Grasp the bottom of the evaporator coil and carefully lift and pull out the bottom end a few inches
10. Remove old heater coil by pulling out from the bottom and replace with new coil
Note: Be very careful when moving the evaporator, it is made of aluminum and will be very costly to repair if you damage the tubing.
11. Replace old thermostat with new thermostat
12. Re-connect thermostat and heater wiring
Note: Remember to route wiring so that condensation does not gravitate to the electrical connections.
13. You can check if the heater is working by manually rotating the defrost timer clockwise. The timer dial is located on the bottom, front of the refrigerator on the freezer side. Be careful, the heater gets very hot.
14. Re-install evaporator cover
15. Re-install shelves and ice storage tray
16. Plug in the refrigerator
Note: Depending on how warm your refrigerator was it may take 24 hours to return to normal operating temperatures.
Note: Take your time and the job will go faster.
Parts Used:
-
Neil from Flemington, NJ
-
Difficulty Level:Easy
-
Total Repair Time:1- 2 hours
-
Tools:Nutdriver, Pliers, Screw drivers
43 of 45 people
found this instruction helpful.
Was this instruction helpful to you?
Thank you for voting!
no water for ice-maker or cold water
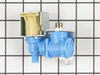
Unplugged refrig and shut off water supply. Removed cardboard backing on back of refrig. Then removed water lines and power plug from old water valve. Removed screws holding water valve on refrig chassis. Attached water lines and power plug to new water valve. Then repeated the above steps in reverse order. Took a max of 30 mins to install the water valve and worked properly when plugged in refrig and turned water supply on.
Parts Used:
-
Billy from Newport News, VA
-
Difficulty Level:Easy
-
Total Repair Time:15 - 30 mins
-
Tools:Nutdriver, Screw drivers, Wrench set
43 of 48 people
found this instruction helpful.
Was this instruction helpful to you?
Thank you for voting!
Ice Maker stopped working
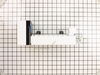
Reviewed the video on your website and followed the directions to the letter. Great video
Parts Used:
-
Dennis from DEER LODGE, MT
-
Difficulty Level:Really Easy
-
Total Repair Time:15 - 30 mins
-
Tools:Nutdriver
39 of 47 people
found this instruction helpful.
Was this instruction helpful to you?
Thank you for voting!
freezer working but refrigerator not getting cold
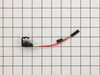
THERMOSTAT--First I removed the fours crews that hold the back of freezer (inside freezer) in place. I then pulled the thermostat out about 3 inches and disconnected the two wires. Plugged in the new one and put back in place. Replaced freezer back and installed the four screws that holds it in.(iIf your freezer has a ice maker just loosen the 2 screws that hold it and lift the ice maker up off the screws
DEFROST TIMER--- removed one screw inside fridge by light bulb that holds in the timer and setting knob, then took out the two screws that held in the timer unplugged the old timer and replaced with the new one put back in the two screws that holds the timer in then replaced the one screw that holds the unit in place
DEFROST TIMER--- removed one screw inside fridge by light bulb that holds in the timer and setting knob, then took out the two screws that held in the timer unplugged the old timer and replaced with the new one put back in the two screws that holds the timer in then replaced the one screw that holds the unit in place
Parts Used:
-
Raymond T from New York, NY
-
Difficulty Level:Easy
-
Total Repair Time:15 - 30 mins
-
Tools:Nutdriver, Screw drivers
38 of 46 people
found this instruction helpful.
Was this instruction helpful to you?
Thank you for voting!
ice maker would not rotate out cube or crushed ice.
1. Remove outer plastic face cover (4) screws.
2. Revove (1) U type nut keeper & (1) metal washer.
3. Remove (1) plastic nut on end of metal auger.
4. Remove inner plastic cover (4) screws and disconnect control rod. (Note postion of control rod befor disconnecting)
5. Note position and order of metal blades and plastic spacers on auger before siding off the end of auger to reposition them upon re-assembly.
6. Remove metal support panel from end of ice bucket (4) screws.
7. Remove auger & plastic cylinder from ice bucket.
8. Remove - slide drive blade off auger.
9. Drive blade replaced.
10. Re-assembled other items removed in reverse order
2. Revove (1) U type nut keeper & (1) metal washer.
3. Remove (1) plastic nut on end of metal auger.
4. Remove inner plastic cover (4) screws and disconnect control rod. (Note postion of control rod befor disconnecting)
5. Note position and order of metal blades and plastic spacers on auger before siding off the end of auger to reposition them upon re-assembly.
6. Remove metal support panel from end of ice bucket (4) screws.
7. Remove auger & plastic cylinder from ice bucket.
8. Remove - slide drive blade off auger.
9. Drive blade replaced.
10. Re-assembled other items removed in reverse order
Parts Used:
-
David from Ponca City, OK
-
Difficulty Level:Easy
-
Total Repair Time:30 - 60 mins
-
Tools:Nutdriver, Pliers, Screw drivers
40 of 62 people
found this instruction helpful.
Was this instruction helpful to you?
Thank you for voting!
The old ice maker had stopped working properly. The cycle was inconsistent, and inlet water would run over existing cubes in the tray, before they were dumped into the dispenser box.
This was really simple, much like changing a light bulb. Two bolts loosened beneath the old unit to allow it to be lifted off and free. The power supply plug was easily disconnected. The new unit was then placed onto the loosened bolts, power supply reconnected and secured with the supplied wire tie. A small angled bracket was removed from the old and reattached to the new as a support toward the from of the unit. The cycle adjuster was backed off a 1/2 turn as per the instructions....and the next morning....new automatic ice. Life is good!
Parts Used:
-
Daniel from Baldwin City, KS
-
Difficulty Level:Really Easy
-
Total Repair Time:Less than 15 mins
-
Tools:Nutdriver
29 of 31 people
found this instruction helpful.
Was this instruction helpful to you?
Thank you for voting!
Ice Crusher Broke. Plastic in Ice Tray
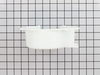
Removed 4 screws holding face plate onto ice bucket. Removed the 3 screws holding the ice crusher housing. Noted postion and rotation of teh s;ring loaded ice selecting rod. Removed broken crusher housing. Reveresed process for installion. Took for test drive. Operational...
Parts Used:
-
Ronald from Dickson, TN
-
Difficulty Level:Easy
-
Total Repair Time:15 - 30 mins
-
Tools:Screw drivers
36 of 54 people
found this instruction helpful.
Was this instruction helpful to you?
Thank you for voting!
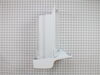
The in the door ice dispencer would not dispense ice since the auger wasn't working properly to push the ice through the door.
Pulled the old ice container assembly out and discarded it and inserted the new one. It immediately worked and now dispenses both crushed and cubed ice through the door.
Parts Used:
-
Thomas from Pineville, LA
-
Difficulty Level:Really Easy
-
Total Repair Time:Less than 15 mins
28 of 33 people
found this instruction helpful.
Was this instruction helpful to you?
Thank you for voting!
Freezer - Refrigerator Not Cold, Keeps Running
At top of refrigerator compartment, took out screws to cover (where temp control is) and to the right took out 2 screws to remove defrost timer and installed in reverse order. In freezer compartment, unscrewed back of freezer wall and took off completely. Removed old freezer thermostat, the body of freezer thermostat snapped onto coil and wire plugged in. Let run for 24 hrs, then made adjustments to temps, so far temps are back in normal range.
Parts Used:
-
ASHLEY from SHENANDOAH, VA
-
Difficulty Level:Really Easy
-
Total Repair Time:30 - 60 mins
-
Tools:Screw drivers
29 of 36 people
found this instruction helpful.
Was this instruction helpful to you?
Thank you for voting!
no cooling in fridge or freezer due to bad defrost timer
i removed the 4 screws holding cover. removed two screws holding timer. unplugged timer. plugged in new one. reassembled.
Parts Used:
-
Todd from pottstown, PA
-
Difficulty Level:Easy
-
Total Repair Time:Less than 15 mins
-
Tools:Screw drivers
29 of 37 people
found this instruction helpful.
Was this instruction helpful to you?
Thank you for voting!
Old icemaker would not cycle to make ice.
I had already removed the ice maker by loosening the two screws with a 1/4" nut driver, in order to compare the design and style to the intended replacement for size and critical measurements. The replacement was almost identical. The wiring harness was 2-3" longer than the original, but after snaping the wire plugs together I simply curved the wire up and to the left to be out of the way. The hanging brackets are slotted and it was easiest to slip the back hanger over the head of the screw and let it slip down, then the front hanger was already to line up even though you can't see the screw with the ice maker in the way. I had to transfer an L-shaped metal bracket to the bottom side, matching the old assembly, and adjusting it to hold the bottom side away from the freezer compartment a little so it would hang level and secure. You have to snug the two screws with a screw driver or 1/4" nut driver by feel, since you can't see them with the icemaker in place. It took about 10 minutes to take out the old and another 10 to put in the new. We now have a full bin of ice, and the old plastic trays have been retired. I should have done this a year ago.
Parts Used:
-
David from Cedar City, UT
-
Difficulty Level:Easy
-
Total Repair Time:15 - 30 mins
-
Tools:Nutdriver
24 of 26 people
found this instruction helpful.
Was this instruction helpful to you?
Thank you for voting!
Ice maker quit working
Loosen two screws, unclip electrical connection, remove ice maker, remove l shaped leveling piece of metal from old one, put on new one. Install in reverse order. Hint.. when loosening two screws, use a mirror
Parts Used:
-
Robert from SIOUX FALLS, SD
-
Difficulty Level:Really Easy
-
Total Repair Time:30 - 60 mins
-
Tools:Nutdriver
27 of 35 people
found this instruction helpful.
Was this instruction helpful to you?
Thank you for voting!