















ESS341 Caloric Range - Instructions
Keep searches simple. Use keywords, e.g. "leaking", "pump", "broken" or "fit".
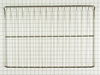
Wire Racks very old and very dirty
I just replaced the racks with beautiful, new, shiny racks. My wife was very pleased
Parts Used:
-
Paul from Belmont, MA
-
Difficulty Level:Really Easy
-
Total Repair Time:Less than 15 mins
1 of 2 people
found this instruction helpful.
Was this instruction helpful to you?
Thank you for voting!
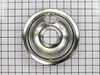
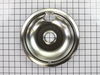
Just needed new drip pans for burners
Was glad to get the correct ones for a 30 year old stove. Had already wasted $12 shipping trying to order from someone else.
Parts Used:
-
Ann from Cadiz, KY
-
Difficulty Level:Really Easy
-
Total Repair Time:Less than 15 mins
1 of 2 people
found this instruction helpful.
Was this instruction helpful to you?
Thank you for voting!
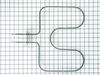
Bake Element Died
Had to use wd-40 to get the old part loose (oven is over 15 years old) and used pliers to pull apart from the oven. Replaced with the new part and works great. . . Once I used the wd-40 to loosen, it was super easy.
Parts Used:
-
Kimberly from Farmington, MI
-
Difficulty Level:Easy
-
Total Repair Time:Less than 15 mins
-
Tools:Pliers
1 of 2 people
found this instruction helpful.
Was this instruction helpful to you?
Thank you for voting!
The bake element did not get hot any longer
Unscrewed the 2 screws in the back of the element. Disconnected the unit from the bake of the oven, replaced the two ends of the new element and screwed in the 2 screws. Oven works great! Took less than 5 minutes to complete.
Thank you for the FAST delivery!!
Thank you for the FAST delivery!!
Parts Used:
-
Donna from Lodi, CA
-
Difficulty Level:Really Easy
-
Total Repair Time:Less than 15 mins
-
Tools:Screw drivers
1 of 2 people
found this instruction helpful.
Was this instruction helpful to you?
Thank you for voting!
Stove Burner wouldn't heat up

-
Donna from Sandwich, MA
-
Difficulty Level:Really Easy
-
Total Repair Time:Less than 15 mins
1 of 2 people
found this instruction helpful.
Was this instruction helpful to you?
Thank you for voting!
The three braces under the coils had weakened and fallen apart
I simply pulled out the old coils and plugged in the new ones. I saved the little pieces that accompanied each coil, because I didn't know what they were used for.
Parts Used:
-
Suzanne from COZAD, NE
-
Difficulty Level:Very Easy
-
Total Repair Time:Less than 15 mins
2 of 5 people
found this instruction helpful.
Was this instruction helpful to you?
Thank you for voting!
Replace oven racks
Very simple process of just ensuring you have the correct size racks and remove the old racks and replace them with the new ones.
Having ordered a lot of things on the internet, I am very pleased with using Part select and would "highly" recommend them to all!!
Having ordered a lot of things on the internet, I am very pleased with using Part select and would "highly" recommend them to all!!
Parts Used:
-
Gregory from Davenport, IA
-
Difficulty Level:Really Easy
-
Total Repair Time:Less than 15 mins
2 of 5 people
found this instruction helpful.
Was this instruction helpful to you?
Thank you for voting!
My drip pans were in bad shape
I removed the old and repaced with new. I never ordered anything one day and got it the next. I'm impressed
Parts Used:
-
Sandra from Oldsmar, FL
-
Difficulty Level:Really Easy
-
Total Repair Time:Less than 15 mins
2 of 5 people
found this instruction helpful.
Was this instruction helpful to you?
Thank you for voting!
Drip bowls very dirty and stained
Remove burner elements. Remove old drip pans. Thoroughly clean stove top under drip pan edges, and under top cover. Install new drip pans. Install burner elements.
I never seem to be able to find the correct replacement drip pans at retail outlets in the quantities I need. Your parts identification, selection and ordering processes were simple and delivery was faster than I hed expected.
Thank you
I never seem to be able to find the correct replacement drip pans at retail outlets in the quantities I need. Your parts identification, selection and ordering processes were simple and delivery was faster than I hed expected.
Thank you
Parts Used:
-
john from donna, TX
-
Difficulty Level:Really Easy
-
Total Repair Time:Less than 15 mins
1 of 2 people
found this instruction helpful.
Was this instruction helpful to you?
Thank you for voting!
Old burner pan warped.burner sat at 15 degree angle.
Removed burner and then burner pan.Then replaced pan and reinstalled burner.
Parts Used:
-
Michael from Portland, OR
-
Difficulty Level:Really Easy
-
Total Repair Time:Less than 15 mins
1 of 2 people
found this instruction helpful.
Was this instruction helpful to you?
Thank you for voting!
Drip pans needed to be replaced
1) removed heating elements. 2) removed drip pans. 3) installed new drip pans. 4) reinstalled heating elements
Parts Used:
-
Mark from ROSENBERG, TX
-
Difficulty Level:Very Easy
-
Total Repair Time:Less than 15 mins
1 of 2 people
found this instruction helpful.
Was this instruction helpful to you?
Thank you for voting!
Broken hinge on oven door
I ordered the part and it was at my door in 2 days. I ordered the part on Wednesday thinking I would install it on the weekend after next. The part showed up on Friday. That was amazing considering I didn't sellect expeidited delivery. I didn't have a manual and have never tried this before so grade my attempt on a curve please. I started by unscrewing the screws closest to the hinge but quickly migrated to the entire face of the range. Pulled the range out and started unscrewing the screws on the side, and then the back. Figuring nothing was coming off and I still couldn't get to the hinge I stopped and regrouped. That's when my wife asked if she could help. I guess I looked distressed. By this time I had removed the drawer and had the range on it's back in the middle of the kitchen with little bowls of screws everywhere. My wife picked up the new hinge and looked it over. Then she started playing with the old hinge which was loose, but I couldn't get it out. She realized that you can remove the old hinge and install the new hinge without taking the whole thing apart. Where was she 30 minutes ago? The hinges came out and the new ones went it in about 10 minutes. It took me another 20 minutes to put back all of the screws I had taken off unnecessarily. Sometimes use your brains instead of a screwdriver. I have the best wife ever!
Parts Used:
-
Robert from Morgan Hill, CA
-
Difficulty Level:A Bit Difficult
-
Total Repair Time:1- 2 hours
-
Tools:Nutdriver, Screw drivers
4 of 11 people
found this instruction helpful.
Was this instruction helpful to you?
Thank you for voting!
no heat element burned out
removed 2 philips screws holding element, un plugged element. new element arrive next day, insalled in less then 1 min. turned on, setoven for 375 pizza in 20 min later
Parts Used:
-
michael from columbus, NE
-
Difficulty Level:Really Easy
-
Total Repair Time:Less than 15 mins
-
Tools:Screw drivers
1 of 2 people
found this instruction helpful.
Was this instruction helpful to you?
Thank you for voting!
broiler pan missing
-
RAYMOND from JACKSONVILLE, FL
-
Difficulty Level:Really Easy
-
Total Repair Time:Less than 15 mins
1 of 2 people
found this instruction helpful.
Was this instruction helpful to you?
Thank you for voting!
The Problem Was That The Plug Was Gone It Fell Down Out Of The Bracket
I took the old wires and plug off and replaced it with the new block it works fine
Parts Used:
-
Elnora from Brundidge, AL
-
Difficulty Level:Easy
-
Total Repair Time:15 - 30 mins
-
Tools:Screw drivers
1 of 2 people
found this instruction helpful.
Was this instruction helpful to you?
Thank you for voting!