















EED191PKER0 Whirlpool Refrigerator - Instructions
Keep searches simple. Use keywords, e.g. "leaking", "pump", "broken" or "fit".
Refrigerator quit refrigerating
Removed 2 control panel knobs and face plate that is snaped in place using a knife to prey it causing to snape lose.
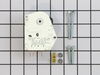
Removed 4 cover screws that gave me acess to Defrost Timer. Remove two fastining screws on timer unit. Remove electrical color coded 4 prong connector plug. Have to make sure black jumper wire on the new timer kit is connected to the correct one of the 4 prongs as to instruction sheet for my model refrigerator. Reassemble in reverse order. Bingo! Fixed.
Removed 4 cover screws that gave me acess to Defrost Timer. Remove two fastining screws on timer unit. Remove electrical color coded 4 prong connector plug. Have to make sure black jumper wire on the new timer kit is connected to the correct one of the 4 prongs as to instruction sheet for my model refrigerator. Reassemble in reverse order. Bingo! Fixed.
Parts Used:
-
William from Hudson, FL
-
Difficulty Level:A Bit Difficult
-
Total Repair Time:1- 2 hours
-
Tools:Nutdriver, Screw drivers
15 of 21 people
found this instruction helpful.
Was this instruction helpful to you?
Thank you for voting!
The refrigerator door made a terrible bang every time it was opened.
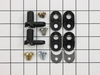
The hardest part was unloading all the food from the refridgerator door! Once done, pry shroud off top door hinge, remove 3 screws and hinge plate. Lift door off bottom hinge. Remove one screw from bottom of door, remove and discard old lifter cam and spacer. Clean up a bit. Install new spacer and lifter cam. Tighten new screw firmly. Replace the lifter cam and spacer on bottom hinge pin (affixed to refridgerator body) using the same method. Replacing the door is easiest if 2 people do it. One person to lift and steady the door, the other has to lie on the floor and guide the door onto the hinge pin. Replace top hinge plate and screws. Snap shroud back over top hinge plate. Replace food in refridgerator. Close door. Done!
Parts Used:
-
Hank from Seattle, WA
-
Difficulty Level:Really Easy
-
Total Repair Time:15 - 30 mins
-
Tools:Nutdriver
13 of 15 people
found this instruction helpful.
Was this instruction helpful to you?
Thank you for voting!
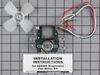
My Fan in the Freezer was making a loud noise
I went on the web to search for parts, did my screening of companies, and chose Partselect.com
They gave me accurate information, very nice, and double checked the part numbers, and the latest replacement part. I received it in a couple of days, followed the directions, and it's working just fine! I saved a lot of money through Partselect, instead of buying a new refrigerator.
NICE JOB Partselect!!
Thanks,
Michael
They gave me accurate information, very nice, and double checked the part numbers, and the latest replacement part. I received it in a couple of days, followed the directions, and it's working just fine! I saved a lot of money through Partselect, instead of buying a new refrigerator.
NICE JOB Partselect!!
Thanks,
Michael
Parts Used:
-
Michael from Imperial, MO
-
Difficulty Level:A Bit Difficult
-
Total Repair Time:1- 2 hours
-
Tools:Screw drivers
15 of 21 people
found this instruction helpful.
Was this instruction helpful to you?
Thank you for voting!
Noise coming from defrost timer
First I unplugged appliance then I remove two screws from the thermostat/light cover. I then remove two defrost timer mounting screws and all electrical connectors. Then utilizing instructions recieved with new defrost timer I ascertained which wires should go where. When I was sure I had the wires ready I connected them to the others in the appliance and plugged the appliance in to ensure that the noise was no longer heard and made sure timer was working. Everything seemed fine so I unplugged appliance and secured two defrost timer mounting screws and thermostat/light cover mounting screws and that was that.
Parts Used:
-
Thomas from Pottstown, PA
-
Difficulty Level:Really Easy
-
Total Repair Time:15 - 30 mins
-
Tools:Nutdriver
12 of 14 people
found this instruction helpful.
Was this instruction helpful to you?
Thank you for voting!
My refrigerator ran constantly and never got cold!
On a whim I looked into what it would take to fix my garage older 2nd fridge. I was thinking I needed a new seal, but when I checked the website there was a great troubleshooter. I would have never guessed that the defrost timer was what would cause it not to ever get cold. After a fairly simple repair the freezer is colder than ever and I actually had to turn it down. The only complication was the fridge was stuck in a defrost cycle so I had to reset the timer to get the refrigerator running. Thanks so much for a super helpful site for a do-it-yourselfer like me.
Parts Used:

-
Brandon from Fort Wayne, IN
-
Difficulty Level:Easy
-
Total Repair Time:30 - 60 mins
-
Tools:Nutdriver, Screw drivers
11 of 12 people
found this instruction helpful.
Was this instruction helpful to you?
Thank you for voting!
refrigerator door was making a popping noise when opening and closing
Not being a handyman I found this job realtively easy.I took most of stuff off fridge door, to make door easier to handle. I then undid top hinge door screws, 3 of them, lifted door out., replaced 2 cams.When putting door back on fridge, you have to make sure door is in exact position and top hinge is lined up exactly, or door will continue to pop a little.It took me a couple of times to get top hinge lined up exactly.
Parts Used:
-
Vincent D from Blackwood, NJ
-
Difficulty Level:Really Easy
-
Total Repair Time:15 - 30 mins
-
Tools:Nutdriver
10 of 10 people
found this instruction helpful.
Was this instruction helpful to you?
Thank you for voting!
would not cycle
removed the defrost timer and replaced with new unit now i have a refrigerator again
Parts Used:
-
Maxine from Birmingham, AL
-
Difficulty Level:Really Easy
-
Total Repair Time:15 - 30 mins
-
Tools:Nutdriver
12 of 16 people
found this instruction helpful.
Was this instruction helpful to you?
Thank you for voting!
There was no light on in refrig area
Just replaced the switch, but unfortunately that was not the problem; nor was it the bulb....so I am back to square one.
But Parts Select is a great place to order from. Thank you.
But Parts Select is a great place to order from. Thank you.
Parts Used:
-
Lori from Chuluota, FL
-
Difficulty Level:Easy
-
Total Repair Time:Less than 15 mins
-
Tools:Screw drivers
12 of 19 people
found this instruction helpful.
Was this instruction helpful to you?
Thank you for voting!
Refrigerator stopped cooling. Would restart when thermostat was tapped, but would stop again within minutes.
Instructions were simple and clear. Removed knob, snapped off plastic control panel. Then removed five 1/4" head sheetmetal screws to remove metal bracket holding thermostat. Two more 1/4" head screws held the thermostat to the bracket. Then pulled off the three fast-on electrical connections and pulled the thermostat and thermocouple tube out. Reversed the process to install new thermostat. My 33 year old garage refrigerator now works perfectly again! NOTE: searching for "thermostat" on the site didn't work.. It's called a "cold control thermostat" for some reason. That's redundant; other than cold, why would a themostat be in a refigerator, for heaven's sakes!?
Parts Used:

-
Charles from Chatsworth, CA
-
Difficulty Level:Really Easy
-
Total Repair Time:Less than 15 mins
-
Tools:Nutdriver
8 of 9 people
found this instruction helpful.
Was this instruction helpful to you?
Thank you for voting!
The fan quit
-
donn from Ranier, MN
-
Difficulty Level:Really Easy
-
Total Repair Time:15 - 30 mins
-
Tools:Nutdriver
11 of 19 people
found this instruction helpful.
Was this instruction helpful to you?
Thank you for voting!
light not working in fridge
It was so easy!
Thanks for the rush to my home on the part.
I just unscrewed the plate that locks in the light switch (screwdriver) and unplugged the old faulty part and plugged in the new switch, screwed the cover back on and I was done!
Easy!
And I am not Mr. Fix-it!
Thanks for the rush to my home on the part.
I just unscrewed the plate that locks in the light switch (screwdriver) and unplugged the old faulty part and plugged in the new switch, screwed the cover back on and I was done!
Easy!
And I am not Mr. Fix-it!
Parts Used:
-
Michael from East Meadow, NY
-
Difficulty Level:Really Easy
-
Total Repair Time:Less than 15 mins
-
Tools:Screw drivers
7 of 8 people
found this instruction helpful.
Was this instruction helpful to you?
Thank you for voting!
Chirping sound coming from the freezer-old gasket on food door causing air leakage r
Removed shelving,ice maker & other air deverters to get at fan motor. Disconnected power, then removed motor by removing screws holding motor assembly in place. Push fan blade on to motor reconnect wiring.
Chirping stopped and ice cream is now rock hard.
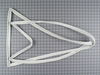
Food door gasket was more time consuming than hard. Loosen old gasket screws with not driver. Gasket is then easily removed. Reinstall gasket, but keep retaining strips loose so you can adjust gasket for a correct fit.
Chirping stopped and ice cream is now rock hard.
Food door gasket was more time consuming than hard. Loosen old gasket screws with not driver. Gasket is then easily removed. Reinstall gasket, but keep retaining strips loose so you can adjust gasket for a correct fit.
Parts Used:
-
JAMES from WAUPACA, WI
-
Difficulty Level:A Bit Difficult
-
Total Repair Time:More than 2 hours
-
Tools:Nutdriver, Screw drivers
10 of 17 people
found this instruction helpful.
Was this instruction helpful to you?
Thank you for voting!
All three lights are not working...lights are off but refrigerator still cooling. Also, the control box not lit up to show the temparture for freezer and refrigerator
Used a screw driver to pull old switch. Pulled one wire at a time, only two wires. After wires instlled to new switch push new one back in place where the old one was.
Parts Used:
-
Antonio from San Antonio, TX
-
Difficulty Level:Really Easy
-
Total Repair Time:Less than 15 mins
-
Tools:Screw drivers
7 of 10 people
found this instruction helpful.
Was this instruction helpful to you?
Thank you for voting!
No tempersture control, it was either onand freezing or off and hot.
A simple job to remove the plastic cover held by two screws. Then one screw which held the old controller frame. Then remove two screws which held controller. Putting it back was just the reverse.
I did not have to adjust the new control position but with the wrench in the kit it would have been no trouble to do that either.
The instructions were just fine and anyone with a little mechanical knowledge could do it
I did not have to adjust the new control position but with the wrench in the kit it would have been no trouble to do that either.
The instructions were just fine and anyone with a little mechanical knowledge could do it
Parts Used:
-
loy from Pahrump, NV
-
Difficulty Level:Really Easy
-
Total Repair Time:15 - 30 mins
-
Tools:Nutdriver, Screw drivers
7 of 10 people
found this instruction helpful.
Was this instruction helpful to you?
Thank you for voting!
In the ice storm in bootheel of Mo the power spiked a few times before it went off. When power came back on, my frige wouldn't stay working. I would have to touch the thermostat to make it cycle back on. Found exact parts on line at partselect needed to repair the fridge. thanks guys!
First I unplugged the appliance, then I took the two screws out that hold the cover over the temp. control knobs,then I removed the cover from the fan and thermocouple probe end. Then I unplugged the two hot wires from the thermostat,and then the ground wire. Then removed the two screws holding the thermostat in place and removed old thermostat. Installed new thermostat following steps in reverse order.
Parts Used:
-
George from Gideon, MO
-
Difficulty Level:Easy
-
Total Repair Time:Less than 15 mins
-
Tools:Nutdriver
6 of 8 people
found this instruction helpful.
Was this instruction helpful to you?
Thank you for voting!