EED191PKER0 Whirlpool Refrigerator - Overview
Sections of the EED191PKER0
[Viewing 1 of 1]Keep searches simple, eg. "belt" or "pump".
Defrost Timer
PartSelect #: PS11723171
Manufacturer #: W10822278
The Defrost Timer (Defrost control) acts like a clock by switching on the defrost heater circuit after a predetermined amount of compressor run time. This allows the defrost circuit to clear the evapo...
$34.74
In Stock
Refrigerator Door Switch
PartSelect #: PS12728638
Manufacturer #: W11384469
Door switch turns the light off when you close the door.
$30.53
In Stock
Door Closing Cam Kit
PartSelect #: PS358690
Manufacturer #: 4318165
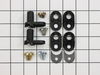
This door closing cam kit is intended for use with the bottom of refrigerator and freezer door hinges. The cam helps with the closing of the doors and to keep them slightly in position when opened.
$22.52
In Stock
Evaporator Fan Motor Kit
PartSelect #: PS376600
Manufacturer #: 482469
This refrigerator evaporator fan motor kit comes with a wiring harness and a four-inch push on fan blade. If your current evaporator fan motor has shorted out and does not circulate the cold air from ...
$103.33
In Stock
Refrigerator Door Shelf End Cap
PartSelect #: PS11745974
Manufacturer #: WP849996
Sold individually.
$9.62
In Stock
Fresh Food Door Gasket
PartSelect #: PS328668
Manufacturer #: 2188404A
This white door gasket is used to seal the refrigerator door when closed to keep the cool air inside and the room air out.
$145.02
In Stock
Refrigerator Cold Control Thermostat
PartSelect #: PS11745205
Manufacturer #: WP819470
This cold control thermostat has a temperature range from 36 degrees Fahrenheit to 17 degrees Fahrenheit and a capillary length of 26 inches.
$78.31
In Stock
Freezer Door Gasket
PartSelect #: PS328670
Manufacturer #: 2188405A
This white door gasket is used to seal the freezer door when closed.
$152.90
Special Order
Do-It-Yourself Manual, Ref./Fz
PartSelect #: PS573929
Manufacturer #: 677969
Conduct your own minor repairs for your refrigerator or freezer using this manual. This instructional manual by Whirlpool provides easy to follow pictures as well as step-by-step repair procedures.
No Longer Available
Vacuum Crevice Wand Attachment
PartSelect #: PS2362547
Manufacturer #: 8171579A
This is a vacuum cleaner attachment for condenser coils and dryer cleaning. This part measures 37 in. in length, made of plastic and fits 1-1/4 in. vacuum.
$34.74
In Stock
Questions And Answers for EED191PKER0
Be the first to ask our experts a question about this model!
✖
Ask a Question
Ask our experts a question on this model and we'll respond as soon as we can.
Sorry, we couldn't find a match for "".
Here's a guide for finding your model number.
Something went wrong. Please try again later.
Your Question Has Been Submitted!
Our experts will send you an email as soon as your question has been answered.
Common Symptoms of the EED191PKER0
[Viewing 17 of 17]Light not working
Fixed by
these parts
these parts
Show All
Fridge too warm
Fixed by
these parts
these parts
Show All
Door won’t open or close
Fixed by
these parts
these parts
Show All
Freezer not defrosting
Fixed by
these parts
these parts
Show All
Freezer section too warm
Fixed by
these parts
these parts
Show All
Leaking
Fixed by
these parts
these parts
Show All
Will Not Start
Fixed by
these parts
these parts
Show All
Noisy
Fixed by
these parts
these parts
Show All
Door Sweating
Fixed by
these parts
these parts
Show All
Fridge and Freezer are too warm
Fixed by
these parts
these parts
Show All
Fridge runs too long
Fixed by
these parts
these parts
Show All
Clicking sound
Fixed by
these parts
these parts
Show All
Fridge too cold
Fixed by
these parts
these parts
Show All
Frost buildup
Fixed by
these parts
these parts
Show All
Freezer too cold
Fixed by
these parts
these parts
Show All
Too warm
Fixed by
these parts
these parts
Show All
Won’t start
Fixed by
these parts
these parts
Show All
Keep searches simple. Use keywords, e.g. "leaking", "pump", "broken" or "fit".
The door would not close properly. The CAM had broken.
The repair was very simple.
1. Remove the food from the door shelves.
2.Remove the door by first removing the three screws holding the hinge at the top of the refrigerator.
3. Lift door off of the bottom hinge.
4.Replace bottom CAM on bottom hinge (one screw)
5. Replace top CAM and sh ... Read more im on door (one screw)
6. I put a little grease on the cam to make it slide better.
7. Place door on bottom hinge. Remount top hinge.
8. Done and works better than new.
Read less
Parts Used:
-
Thomas from San Clemente, CA
-
Difficulty Level:Really Easy
-
Total Repair Time:Less than 15 mins
-
Tools:Nutdriver, Screw drivers
143 of 147 people
found this instruction helpful.
Was this instruction helpful to you?
Thank you for voting!
Lights inside refrigerator not working
I used a flat-head screwdriver to pop out the old light rocker switch. Then, I unplugged the wires, plugged them into the new light rocker switch, and then popped the new switch into the hole. That's it! Lights began working again.
Parts Used:
-
Clint from Rayville, MO
-
Difficulty Level:Really Easy
-
Total Repair Time:Less than 15 mins
-
Tools:Screw drivers
136 of 250 people
found this instruction helpful.
Was this instruction helpful to you?
Thank you for voting!
Defrost timer was faulty. Required a mild tap to restart
Trouble shot the electrical circuit per the electrical schematic and zeroed in when I noted the Defrost Timer circuit was open. When I tapped on the bottom of the timer it began functioning normally (for a few days). Ordered a new Defrost Timer Kit and along with the installation instruction, I watched the on-line video. It was very help
... Read more
ful!!
After installation was complete, I plugged the Refrigerator into the electrical outlet and.......nothing happened! Hmmm!
Removed the Defrost Time Kit and inspected it for any damage and found none. Then I placed a flathead screwdriver to the manual advance knob and slightly rotate the gear mechanism. I heard a distance "click”. I believe the Timer was in the ‘defrost’ mode when received.
I reinstalled the timer, verified the wiring connections and this time plugged the Refrigerator into the electrical outlet and ….. it worked!!!
I unplugged the refrigerator, finished the installation per the instructions, plugged the unit in and monitored it for a few hours (just in case). That was a week ago and the Refrigerator is working like new.
The instructions were written in a manner which required re-reading a few times as they could be a bit vague. The video was what really helped and I appreciate PartSelect adding it to the instructions.
Read less
Parts Used:
-
LES from MADERA, CA
-
Difficulty Level:Really Easy
-
Total Repair Time:30 - 60 mins
-
Tools:Nutdriver, Screw drivers
69 of 76 people
found this instruction helpful.
Was this instruction helpful to you?
Thank you for voting!