















EB9SHKXVQ00 Whirlpool Refrigerator - Instructions
Keep searches simple. Use keywords, e.g. "leaking", "pump", "broken" or "fit".
Ice maker quit making ice
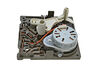
I removed the ice maker which required removing 3 screws and then disconnecting the electrical plug. Once the ice maker was out, I removed the 3 screws that held the motor assembly to the unit.
I removed the motor, replacing it with the new one.
Plugged the power supply cord back in, replaced the unit with the 3 screws and within a few minutes the unit was receiving water and by the next day I had ICE. This saved me $50. for the service call, then another $25.00 installation fee when the part came in (had to be ordered) plus the markup on the motor (approx. $25.00) So I saved approx. $100. and only took about 30 min.
I removed the motor, replacing it with the new one.
Plugged the power supply cord back in, replaced the unit with the 3 screws and within a few minutes the unit was receiving water and by the next day I had ICE. This saved me $50. for the service call, then another $25.00 installation fee when the part came in (had to be ordered) plus the markup on the motor (approx. $25.00) So I saved approx. $100. and only took about 30 min.
Parts Used:
-
Dean from Pahrump, NV
-
Difficulty Level:Really Easy
-
Total Repair Time:15 - 30 mins
-
Tools:Nutdriver
44 of 49 people
found this instruction helpful.
Was this instruction helpful to you?
Thank you for voting!
water to ice maker not shutting off; overflowing
1. turn off power.
2. pop off ice maker cover to access motor assembly.
3. remove three screws to assembly.
4. pull off assembly.
5. attach new assembly making sure metal arm and plastic
ice tray rod align with assembly.
6. screw assembly onto unit.
7. replace cover.
8. plug in refrigerator.
9. enjoy ice again with no leakage into freezer.
2. pop off ice maker cover to access motor assembly.
3. remove three screws to assembly.
4. pull off assembly.
5. attach new assembly making sure metal arm and plastic
ice tray rod align with assembly.
6. screw assembly onto unit.
7. replace cover.
8. plug in refrigerator.
9. enjoy ice again with no leakage into freezer.
Parts Used:
-
g anthony from salt lake city, UT
-
Difficulty Level:Really Easy
-
Total Repair Time:Less than 15 mins
-
Tools:Screw drivers
43 of 48 people
found this instruction helpful.
Was this instruction helpful to you?
Thank you for voting!
compressor clicking but not turning on
I just opened up the fridge back panel accessed the old relay/capacitor, pulled it out, replaced with the new one, snapped it back into place, tested it (compressor came on), replaced the back panel and went on my way. Really, really easy repair.
Parts Used:
-
brice from irving, TX
-
Difficulty Level:Really Easy
-
Total Repair Time:15 - 30 mins
-
Tools:Nutdriver
45 of 55 people
found this instruction helpful.
Was this instruction helpful to you?
Thank you for voting!
crisper drawers were off center rail due to c.r fracture
removed old rail,lifted glass panel above and inserted new rail-voila!!done.
Parts Used:
-
albert from quakertown, PA
-
Difficulty Level:Really Easy
-
Total Repair Time:Less than 15 mins
42 of 47 people
found this instruction helpful.
Was this instruction helpful to you?
Thank you for voting!
while closing the door, the light switch fouled, resulting in the switch breaking
I used a flat screwdriver and released the lock tab on the bottom of the light switch, and pried the switch out, being careful to not damage the plastic around the mounting place of the switch, unplugged wiring from old switch, plugged in the new one and pushed the new switch into place. Job finished light switch now working.
Parts Used:
-
Kevin from Beckley, WV
-
Difficulty Level:Really Easy
-
Total Repair Time:Less than 15 mins
-
Tools:Screw drivers
65 of 116 people
found this instruction helpful.
Was this instruction helpful to you?
Thank you for voting!
No Ice, Water did not fill icemaker
We weren't sure if the problem was in the Water Inlet Valve or in the Icemaker Control & Motor Assembly. The water in the door did work. We removed the Water Inlet Valve & tested it with an Ohm Meter. It tested good so we put it back in. We then ordered the Icemaker Control & Motor Assembly. When it arrived we installed it and waited a few hours but the icemaker still did not fill with water. We telephoned a parts store and were told the problem could be the thermostat or we could replace the whole icemaker. We replaced the whole icemaker.
Parts Used:
-
Barbara from Davenport, IA
-
Difficulty Level:A Bit Difficult
-
Total Repair Time:1- 2 hours
-
Tools:Nutdriver, Screw drivers, Wrench (Adjustable)
45 of 59 people
found this instruction helpful.
Was this instruction helpful to you?
Thank you for voting!
Light Switch broke
An easy job for smaller hands. Removed the two bolts holding the light cover. Removed two electrical connections from the old switch by pinching the retaining clip,removed the switch, snapped in the new one and re-attached the connectors. Your online illustrations helped me to know that the plastic housing for the light switch would only swing down so far and was not intended to be removed. Saved me from breaking that plastic cover's tabs. This home repair saved me more than 5 times the cost of hiring a professional to do it. Very happy homeowner.
Parts Used:

-
James Richard from St. Cloud, MN
-
Difficulty Level:Easy
-
Total Repair Time:Less than 15 mins
-
Tools:Socket set
48 of 76 people
found this instruction helpful.
Was this instruction helpful to you?
Thank you for voting!
The icemaker stopped filling the ice tray to make ice.
I checked the fuses and hoses in the back of the refrigerator to make sure water WAS in fact getting to the front of the fridge. Since the water through the front door worked fine, I had to check the water tube running to the ice maker. It was fine and water was waiting to go somewhere! I decided to pull the icemaker out of the fridge to see what I could fine. Once it was out, I took the ICEMAKER CONTROL AND MOTOR ASSEMBLY off (that's the side part with the dial on it). Only 3 screws to take that off, and it was EASY to see what was wrong once I took that off. There was a connection that was obviously bad (looked almost like it had burned out). My thought was that it was obvious what part was bad, what would it hurt for me to try to fix it myself? When I got online to find the part, PartSelect was the only one that I found that had the EXACT part that I needed, and lucky for me, there were multiple pictures of multiple angles of the part so I could compare and make sure I had the right one!! The part with shipping cost less than the cost of a repair tech to even come out and look at the fridge. Then add the cost of the part and labor if I had the repair tech fix it...I probably saved about $250!!!!
Parts Used:
-
shannon from sierra vista, AZ
-
Difficulty Level:Easy
-
Total Repair Time:Less than 15 mins
-
Tools:Screw drivers, Socket set
32 of 37 people
found this instruction helpful.
Was this instruction helpful to you?
Thank you for voting!
Ice maker mold was cracked and leaking water into the bin which then froze all the cubes together.
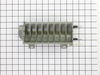
I removed the ice maker assembly from the freezer compartment (four nuts/ nut driver) and unplugged the wire harness. I discovered the nature of the problem and I went on the Internet to look for replacement parts expecting I'd have to buy the entire ice maker. When I found PartSelect.com I looked through the pictures of the parts available for my ice maker. I found the correct part quickly and easily. And having an acurate photo on the site, I was able to match all the key features of the mold I had with the one on the screen. I ordered the part, and installed it the day it arrived with just a Phillips screwdriver and a nut driver. It functions perfectly.
Parts Used:
-
George from Cottage Grove, MN
-
Difficulty Level:Really Easy
-
Total Repair Time:Less than 15 mins
-
Tools:Nutdriver, Screw drivers
28 of 30 people
found this instruction helpful.
Was this instruction helpful to you?
Thank you for voting!
The black plastic or teflon coating on the ice mold was coming off in flakes and freezing in the ice cubes
I took out the ice collection box and auger to get access to the three screws holding the ice maker assembly against the left wall of the freezer. You can use a screwdriver or a nut driver. I then unpluged the assembly and wiggled it loose from the water fill tube. I assumed that unplugging the unit would disable the water valve but I put a plastic tub under the fill tube just in case. I studied the assembly on the kitchen table for a few minutes before I disasembled it. After removing a snapon plastick cover I removed three or four screws on the gearbox and was able to pull and wiggle the parts apart. The heater contacts have rubber O rings so you have to be firm pulling the mould out of and into the gearbox mount. Make sure it is fully seated. On reassembly note that the ice kicking arm is notched so it fits into the gearbox only one way and it helps to have it in position when you screw the gearbox back on. I also found the plastic ice guide that fits on top of the mold a little awkward in snaping back together. Make sure its fingers space evenly with the ice kicking arms.
Parts Used:
-
Roger from Sunnyvale, CA
-
Difficulty Level:Easy
-
Total Repair Time:30 - 60 mins
-
Tools:Nutdriver, Screw drivers
32 of 42 people
found this instruction helpful.
Was this instruction helpful to you?
Thank you for voting!
The light switch on the refridgerator broke - no light.
Once I saw the replacement part I understood how to pry out the switch with a small screwdriver. Then just unplug the old one, plug in the new one and pop it into place.
The PartSelect site made it easy to correctly identify the correct part, it was inexpensive, and the shipping was fast.
I'm very pleased!
The PartSelect site made it easy to correctly identify the correct part, it was inexpensive, and the shipping was fast.
I'm very pleased!
Parts Used:
-
David from Albany, OR
-
Difficulty Level:Really Easy
-
Total Repair Time:Less than 15 mins
-
Tools:Screw drivers
36 of 56 people
found this instruction helpful.
Was this instruction helpful to you?
Thank you for voting!
The refrigerator was freezing most products
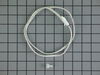
Remove the light cover. Use a flat head screw driver to push in the tabs on the back of the program mount and pull down to expose the computer board. The Thermistor is clipped on under the vent holes on the right side. Cut both wires to remove the old thermistor strip a 1/4 inch off the remaning wires and the new thermistor wires twist both ends together crimp on the wire caps snap in the new thermistor reinstall the program board until the retainer clips snap into place, slide the light cover back on.
Parts Used:
-
michael from MARION, IL
-
Difficulty Level:Easy
-
Total Repair Time:Less than 15 mins
-
Tools:Pliers, Screw drivers
27 of 30 people
found this instruction helpful.
Was this instruction helpful to you?
Thank you for voting!
Ice maker not working
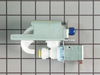
The initial problem was that the ice maker was not working. I had the unit repaired at a local store and they assured me that it worked fine in their workshop. I believed that the valve was the next logical part to replace. The installation was very easy. I unplug the refrigerator and turned off the water. Removed two, easily reached, screws and pulled the unit out. Disconnected the wire harness (you may want to mark the top of the wire harness before removing for immedite alignment on reassembly) and tubing. Notice a spot in the tubing that had been kinked, so cut that out. Reassemble and turned everything back on. Installation went perfectly. Unfortunately, I still do not have ice and will be doing some additional trouble shooting to determine the next course of action. I may be in touch.
Parts Used:
-
Bruce from Biddeford, ME
-
Difficulty Level:Really Easy
-
Total Repair Time:15 - 30 mins
-
Tools:Nutdriver, Screw drivers
33 of 48 people
found this instruction helpful.
Was this instruction helpful to you?
Thank you for voting!
The evap motor failed (no air movement inside of refrierater
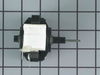
Removed screws from cover tested for power to motor found power was on to motor but motor did not work. I went to your web site was able to locate part in about 5 minutes . Even with over night shipping the part came to about $50,00, far cheaper tha a service call would have been.
Thanks John Paulsell
Thanks John Paulsell
Parts Used:
-
John from Flagstaff, AZ
-
Difficulty Level:Really Easy
-
Total Repair Time:15 - 30 mins
-
Tools:Nutdriver
29 of 36 people
found this instruction helpful.
Was this instruction helpful to you?
Thank you for voting!
No ice in ice maker
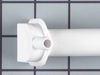
Turn water and refrigerator off, use hair to thaw the ice maker filler tube, then remove the filler tube inside the freezer. Next remove the water supply line cover plate in back of the refrigerator. Now remove the speed clip at the white pvc elbow and pull out the supply line. Next, grasp the pvc elbow with pliers and pull hard to remove. The new filler tube is a 1 piece design (filler tube and elbow combined) and needs to be cut to the proper length. Mark it inside the freezer, remove it and cut to length. Now coat the outside flange with caulk or PU glue and snap into the opening. Put the speed clip on the elbow first and center it. Ensure that the spreader insert is in place in the plastic tube, then slide the supply line into the elbow untill completely engaged. Replace cover.
Parts Used:
-
Dave from dunwoody, GA
-
Difficulty Level:A Bit Difficult
-
Total Repair Time:15 - 30 mins
-
Tools:Pliers, Screw drivers
28 of 37 people
found this instruction helpful.
Was this instruction helpful to you?
Thank you for voting!