















CGS1230ADT Magic Chef Range - Instructions
Keep searches simple. Use keywords, e.g. "leaking", "pump", "broken" or "fit".
oven didnt lite
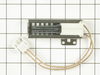
removed 2 screws on element then unpluged it then replaced it with new one easy job
Parts Used:
-
frank from warrensburgh, NY
-
Difficulty Level:Really Easy
-
Total Repair Time:Less than 15 mins
-
Tools:Nutdriver
0 of 1 people
found this instruction helpful.
Was this instruction helpful to you?
Thank you for voting!
Oven would take 3 min. too lite,would not hold temp,sometimes go up too 350* then down too 250* maybe not relite @ all.
It took all of 10 mins. Open oven door slightly lift to remove.took out shelves and bottom of oven,lift at back to remove.Two screws hold the Igniter, was able to pull the connector into the oven to change. Oven works great!
Parts Used:
-
dave from troy, ID
-
Difficulty Level:Really Easy
-
Total Repair Time:Less than 15 mins
-
Tools:Screw drivers
0 of 2 people
found this instruction helpful.
Was this instruction helpful to you?
Thank you for voting!
oven wouldn't heat up, but igiter turned red hot!
First i removed the two screws that hold the element in place. I then pulled the wire out of the hole and disconected the plug. then plug in the new one, put the two screws back in, and checked it to see if it worked,It worked like a new one! So as my reward my wife baked me cookies!
Parts Used:
-
barney from spencerville, OH
-
Difficulty Level:Really Easy
-
Total Repair Time:Less than 15 mins
-
Tools:Socket set
0 of 2 people
found this instruction helpful.
Was this instruction helpful to you?
Thank you for voting!
terminal spade wrong size on range wiring to fit module
cut off terminals and replaced with the right size one's stove lights every time now wlrowe
Parts Used:
-
wilber from oshkosh, WI
-
Difficulty Level:A Bit Difficult
-
Total Repair Time:15 - 30 mins
-
Tools:Pliers, Screw drivers
2 of 9 people
found this instruction helpful.
Was this instruction helpful to you?
Thank you for voting!
Oven took too long to heat
This is simple for most people - unscrew and remove the bottom oven floor pan. There is the igniter, removed with two screws with a 1/4 nutdriver. However, my problem was that when I unclipped the old igniter, I dropped the over part of the connection, it fell down the hole, through the insulation, to the bottom of the stove where the wiring is. I had to pull out the stove to get to the connection, push it back up the hole to the oven, then install the igniter. My advice: do no lose your grip on the oven wire whatever you do. Otherwise, it was a snap, even for a klutz.
Parts Used:
-
George from Richardson, TX
-
Difficulty Level:Really Easy
-
Total Repair Time:1- 2 hours
-
Tools:Nutdriver, Screw drivers
0 of 4 people
found this instruction helpful.
Was this instruction helpful to you?
Thank you for voting!
No problem at all
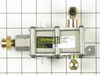
Pulled stove away from wall to access gas valve in rear. Adjusted the jet on the replacement valve for LP gas and connected the four control wires. Two open end wrenches and one stubby phillips screwdriver were all that was needed.
Parts Used:
-
Larry from Montgomery, TX
-
Difficulty Level:A Bit Difficult
-
Total Repair Time:15 - 30 mins
-
Tools:Screw drivers, Wrench set
1 of 7 people
found this instruction helpful.
Was this instruction helpful to you?
Thank you for voting!
Intermittent but rare spark when I went to start the rage: spark module definitely was toast or on its way out
The trickiest part was locating the elusive spark module. I am not certain I took the best route, but not considering all the wrong routes in trial and error, it was the most expedient. Certainly there must have been a single something to remove to get to this frequently faulted part..
Anyhow, thanks to the great part, the stove works really well again.
Anyhow, thanks to the great part, the stove works really well again.
Parts Used:
-
Bronius from College Station, TX
-
Difficulty Level:A Bit Difficult
-
Total Repair Time:15 - 30 mins
-
Tools:Screw drivers
5 of 22 people
found this instruction helpful.
Was this instruction helpful to you?
Thank you for voting!
Oven Burner Would Not Start Fifty Percent Of The Time.
My top burners and broiler were working fine so I knew it was not a gas pressure issue,after reading other peoples oven issues I felt comfortable that my problem was the oven igniter, the igniter was only building about 50 to 75 percent of the normal glow/heat needed, thereby not creating enough heat to trip the sensor that opens the oven burner gas valve. 2 Screws hold a drip pan which after removed allow access to the igniter. 2 Screws hold the igniter in. You need to access the rear of the stove to plug in the new igniter connector at a 1 screw access panel in the center of the back of stove. My oven has been working great since the repair. I would recomend partselect anytime, I ordered the wrong igniter, the diagram is confusing so be carefull , and had to send it back , I got my refund in less than a week. Good luck from beautiful western new york state.
Parts Used:
-
DYKO from ALDEN, NY
-
Difficulty Level:A Bit Difficult
-
Total Repair Time:30 - 60 mins
-
Tools:Nutdriver, Screw drivers
Was this instruction helpful to you?
Thank you for voting!
Burner igniter was not lighting the pilot. Needed replacement.
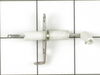
We replaced 3 of 4 igniters on the stove top according to the previously submitted recommendations. Easy to do butt after putting one of the modules back together, we found one igniter still didn't function. We discovered the solution was to run the connecting wire under the gas tubing. Apparently it was compressed when it was over the top of the tube and not under it.
Parts Used:
-
Arthur from South Burlington, VT
-
Difficulty Level:Easy
-
Total Repair Time:30 - 60 mins
-
Tools:Screw drivers
Was this instruction helpful to you?
Thank you for voting!
Oven would not light
Suspected the igniter, and verified by reading comments on your parts site. The mounting screws were frozen so I used larger screws. Piece of cake! Wa La!
Parts Used:
-
Jim from Oceanside, CA
-
Difficulty Level:Easy
-
Total Repair Time:30 - 60 mins
-
Tools:Screw drivers
Was this instruction helpful to you?
Thank you for voting!
Leveling legs were broken during the summer
The range in my classroom had the leveling legs broke off by the summer staff. I ordered two new leveling legs and the night custodian replaced them in about 45 minutes and them leveled the stove. Parts were just as stated and easy to order.
Parts Used:

-
Jayne from Willimantic, CT
-
Difficulty Level:A Bit Difficult
-
Total Repair Time:30 - 60 mins
-
Tools:Pliers, Screw drivers, Wrench set
Was this instruction helpful to you?
Thank you for voting!
leg was bent, also metal receiving bracket bent
Removed stove from slot in wall. Bent rear left leg would not unscrew due to bent metal bracket. Used hacksaw to cut out leg, then straightened metal bracket with small hammer and was able to screw new leg in and adjust height by using level on stove before reinserting stove its slot. Recheck level after pushing back in place and adjust front legs if necessary. If not for bent metal receiving bracket, would have taken much less time. Still easy tho. R'cvd part in two days. Very quick.
Parts Used:
-
Virginia from Oceanside, CA
-
Difficulty Level:Really Easy
-
Total Repair Time:30 - 60 mins
-
Tools:Wrench (Adjustable)
Was this instruction helpful to you?
Thank you for voting!
Oven would not heat when turned on.
Unplugged the oven from electricity. Took off the bottom(Floor) of the inside of the oven. Checked that the new part looked the same as the old. It did. Then I checked the back of the oven, had to take off a cover, and the connector in the back was not the same. I did not that it had the same two wires so rather than send it back, I figured I could make it work. I started to take off the old piece by unscrewing the two screws. They were a bit rusted, one came off the other I had to hacksaw and twist off. I cut the old connecting end off of the old part and the end off of the new part stripped the cover off the ends of the wires, and put the old end to the new part, having also put the old wire covers over the new wires. then twisted the end together and wrapped the in electrical tape. I had to take the piece that held the new part out of the oven the tried to use the one semi-good old screw, then some newer screws, then finally used some new nuts and bolts to connect the part tightly. put everything back together and it worked.
Parts Used:
-
Andrew from Hyrum, UT
-
Difficulty Level:A Bit Difficult
-
Total Repair Time:More than 2 hours
-
Tools:Screw drivers, Wrench set
Was this instruction helpful to you?
Thank you for voting!
Burned out oven Bake Igniter
This oven is part of a stand-alone gas (propane) stove. It was purchased and installed in July, 2005. The igniter I ordered from PartSelect arrived as promised. But the connecter on the new igniter did not match the connecter on the old one. I had to either find an igniter with a compatible connecter or splice the old connecter to the new igniter; I chose to splice. Now, I'm not a real handyman, and I'm especially skittish around electricity. But I found two wire connecters (plastic tube-like things with metal interiors). I stripped about a 1/4-inch from all four wires and inserted them into the wire connecters, making sure the igniter was properly placed so the screw holes lined up. Then I used the crimper tool to crimp the wires together. I did a pull test to make sure the wires were secure, replace the now connected wires in their proper place and turned the oven on. It worked! On this particular stove, you'll need a screwdriver to remove the vent cover, exposing the igniter wires. Due to the gas connection in the back of the stove, you can only pull the stove out so far. So, there's not a lot of room to work in the back of this stove; that's why it took a lot longer to complete this job than the wiring inself. I'd say no more than fifteen minutes. Of course, if all the parts are compatible, even less. Good luck!
Parts Used:
-
Gordon from Wilmington, OH
-
Difficulty Level:A Bit Difficult
-
Total Repair Time:30 - 60 mins
-
Tools:Screw drivers
Was this instruction helpful to you?
Thank you for voting!
Broke the insulator on the ignitor while cleaning the cooktop.
Unscrew the bottom cover, remove the old ignitor. Reverse the process to install. Hardest part was getting the bottom cover screws out because of rust. Otherwise, very simple.
Parts Used:
-
David from Shelley, ID
-
Difficulty Level:Really Easy
-
Total Repair Time:30 - 60 mins
-
Tools:Screw drivers
Was this instruction helpful to you?
Thank you for voting!