















79096512404 Kenmore Range - Instructions
Keep searches simple. Use keywords, e.g. "leaking", "pump", "broken" or "fit".
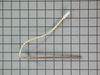
Oven turning off ater Pre- Heating
Talked to someone who knows , DX'd the potential problem,looked for the part on your very user friendly website and your DX was exactly what my oven was doing, when the Thermo-Sensor arrived, I unplugged the oven, removed the metal back, took out the faulty Sensor, replaced it very easy then realized the plug was different, so called a friend who knows how to Solder and 2 hrs, later, my oven was repaired and I began baking an Apple pie to repay a friends kindness The pie was perfectly baked , my friend was happy and so am I ,the baker, just before the holidays Thank you Parts Select for helpful DX and speedy delivery - seems you saved Christmas for me.
Parts Used:
-
Catherine from Bowie, AZ
-
Difficulty Level:A Bit Difficult
-
Total Repair Time:More than 2 hours
-
Tools:Nutdriver
Was this instruction helpful to you?
Thank you for voting!
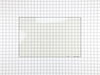
inner oven door glass broken
I was unable to loosen the screws myself so I called my friends husband to help me. We watched the video together and followed the instructions. The door in the video was a bit different than mine but this repair was easy.
Parts Used:
-
Cheryl from Derby, NY
-
Difficulty Level:Really Easy
-
Total Repair Time:30 - 60 mins
-
Tools:Screw drivers
Was this instruction helpful to you?
Thank you for voting!
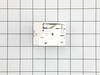
When turning the switch on for the large eye I could hear an electrical short behind the switch.
Initially we realized there was a problem while cooking with the large eyes and we began hearing an electrical short behind the control switch. I unplugged the power from the oven/cooktop and removed the back panel where I could visually see soot on the switches where it was shorted. Careful while choosing your part from the diagram on Partselect.com. For the model FEF336ECJ, atleast for my oven, the eye switches were reversed and I ordered the small eye's switches! Luckily they have an outstanding customer support and immediately mailed out the new parts and a label to send the wrong parts back. Changing the parts out was very simple. Pull the oven out and UNPLUG IT from any electrical outlet. Remove the back panel. Double check from the label on the front of the control panel that you are working with the correct switch, and before removing the current switch, remove the wires one by one and place them on the new part to make sure you don't misplace these wires. Once the wires are connected to the new part, pull the plastic knob off of the old switch to reveal the screws on front of the panel. Place the new switch where the old one came from and fasten the screws back in place. Replace the knob, replace the back panel(for safety) and test the new switch before you push the oven back into place. If you can turn a screw driver, move the oven, and unplug the power, this easy do it yourself repair will save you possibly hundreds by not calling a repair/handyman who would absolutely love you to pay out the nose for such an easy task.
Parts Used:
-
Kent from McHenry, MS
-
Difficulty Level:Really Easy
-
Total Repair Time:Less than 15 mins
-
Tools:Nutdriver, Screw drivers
Was this instruction helpful to you?
Thank you for voting!
Door glass cracked
Really straightforward - just took door off of the hinges and worked taking it apart until I got to the front glass that was cracked. Took it out and put the new piece in and reversed the process. Really easy and I got to clean each piece on the way back in to get rid of some spills.
Parts Used:
-
Mike from Collegeville, PA
-
Difficulty Level:Easy
-
Total Repair Time:30 - 60 mins
-
Tools:Nutdriver, Screw drivers, Socket set
Was this instruction helpful to you?
Thank you for voting!
inner glass door was broken
removed the door from the range. removed the 4 layers of glass and carefully set aside the unbroken ones. the 3rd and 4th glasses were held together with a metal frame which had to be dismantled. The old broken glass was rusted and hard to get out of the frame. It had to be cleaned thoroughly of broken glass and rust. the removal process could then be reversed to assemble the parts and re assemble the door to the front of the range
Parts Used:
-
Norma J from Riverview, FL
-
Difficulty Level:Difficult
-
Total Repair Time:30 - 60 mins
Was this instruction helpful to you?
Thank you for voting!
Cracked inside glass
I actually watched Youtube while I was changing it. This video was not actually the same make up of my oven, even though the I typed in the model number. I manage to figure it any with the steps anyway. It was harder then I expected but not horrible. I think I did pretty well for a women. Patti
Parts Used:
-
patti from Greer, SC
-
Difficulty Level:A Bit Difficult
-
Total Repair Time:1- 2 hours
-
Tools:Screw drivers
Was this instruction helpful to you?
Thank you for voting!