















79096512404 Kenmore Range - Instructions
Keep searches simple. Use keywords, e.g. "leaking", "pump", "broken" or "fit".
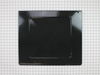
Bottom oven pan was warped and discolored
Unscrew the 2 screws at the back of the oven bottom pan in the range. Place new oven pan in and rescrew the 2 screws. I could not get the two screws screwed back in. Since the bottom pan cannot move from its position, I felt like the two screws were not necessary.
Parts Used:
-
Kathryn from LAKELAND, FL
-
Difficulty Level:Very Easy
-
Total Repair Time:Less than 15 mins
-
Tools:Screw drivers
2 of 4 people
found this instruction helpful.
Was this instruction helpful to you?
Thank you for voting!
wrong part received and returned
I wanted the bracket for the oven heating element and received the bracket for the broiler.... part returned and now I am stumped about what my next move will be
Parts Used:

-
Rhonda from PACHECO, CA
-
Difficulty Level:Very Difficult
-
Total Repair Time:More than 2 hours
1 person
found this instruction helpful.
Was this instruction helpful to you?
Thank you for voting!
Broken Handle
1. Order part
2. Remove 2 top screws holding vent cover and carefully remove
cover
3. Open door all the way and lift, door will come of the microwave
4. Set door on a flat surface facing down
5. You will need a flat screwdriver,carefully set the screwdriver
between the door and the black plastic and pry out completely
6. Remove screws holding handle. (This will be a good time to clean
the inside of this door)
7. Attach new handle tighten screws
8. Put black plastic back in door and press on all around make sure
that is set in place
9. Re-install door and vent.
2. Remove 2 top screws holding vent cover and carefully remove
cover
3. Open door all the way and lift, door will come of the microwave
4. Set door on a flat surface facing down
5. You will need a flat screwdriver,carefully set the screwdriver
between the door and the black plastic and pry out completely
6. Remove screws holding handle. (This will be a good time to clean
the inside of this door)
7. Attach new handle tighten screws
8. Put black plastic back in door and press on all around make sure
that is set in place
9. Re-install door and vent.
Parts Used:

-
Robert from WATERTOWN, MA
-
Difficulty Level:Easy
-
Total Repair Time:15 - 30 mins
-
Tools:Screw drivers
1 of 3 people
found this instruction helpful.
Was this instruction helpful to you?
Thank you for voting!
light bilb went out

-
Denise from Landover, MD
-
Difficulty Level:Really Easy
-
Total Repair Time:Less than 15 mins
2 of 6 people
found this instruction helpful.
Was this instruction helpful to you?
Thank you for voting!
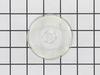
Lens cover for oven light broke.
Really a no brainer, but I do have to say that PartSelect customer service is excellent. My part was located and on it's way within a day and arrived a couple of days later.
Parts Used:
-
Amy from Corona, CA
-
Difficulty Level:Really Easy
-
Total Repair Time:Less than 15 mins
0 of 1 people
found this instruction helpful.
Was this instruction helpful to you?
Thank you for voting!
Door slightly open at the top, heat escaping
Took off the door, disassembled the door and replaced the springs. I had to retap the holes in the hinge frames as they were not threaded well. Put the door back together, hung it on the stove and the door closes all the way now.
Parts Used:

-
Mark from MERCED, CA
-
Difficulty Level:Easy
-
Total Repair Time:15 - 30 mins
-
Tools:Screw drivers
2 of 7 people
found this instruction helpful.
Was this instruction helpful to you?
Thank you for voting!
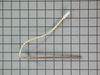
temp was not reading right
-
santa from glassboro, NJ
-
Difficulty Level:Really Easy
-
Total Repair Time:Less than 15 mins
-
Tools:Nutdriver
3 of 10 people
found this instruction helpful.
Was this instruction helpful to you?
Thank you for voting!
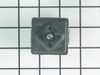
Burner quit working
Received the new part FAST. Ordered online. Easy to plug in the new part. Will use PartSelect.com again when needed to order parts!
Parts Used:
-
Abe from Manson, WA
-
Difficulty Level:Really Easy
-
Total Repair Time:Less than 15 mins
0 of 4 people
found this instruction helpful.
Was this instruction helpful to you?
Thank you for voting!
Broken globe in oven and burnt out light bulb
-
Sharon from Foley, AL
-
Difficulty Level:Really Easy
-
Total Repair Time:Less than 15 mins
0 of 5 people
found this instruction helpful.
Was this instruction helpful to you?
Thank you for voting!
shorted out small element burner switch
First, I disconnected the electrical power by pulling apart the plug behind the range. Next, I removed the screws holding the service plate on back of the top panel.I removed the switch knob by gently pulling it from the stem. Underneath I found 2 screws holding the switch in the panel. I removed these with a phillips screwdriver.I was able to pull the entire switch out to the rear leaving all wires attached.The new switch looked different from the original and the wires were configured differently but the wires were clearly marked. By removing one at a time and placing it on the new switch to the corresponding marking,it was a simple matter to wire the switch.I reinstalled the switch in the panel,put back in the screws to hold the switch, slid the knob back on the stem, reinstalled the rear panel,and plugged the power cord back in.The switch worked perfectly.
Parts Used:
-
Alvie from Walnut Cove, NC
-
Difficulty Level:Easy
-
Total Repair Time:15 - 30 mins
-
Tools:Nutdriver, Pliers, Screw drivers
Was this instruction helpful to you?
Thank you for voting!
Needed to install an anti-tip bracket on my stove.
Moved the stove. Used the template to position the bracket. Put the supplied screws to attach bracket to the floor. Slid stove back into place. DONE!
Parts Used:
-
Daniel from Provo, UT
-
Difficulty Level:Really Easy
-
Total Repair Time:Less than 15 mins
-
Tools:Socket set
Was this instruction helpful to you?
Thank you for voting!
put aluminum foil on bottom panel of oven to catch drips. Big mistake. adhered to oven in minutes.
Removed 2 screws at rear of bottom panel. Removed old panel, replaced with new and screwed back in.Piece of cake. Plus this company was great to order from. received part the same day. Very happy. Would order through this company again.
Parts Used:
-
jill from new boston, NH
-
Difficulty Level:Really Easy
-
Total Repair Time:Less than 15 mins
-
Tools:Screw drivers
Was this instruction helpful to you?
Thank you for voting!
broke hinge point
Simple just remember there is a hinge lock on the hinge just open the door reach down to hinge and lift lock it blends in but its there close the door and pull out the door pull 2 screws on the hinge connecting it to door install new hinge
Parts Used:
-
vince from west bloomfield, MI
-
Difficulty Level:Really Easy
-
Total Repair Time:15 - 30 mins
-
Tools:Screw drivers
Was this instruction helpful to you?
Thank you for voting!
Temperature not correct.
Pull out stove. Unplug power. Remove four screws on each corner and loosen one screw in the middle. Remove back panel. Locate and unplug sensor connector. Remove one screw from sensor plate. Turn the sensor 45 degrees and pull sensor out from the rear. Connector received had the incorrect plug and terminals so it was necessaary to splice the connector from the one removed to the one received. Cut and splice wires as necessary. Install sensor, install back panel, plug in electrical power, push stove back into position. I used a temperature gauge to check temperature after stove was in position. In my case the temperature had to be adjusted which is a keyboard function on this unit.
Parts Used:
-
David C from Huntington Beach, CA
-
Difficulty Level:Really Easy
-
Total Repair Time:15 - 30 mins
-
Tools:Nutdriver, Pliers
Was this instruction helpful to you?
Thank you for voting!
I had placed aluminum foil on bottom and it adhered to the surface.
I removed two screws and lifted out the ruined bottom. I set the new bottom in, but could not get the screws lined up so left them out. The bottom is heavy enough, it is not going anywhere. I am very grateful the part was available.
Parts Used:
-
Marilyn from Logansport, IN
-
Difficulty Level:Really Easy
-
Total Repair Time:15 - 30 mins
-
Tools:Pliers, Screw drivers
Was this instruction helpful to you?
Thank you for voting!