















3CEP2910BW0 Whirlpool Dryer - Instructions
Keep searches simple. Use keywords, e.g. "leaking", "pump", "broken" or "fit".
The dryer was squeaking and would not heat at all.
The first thing I did was call my friend Donnie who manages some apartment buildings and who is always complaining about fixing things and getting the right parts to fix things. He told me what to order from PartsSelect and when the parts got here I called him up and he did the repair work.
He was reluctant to do the work at first but after he found out I had ordered the parts from PartsSelect he was happy to do the work. "Their parts are always right and they always work," was what he said after he had my dryer working just like new. So if you know nothing about fixing things and buying parts just call PartsSelect and you will be fine. Just ask my friend Donnie!!!
He was reluctant to do the work at first but after he found out I had ordered the parts from PartsSelect he was happy to do the work. "Their parts are always right and they always work," was what he said after he had my dryer working just like new. So if you know nothing about fixing things and buying parts just call PartsSelect and you will be fine. Just ask my friend Donnie!!!
Parts Used:
-
Steven from Oxnard, CA
-
Difficulty Level:Difficult
-
Total Repair Time:1- 2 hours
-
Tools:Nutdriver, Pliers, Screw drivers, Socket set, Wrench (Adjustable)
7 of 12 people
found this instruction helpful.
Was this instruction helpful to you?
Thank you for voting!
bad drum rooller bearing
took the top, sides and back removed the drum and replaced the roller roller shaft and drive belt and the belt tensioner
Parts Used:

-
randy from simi valley, CA
-
Difficulty Level:Really Easy
-
Total Repair Time:1- 2 hours
-
Tools:Nutdriver, Pliers, Screw drivers, Socket set, Wrench set
10 of 21 people
found this instruction helpful.
Was this instruction helpful to you?
Thank you for voting!
Dryer quit heating
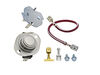
I removed the hex head screws from the back of the dryer and removed the back panel, after unplugging the dryer. I tested the various electrical components until I found that the upper limit temp fuse had gone out. Came to partselect.com and found the kit I needed and ordered it. When it came in, I replaced the upper temp limit fuse, and the other parts that came with the kit. I also, since the back was open, used the opportunity to vacuum out the blower fan and as much of the lint as I could get to. Dryer works great now!
Parts Used:
-
Christopher from Orlando, FL
-
Difficulty Level:Easy
-
Total Repair Time:15 - 30 mins
-
Tools:Nutdriver, Screw drivers
6 of 9 people
found this instruction helpful.
Was this instruction helpful to you?
Thank you for voting!
Dryer runs, but won't heat.
First only replaced the high temp cut off switch which allowed the element to heat. However, after one heat cycle the switch would not reset. Then changed the thermostat (included in the kit). After tapping the cut off switch lightly to manually reset it, the dryer ran perfectly. Moral of the story: always change all parts included with a repair kit!
Parts Used:
-
Eric from DELHI, NY
-
Difficulty Level:Really Easy
-
Total Repair Time:30 - 60 mins
-
Tools:Nutdriver, Pliers
4 of 4 people
found this instruction helpful.
Was this instruction helpful to you?
Thank you for voting!
Broken drive belt
I received the part I ordered immediately and the included instructions made installation a snap. Thank you for your help. I would not hesitate to order from your company again.
Parts Used:

-
Stanley from Flushing, NY
-
Difficulty Level:Easy
-
Total Repair Time:15 - 30 mins
-
Tools:Screw drivers
7 of 13 people
found this instruction helpful.
Was this instruction helpful to you?
Thank you for voting!
Taking 90 minutes + to dry one load
Removed the back of the dryer about 8 screws. Removed the Thermostat 250 F and replaced with new. Dries a load of clothes in one cycle on medium. Not bad for a 16 dollar part. I am a computer tech and I am used to taking computers a part but I think most people that are in anyway mechanically inclined and can look at a diagram could do this and save yourself a lot of money.
Parts Used:
-
Bryan from newington, CT
-
Difficulty Level:Easy
-
Total Repair Time:15 - 30 mins
-
Tools:Socket set
5 of 7 people
found this instruction helpful.
Was this instruction helpful to you?
Thank you for voting!
dryer would not turn on
Found the switch part on the floor and after I figured out where it came from it was minutes before it took to find the web site and order the part, I then watched the installation video which helped with a few pointers and days later it was installed and fixed for 10 dollars with shipping,AMAZING!!!
Parts Used:

-
Larry from Bethpage, NY
-
Difficulty Level:Really Easy
-
Total Repair Time:15 - 30 mins
-
Tools:Screw drivers
5 of 7 people
found this instruction helpful.
Was this instruction helpful to you?
Thank you for voting!
Broken drum belt
I noticed my dryer was heating, but not tumbling. I"m a 53 year old single female, and my dryer I bought used 3 years ago. I had no clue what the problem was. I texted my brother and said, "it heats but doesn't tumble - is it shot?" He texted back "probably the drive belt - pop the top and see." So I popped the top, and sure enough, the belt was broken. So I googled "diy + dryer + drive belt" and watched a You Tube video. I then drove all over town looking for a belt, and the only place that carried it had closed at noon (saturday). So I googled " appliance parts + dryer and came to this site, ordered the part and it was delivered in two days.
I borrowed a nut driver from my brother, removed the front of the dryer, used a plastic cup to prop up the drum. I put the belt on the drum, being sure to place the ribbed side down, looped through the pulley and onto the motor, removed the cup, put the front back on, dropped the top, replaced the lint trap and the two screws holding that in place, turned the dryer on and voila! All done.
I borrowed a nut driver from my brother, removed the front of the dryer, used a plastic cup to prop up the drum. I put the belt on the drum, being sure to place the ribbed side down, looped through the pulley and onto the motor, removed the cup, put the front back on, dropped the top, replaced the lint trap and the two screws holding that in place, turned the dryer on and voila! All done.
Parts Used:
-
Michelle from Fort Myers BEach, FL
-
Difficulty Level:Easy
-
Total Repair Time:15 - 30 mins
-
Tools:Nutdriver, Screw drivers
4 of 4 people
found this instruction helpful.
Was this instruction helpful to you?
Thank you for voting!
drum roller became lose and seperated from the shaft that supports it. it had to be replaced
remove the front panel, belt [notice the way the belt is fasten] remove the tub, support bracket to the drum roller, and slide the new drum roller on and place the tre ring in the slot. then re-install everything in reverse
Parts Used:
-
Dillard C. from Vina, AL
-
Difficulty Level:Easy
-
Total Repair Time:15 - 30 mins
-
Tools:Socket set
5 of 7 people
found this instruction helpful.
Was this instruction helpful to you?
Thank you for voting!
My dryer stopped heating
The repair was really easy and I loved the DIY videos they were great, not many tools needed to do these repairs that was great. The only thing is this didn't solve my issue.
Parts Used:
-
Jennifer from CLINTON, MS
-
Difficulty Level:Really Easy
-
Total Repair Time:30 - 60 mins
-
Tools:Nutdriver
5 of 7 people
found this instruction helpful.
Was this instruction helpful to you?
Thank you for voting!
No Heat
The dryer stopped heating, it would only blow cold air. I removed the back panel and tested the thermal fuse with a dmm. The fuse was open, so it was bad and I needed a new one. I tested the thermostat and the dmm measured continuity across the terminals, so I thought it was good, bad assumption. I ordered a thermal fuse from partsselect and it came with a thermostat. Like a dummy, I only installed the fuse. The 1st time I ran the dryer the fuse blew again, because the thermostat was bad. So, moral of the story, install both parts.
Parts Used:
-
Richard from Eaton, OH
-
Difficulty Level:A Bit Difficult
-
Total Repair Time:15 - 30 mins
-
Tools:Nutdriver, Pliers
4 of 5 people
found this instruction helpful.
Was this instruction helpful to you?
Thank you for voting!
Dryer makes squealing noise, finally the motor seized up.
My dryer started squeaking and I thought it was the drum rollers, so I bought a set. When I attempted the repair and got as far as removing the dryer drum and I decided to spin the shaft on the motor and that was where the squealing was coming from. I put the rollers on and reassembled the dryer. One day later the motor seized up. Ordered a new motor and installed it with no problems. The nut on the back of the motor ended up being a 20mm wrench. Motor cost me $105.56 and the maintenance kit (ps37308) (2 rollers,4 clips, button clip, new idler pulley and belt) cost $32.08. It cost a total of $137.64 in repairs with no labor costs and I accomplished it in under an hour. Minor handyman skills needed or find a friend who is handy. My dryer is 14 years old and now is running like new again. I used the 50% rule, if a repair exceeds 50% of the cost of a new machine, replace it, if the repair can be done for less than 50% of the cost of a new on, fix it.
Parts Used:
-
Anthony from PITTSTON, PA
-
Difficulty Level:Really Easy
-
Total Repair Time:30 - 60 mins
-
Tools:Nutdriver, Screw drivers
4 of 5 people
found this instruction helpful.
Was this instruction helpful to you?
Thank you for voting!
No Gas Heat
I did what any novice would have done. I took the entire thing apart to get to the gas jet. I did not know about the thermal fuse until I got to the schematic behind the timer and controls. I was a tech back in the 70's and 80's and only worked on electric dryers. Back then I would remove the heater core and twist the coils together to save money. So I had no idea how a gas dryer heating unit worked. So now any one that reads this. You do not have to take the dryer completely apart, I did that for all of you. Just replace the thermal fuse on the back of the unit by unplugging that wires and removing the screws! It looks like a long white piece of plastic with 2 wires to it. You will find this under the full metal shield on the back of the unit. This should be about a 1 hour repair at the most!
Parts Used:
-
Debra from Springfield, PA
-
Difficulty Level:Very Difficult
-
Total Repair Time:More than 2 hours
-
Tools:Nutdriver
4 of 5 people
found this instruction helpful.
Was this instruction helpful to you?
Thank you for voting!
Element not heating up.
Opened access door, noticed main power wire to heating element was partially melted. This was caused by a bad connection to the drying element, loose. Removed heating element assembly. Cut bad section of wire and added new connection. While doing this the thermostats plastic casing cap came off ! Probably due to exessive heat / resistance from the bad connection. This confirmed why there was no heat. Intalled new thermostat and and am now good to go !
Parts Used:
-
Phillip from Breinigsville, PA
-
Difficulty Level:Easy
-
Total Repair Time:15 - 30 mins
-
Tools:Screw drivers
4 of 5 people
found this instruction helpful.
Was this instruction helpful to you?
Thank you for voting!
a loud, high-pitched ringing noise
Raised the top of the dryer then took the front of the dryer off. Took the drum off. Replaced the pulley and support rollers. Then, put the new belt on and put it back together.
Parts Used:

-
Craig from Booneville, AR
-
Difficulty Level:Easy
-
Total Repair Time:15 - 30 mins
-
Tools:Nutdriver, Screw drivers
4 of 5 people
found this instruction helpful.
Was this instruction helpful to you?
Thank you for voting!