















155910 General Electric Range - Instructions
Keep searches simple. Use keywords, e.g. "leaking", "pump", "broken" or "fit".
Stove was not getting enough power.
My stove didn't seem to be getting enough power for the oven to heat up and the burners to get hot enough. When I checked the connection of the electric cord I found that one of the 3 terminals that the plug connects to was broken off. When the new part came I removed the old part by first disconnecting the 3 wires [black,white(ground),red] and then using a small but long 1/4 socket (that I found at Lowes)I removed the 2 screws that held the old part to the stove and the green screw under it holding the flat copper piece that also connects under the white ground wire of the part. I mounted the new piece on with the 2 1/4 screws. The new part comes with a piece of copper that is for grounding the part to the stove. When I compared it to the old part it was a little different. I first screwed the copper piece onto the stove (under the part) with the green screw then I screwed the white wire over the copper piece to the center terminal(you have to make the hole of the copper piece line up to the screw hole). I connected the other 2 wires and then connected the electric cord to the new terminal block and then put the back cover back on the stove and plugged it in. The clock came on I turned on the four burners they all got hot and red. I turned on the oven the element on the bottom got red I then turned on the broiler the top element got red. My stove is fixed.
Parts Used:
-
Nathan from Wells, ME
-
Difficulty Level:A Bit Difficult
-
Total Repair Time:15 - 30 mins
-
Tools:Nutdriver, Pliers, Screw drivers, Socket set
2 of 2 people
found this instruction helpful.
Was this instruction helpful to you?
Thank you for voting!
replaced broken oven door handle
On a 18 year old electric GE range: amazing not the exact handle but it does fit perfectly and looks great. If your somewhat handy this is very easy and can be completed in less than a half hour. Save the screws from the old handle, they can be used again.
Parts Used:
-
John from BOCA RATON, FL
-
Difficulty Level:Very Easy
-
Total Repair Time:30 - 60 mins
-
Tools:Pliers, Screw drivers
2 of 2 people
found this instruction helpful.
Was this instruction helpful to you?
Thank you for voting!
Was burned out
-
BRINDIA from DOVER, TN
-
Difficulty Level:Really Easy
-
Total Repair Time:30 - 60 mins
-
Tools:Screw drivers, Socket set
2 of 2 people
found this instruction helpful.
Was this instruction helpful to you?
Thank you for voting!
Terminal block connectors worn out wasn’t making a good connection with the stove top burner
Cut 4 inch’s off the new terminal block wires then using my wire strippers stripped 1/2 inch off the ends , the old terminal block wires I stripped 1/2 inch at the ends using a wire nuts on both wires and electrical tape connected the terminal block to the stove plugged the new burner in and the burner worked 100%.
Parts Used:
-
Lance from HAHIRA, GA
-
Difficulty Level:Really Easy
-
Total Repair Time:30 - 60 mins
-
Tools:Nutdriver
2 of 2 people
found this instruction helpful.
Was this instruction helpful to you?
Thank you for voting!
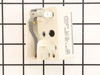
Burner spontaneously cycled without knob activation
First I cut the circuit at the breaker, and then pulled the range from wall to access the access panel. This top panel was held with 4 screws and removable with a standard phillips head screwdriver.
I then removed the 5 wire-crimped fasteners from the defective surface burner switch. (I first labeled these wires to ensure correct placement to the new switch). There were an additional two screws behind the corresponding knob that needed to be removed in order to completely remove the old switch.
The new switch was installed in reverse order to the steps indicated above (two screws behind knob, 5 wire-crimped fasteners, 4 screws to panel). Range was pushed back into position and breaker turned on.
I then removed the 5 wire-crimped fasteners from the defective surface burner switch. (I first labeled these wires to ensure correct placement to the new switch). There were an additional two screws behind the corresponding knob that needed to be removed in order to completely remove the old switch.
The new switch was installed in reverse order to the steps indicated above (two screws behind knob, 5 wire-crimped fasteners, 4 screws to panel). Range was pushed back into position and breaker turned on.
Parts Used:
-
Anil from Milpitas, CA
-
Difficulty Level:Easy
-
Total Repair Time:Less than 15 mins
-
Tools:Screw drivers
2 of 3 people
found this instruction helpful.
Was this instruction helpful to you?
Thank you for voting!
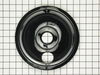
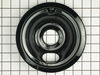
My burner trays were worn out and I needed new ones
I simply pulled the old ones out and replaced them with the new ones. It looks so much better and cleanes up well.
Parts Used:
-
Mary Jane from La Junta, CO
-
Difficulty Level:Really Easy
-
Total Repair Time:Less than 15 mins
1 person
found this instruction helpful.
Was this instruction helpful to you?
Thank you for voting!
Could not adjust heat on burner.
Followed directions given by previous customers problems which we found on the internet.
Parts Used:
-
Roy from Au Gres, MI
-
Difficulty Level:Really Easy
-
Total Repair Time:Less than 15 mins
-
Tools:Nutdriver, Screw drivers
2 of 4 people
found this instruction helpful.
Was this instruction helpful to you?
Thank you for voting!
Element blew hole in self then no power to burner.
Replaced burned element, did not fix no power problem. Ordered receptor replacement, replaced it, took less than 10 mminutes, but still no power to burned. Then ordered replacement switch, replacement too less than 10 minutes again and burner works fine.
Parts Used:
-
Melvin from Portland, TN
-
Difficulty Level:Easy
-
Total Repair Time:Less than 15 mins
-
Tools:Screw drivers, Socket set
2 of 4 people
found this instruction helpful.
Was this instruction helpful to you?
Thank you for voting!
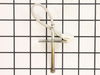
Not Reaching Temperature above 300 Degrees
Take off 6 screws of back cover of the range, unplug the white wire. Go to the inside of oven, pull out racks. At the top of the oven is your Broiler element, in the center you will see a rod sticking out with one screw holding it in place. Take out screw and pull temperature sensor out toward you. Reverse steps to put it back together.
Parts Used:
-
Ron from SAN TAN VLY, AZ
-
Difficulty Level:Very Easy
-
Total Repair Time:Less than 15 mins
-
Tools:Nutdriver
1 person
found this instruction helpful.
Was this instruction helpful to you?
Thank you for voting!
Old burner bowl needed to be replaced
-
bonnie from N KINGSTOWN, RI
-
Difficulty Level:Very Easy
-
Total Repair Time:Less than 15 mins
2 of 4 people
found this instruction helpful.
Was this instruction helpful to you?
Thank you for voting!
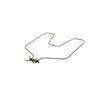
Oven would not heat up
I removed the rear lower cover. Disconnected the terminals from the heating element. Removed 2 screws from the heating element from inside the oven. Removed the heating element. Reinstalled everything in reverse order.
Parts Used:
-
MICHAEL from MORROW, GA
-
Difficulty Level:Really Easy
-
Total Repair Time:Less than 15 mins
-
Tools:Nutdriver
1 person
found this instruction helpful.
Was this instruction helpful to you?
Thank you for voting!
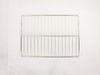
oven racks old and ugly
1. Open oven door
2. insert oven racks (perfect fit)
3. close oven door. Done and finished - man am I tired
2. insert oven racks (perfect fit)
3. close oven door. Done and finished - man am I tired
Parts Used:
-
Claudene from ORCUTT, CA
-
Difficulty Level:Very Easy
-
Total Repair Time:Less than 15 mins
1 person
found this instruction helpful.
Was this instruction helpful to you?
Thank you for voting!
control switch had stopped working, burner wouldn't work properly
took out a couple of screws and replaced with new switch, plugged in switch wires. very easy
Parts Used:
-
Ruth from JACKSON, MO
-
Difficulty Level:Really Easy
-
Total Repair Time:Less than 15 mins
-
Tools:Screw drivers
1 person
found this instruction helpful.
Was this instruction helpful to you?
Thank you for voting!
The light inside the oven had burned out
0. As a safety precaution, unplug the range or hit the relevant fuse breaker before you start. You might also want to grab a flashlight. Definitely do not try to do this while the oven is hot.
1. Pinch the wire over the light bulb cap to remove it. This is inside the oven at the back.
2. Pop off the hemispherical glass cap.
3. Unscrew the old light bulb, and screw the new light bulb in its place.
4. Put the cap back.
5. Secure the cap by putting the wire back in its slots on the cap.
No tools needed, the cap is just held in place with pressure from the wire.
1. Pinch the wire over the light bulb cap to remove it. This is inside the oven at the back.
2. Pop off the hemispherical glass cap.
3. Unscrew the old light bulb, and screw the new light bulb in its place.
4. Put the cap back.
5. Secure the cap by putting the wire back in its slots on the cap.
No tools needed, the cap is just held in place with pressure from the wire.
Parts Used:

-
Catherine from SEATTLE, WA
-
Difficulty Level:Very Easy
-
Total Repair Time:Less than 15 mins
3 of 7 people
found this instruction helpful.
Was this instruction helpful to you?
Thank you for voting!
on off switch smoked and smelled hot
-
john from MILROY, PA
-
Difficulty Level:Really Easy
-
Total Repair Time:15 - 30 mins
-
Tools:Pliers, Screw drivers
1 person
found this instruction helpful.
Was this instruction helpful to you?
Thank you for voting!