













110200 Kenmore Washer - Overview
Models starting with 110200
Click on the best match to narrow your results.
- 11020022010 Kenmore Washer
- 11020022011 Kenmore Washer
- 11020022012 Kenmore Washer
- 11020022013 Kenmore Washer (AUTOMATIC WASHER)
- 11020022014 Kenmore Washer (WASHER)
- 11020052990 Kenmore Washer
- 11020052991 Kenmore Washer
- 11020052992 Kenmore Washer
- 11020052993 Kenmore Washer
- 11020052994 Kenmore Washer
- 11020056991 Kenmore Washer
- 11020056992 Kenmore Washer
- 11020056993 Kenmore Washer
- 11020056994 Kenmore Washer
- 11020072990 Kenmore Washer
- 11020072991 Kenmore Washer
- 11020072992 Kenmore Washer
- 11020072993 Kenmore Washer
- 11020092990 Kenmore Washer
- 11020092991 Kenmore Washer
- 11020092992 Kenmore Washer
- 11020092993 Kenmore Washer
- 11020094992 Kenmore Washer
- 11020094993 Kenmore Washer
- 11020096990 Kenmore Washer
- 11020096991 Kenmore Washer
- 11020096992 Kenmore Washer
- 11020096993 Kenmore Washer
- 11020097990 Kenmore Washer
- 11020097991 Kenmore Washer
- 11020097992 Kenmore Washer
- 11020097993 Kenmore Washer
Keep searches simple, eg. "belt" or "pump".

Agitator Directional Cogs
PartSelect #: PS388034
Manufacturer #: 80040
This kit is used for replacing the agitator directional cogs (Agitator Dogs, Agitator Repair Kit, Washer Agitator Dogs, Agitator Dog Ears). The agitator is what creates the thrusting motion in your wa...
$6.40
In Stock

Direct Drive Motor Coupling
PartSelect #: PS1485646
Manufacturer #: 285753A
This direct drive motor coupling (Direct Drive Washer Motor Coupling, Motor Coupling, Washer Motor Coupling, Coupling Kit) provides a cushioned connection between the transmission and the motor shaft....
$21.45
In Stock

Washer Direct Drive Water Pump
PartSelect #: PS11741239
Manufacturer #: WP3363394
The direct drive drain pump (Whirlpool Direct Drive Washer Pump, Drain Pump, Washer Drain Pump, Water Pump) removes water from the washer during the drain cycle without the use of a belt. The pump is ...
$43.18
In Stock

Suspension Spring
PartSelect #: PS11743345
Manufacturer #: WP63907
The suspension spring supports the outer tub and keeps the tub steady during loads that could cause an unbalance. If this part breaks, is worn down or has stretched out and lost its spring, it could c...
$9.62
In Stock

Washer Clutch Assembly
PartSelect #: PS334641
Manufacturer #: 285785
A clutch assembly (Clutch, Washer Clutch) is found in your washing machine and is responsible for spinning the basket during the spin cycle. The clutch lining can wear over time. If the clutch lining ...
$38.96
In Stock

Thrust Spacer
PartSelect #: PS334562
Manufacturer #: 285587
This is a genuine OEM thrust spacer for your washer, and is also commonly known as a retainer ring. The spacer is about 2.5 inches in diameter, is made of plastic, and is white in color. It is used in...
$7.65
In Stock

Washer Tub Spring
PartSelect #: PS11751118
Manufacturer #: WPW10250667
This tub spring is also known as suspension spring, balance spring, or counterweight spring. It is sold individually. The function of the part is to counterbalance the weight of the motor on the front...
$6.40
In Stock

Washer Inner Cap Seal
PartSelect #: PS11748108
Manufacturer #: WPW10072840
This is an inner cap seal, but may also be known as an O-ring, and it is a part for your washing machine. Some symptoms replacing this part will fix include: leaking from your appliance, uncontrollabl...
$9.62
In Stock

Washer Drive Pulley
PartSelect #: PS10057144
Manufacturer #: W10721967
This splutch cam kit is a genuine replacement assembly designed for select Whirlpool, Maytag, and affiliated brand washing machines. It plays a critical role in the wash and spin cycles by engaging th...
$38.96
In Stock

Lid Latch Assembly
PartSelect #: PS3497627
Manufacturer #: W10404050
This washer lid switch is a critical safety component designed to halt the spinning motion of the tub when the lid is opened. Its primary function is to prevent accidental contact with moving parts du...
$50.56
In Stock

Washing Machine Suspension Rod Kit
PartSelect #: PS11703290
Manufacturer #: W10780048
This suspension rod kit is a genuine OEM kit specially designed for washing machines. Each kit includes a set of 4 rods, 4 suspension balls and 4 bushings. The suspension rods are responsible for supp...
$65.73
In Stock

Washer Drive Belt
PartSelect #: PS11747978
Manufacturer #: WPW10006384
This genuine OEM drive belt is designed to transfer power from the motor to the drum in select Whirlpool, Maytag, Kenmore, and other compatible washing machines. Operating at 115 volts and 60 Hz, the ...
$29.47
In Stock
Exact Part matches for your search term
[Viewing 3 of 3]
Tube
This part number matches the current model number 110200
PartSelect #: PS8840124
Manufacturer #: 110200
No Longer Available
Lawn & Garden Equipment Engine Fuel Tank Cap
This part number matches the current model number 110200
PartSelect #: PS16252221
Manufacturer #: 110200
No Longer Available
COUPLER, LINE, AIR
This part number matches the current model number 110200
PartSelect #: PS18815153
Manufacturer #: 110200
$267.62
Special Order
Common Symptoms of models starting with 110200
[Viewing 22 of 22]Will not agitate
Fixed by
these parts
these parts


Show All
Leaking
Fixed by
these parts
these parts


Show All
Spins slowly
Fixed by
these parts
these parts

Show All
Will not drain
Fixed by
these parts
these parts

Show All
Spinning Issues
Fixed by
these parts
these parts

Show All
Shaking and Moving
Fixed by
these parts
these parts


Show All
Will Not Start
Fixed by
these parts
these parts


Show All
Burning smell
Fixed by
these parts
these parts

Show All
Lid or door won’t close
Fixed by
these parts
these parts

Show All
Noisy and Marks Left on Clothes
Fixed by
these parts
these parts
Show All
Cycle Not Advancing
Fixed by
these parts
these parts


Show All
Draining Issues
Fixed by
these parts
these parts


Show All
Marks left on clothes
Fixed by
these parts
these parts


Show All
Leaks water
Fixed by
these parts
these parts
Show All
Does not dispense fabric softener or detergent
Fixed by
these parts
these parts

Show All
Locking Issues
Fixed by
these parts
these parts
Show All
No hot or cold water
Fixed by
these parts
these parts

Show All
Water Filling Issues
Fixed by
these parts
these parts
Show All
Not cleaning dishes properly
Fixed by
these parts
these parts
Show All
Noisy
Fixed by
these parts
these parts
Show All
Timer Not Working
Fixed by
these parts
these parts

Show All
Touchpad does not respond
Fixed by
these parts
these parts
Show All

Keep searches simple. Use keywords, e.g. "leaking", "pump", "broken" or "fit".
No movement from Basket & agitator
The job looked intimidating but turned out to be very easy.
First take off the water pump by removing the two clips that hold it in place. Place a shallow pan under the pump to catch the water that is in the pump and hoses. Open the hose clamps with a pair of pliers or channel locks (better) and slide the hoses off of the water pum ... Read more p.
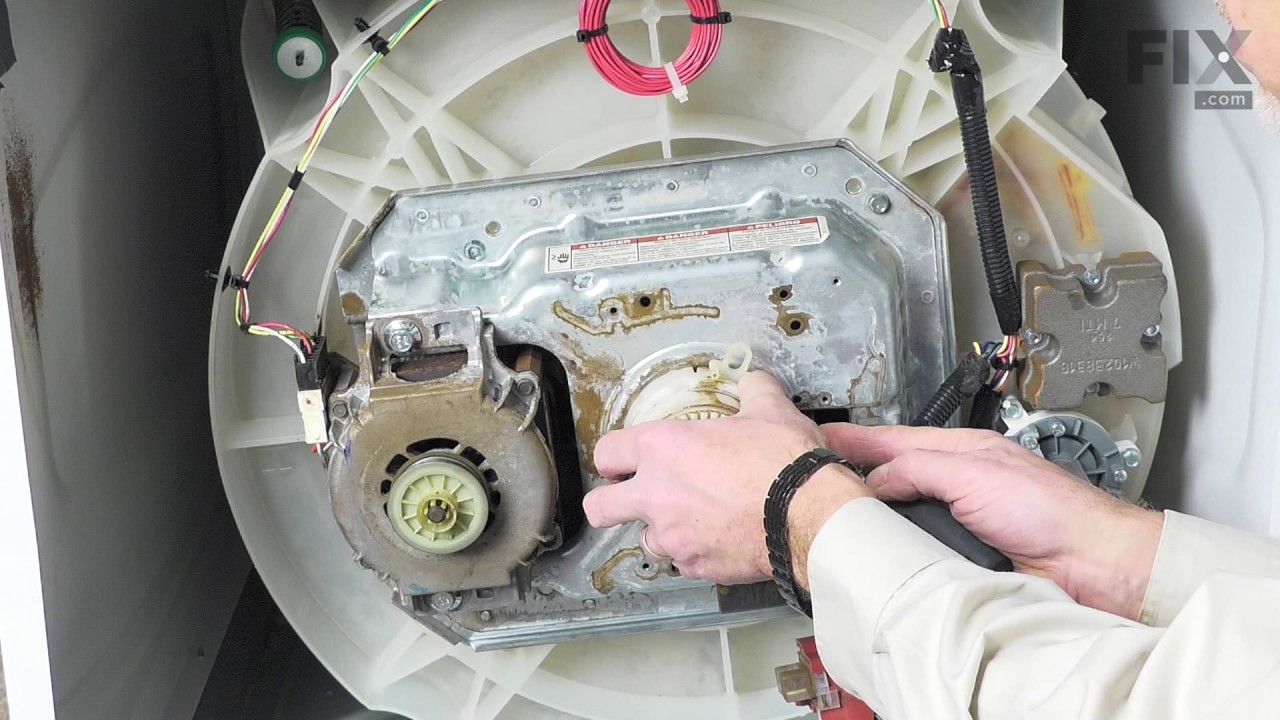
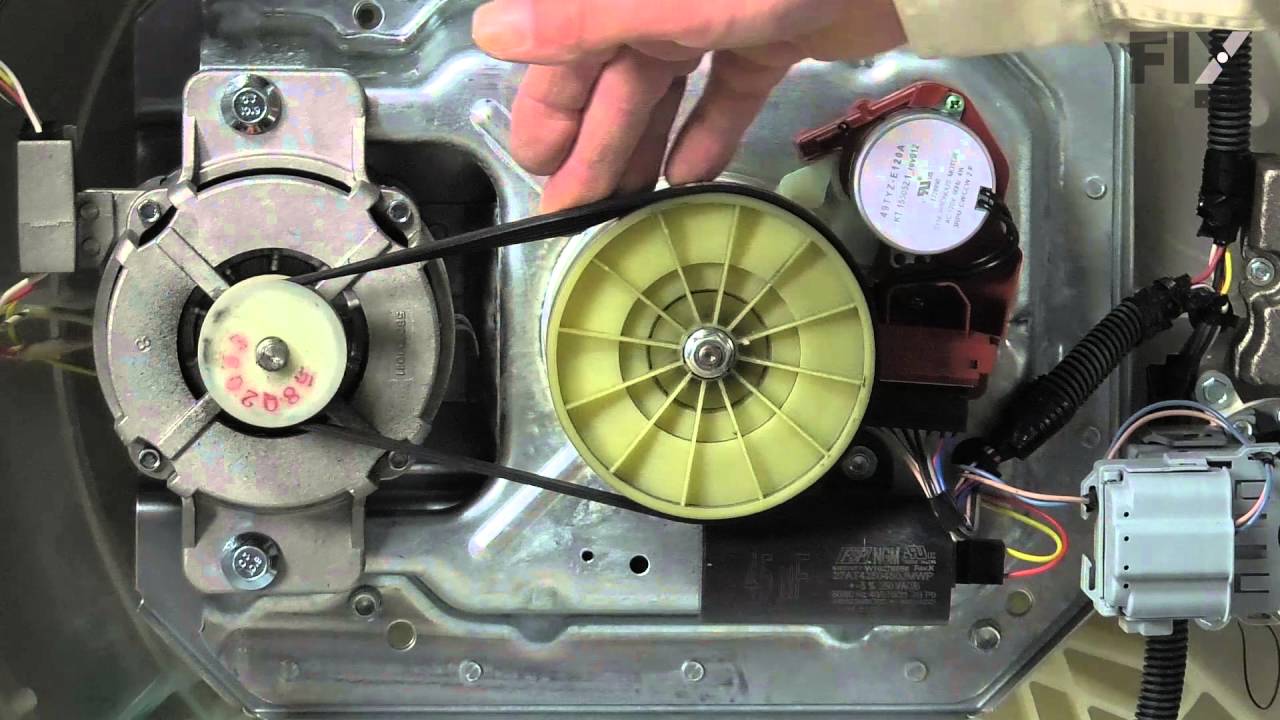
The motor comes off next. Unplug the electrical connector from the motor and two wires from the capacitor. Remove the two screws holding the clamps in place and then pop off the two clamps. You will need to hold up the motor with one hand while you remove the clamps or it will fall to the floor once the clamps are removed.
One piece of the coupling assemble will be attached to the motor and the other will be attached to the gearcase drive shaft. If you want to clean up the mess created by the shredded rubber center piece of the coupling assembly you will have to take off the motor mounting plate. It is held on by two bolts and removing it makes installing the coupling easier but probably not necessary.
Push the back half of the coupling on to the gearcase drive shaft until the shaft is flush with the face of the coupling. Install the new rubber center piece on to the coupling then re-install the motor mounting plate. Install the other half of the coupling on to the motor shaft and lift the motor up to the coupling. You have to rotate the motor shaft by spinning the fan blades until the coupling lines up so you can slide it into the other half of the coupling. Then just reattach the motor, connectors and water pump in the reverse order of disassembly.
First take off the water pump by removing the two clips that hold it in place. Place a shallow pan under the pump to catch the water that is in the pump and hoses. Open the hose clamps with a pair of pliers or channel locks (better) and slide the hoses off of the water pum ... Read more p.
The motor comes off next. Unplug the electrical connector from the motor and two wires from the capacitor. Remove the two screws holding the clamps in place and then pop off the two clamps. You will need to hold up the motor with one hand while you remove the clamps or it will fall to the floor once the clamps are removed.
One piece of the coupling assemble will be attached to the motor and the other will be attached to the gearcase drive shaft. If you want to clean up the mess created by the shredded rubber center piece of the coupling assembly you will have to take off the motor mounting plate. It is held on by two bolts and removing it makes installing the coupling easier but probably not necessary.
Push the back half of the coupling on to the gearcase drive shaft until the shaft is flush with the face of the coupling. Install the new rubber center piece on to the coupling then re-install the motor mounting plate. Install the other half of the coupling on to the motor shaft and lift the motor up to the coupling. You have to rotate the motor shaft by spinning the fan blades until the coupling lines up so you can slide it into the other half of the coupling. Then just reattach the motor, connectors and water pump in the reverse order of disassembly.
Read less
Parts Used:
-
Jeff from Wayne, NJ
-
Difficulty Level:Easy
-
Total Repair Time:30 - 60 mins
-
Tools:Pliers, Screw drivers, Socket set
1124 of 1228 people
found this instruction helpful.
Was this instruction helpful to you?
Thank you for voting!
washer wouldn't agitate
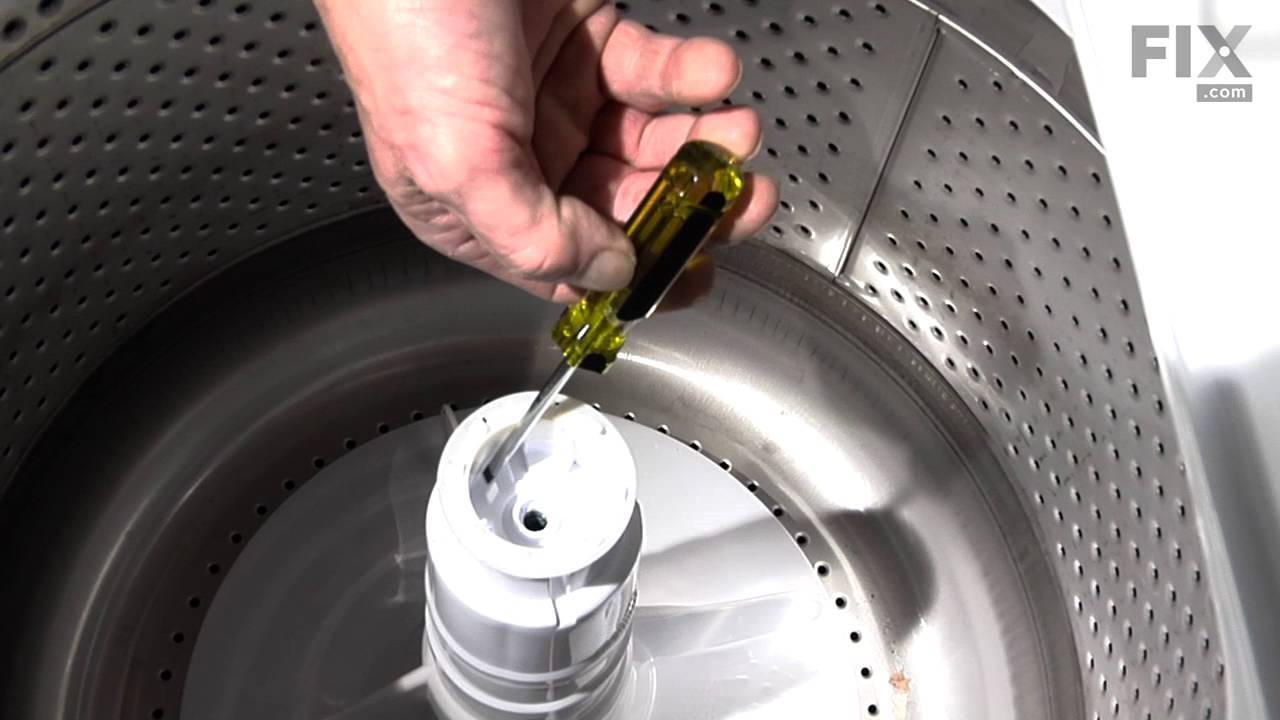
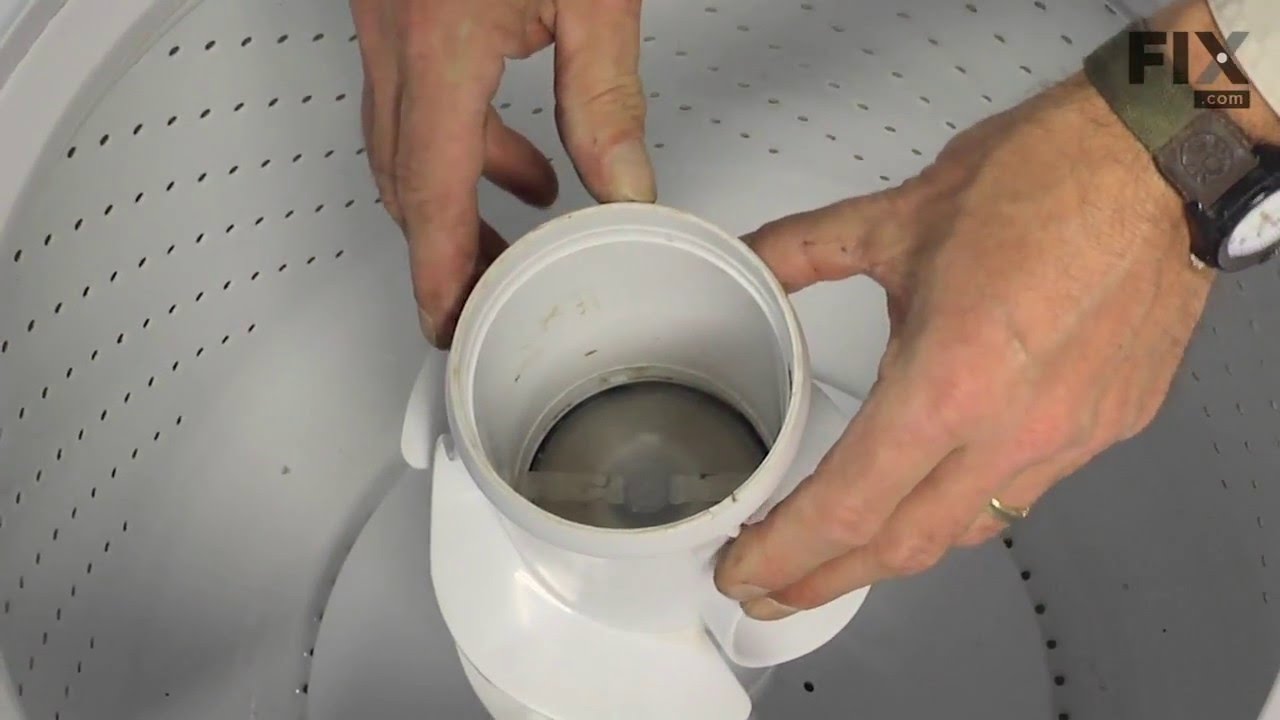
First pry off the cap of the agitator. Then using a socket remove the bolt that holds the plastic cup in place. Remove this cup by prying it loose from the two tabs that hold it in place. Once this cup is removed you can get to the broken cogs.
Slip the new cogs into the underside of the cup, and slide the cup back down in the a ... Read more gitator housing using the slots on the side for a guide. (You may want to remove the entire agitator and assemble everything upside down, then flip it all back over to mount, so the cogs don't fall out).
Tighten the bolt, snap the cap back in place on top of the agitator and your'e done. Easy repair.
Slip the new cogs into the underside of the cup, and slide the cup back down in the a ... Read more gitator housing using the slots on the side for a guide. (You may want to remove the entire agitator and assemble everything upside down, then flip it all back over to mount, so the cogs don't fall out).
Tighten the bolt, snap the cap back in place on top of the agitator and your'e done. Easy repair.
Read less
Parts Used:
-
mike from Kent, WA
-
Difficulty Level:Easy
-
Total Repair Time:15 - 30 mins
-
Tools:Screw drivers, Socket set
955 of 1056 people
found this instruction helpful.
Was this instruction helpful to you?
Thank you for voting!
Washer not agitating
On top of the agitator is a flat cap that is held in place by the friction of an o-ring, there are no fasteners. I would imagine one could get under the lip with a small screwdriver or butter knife to pop it off but I chose simply using my fingernails so as to not disfigure the cap. Under the cap you will find the head of the only bolt
... Read more
that holds the assembly together it is a 7/16 head and because it is in a 4" deep well your will need a 6" extension for your ratchet. Once the bolt is out the top of the agitator, the assembly with the cogs removes by hand. Set the assembly upside down on the counter, slide the black plastic ring off, pull the cogs out with your fingertips, install the new cogs put a new black ring on and set the assembly back in the agitator. Reinstall bolt. As the bolt is down in a tube, you cannot set it in place with your fingers and it will fall out of the socket. To hold the bolt in the socket during positioning you can either put a gob of Vaseline on the bolt head to hold it in the socket or form a small piece of paper over the bolt head and set it into the socket, the friction of the paper will hold the bolt into the socket. Took me less then 10 minutes, good luck
Read less
Parts Used:

-
Craig from Polk City, FL
-
Difficulty Level:Really Easy
-
Total Repair Time:Less than 15 mins
-
Tools:Socket set
645 of 683 people
found this instruction helpful.
Was this instruction helpful to you?
Thank you for voting!