Your coupon for will be reflected when you check out!
✖
Your coupon for
✖
Hello!
You're visiting the PartSelect site in U.S.
Would you like to shop on the Canadian site?
Stay on this site
Go to Canadian site
✖
Model Number Locations
1Select Category Type
Select Category Type
2Select Product Type
Select Product Type
3Select {MODEL} Type
Select {MODEL} Type
Sample Model Number Tags
Model numbers can be made up of numbers (1005400, for example) or a combination of letters and numbers (LAT1000AAE). The model number will most likely appear on either a paper sticker or a metal plate. Your appliance's model number tag may look similar to the sample model number tags shown here (model number highlighted in yellow):
OEM stands for Original Equipment Manufacturer. Simply put, this means that the company who made your appliance is also supplying the replacement part for it.
Replacing your Frigidaire Range Electronic Control Board
Troubleshooting
This part fixes the following symptoms:
Touchpad does not respond
Little to no heat when baking
Element will not heat
This part works with the following products:
Range
Part# 5304495521 replaces these:
AP5807224, 316560117
Customer Reviews
Average Rating:
★★★★★
★★★★★
3 Reviews
5.0
Filter By Rating:
5 Stars
3
4 Stars
0
3 Stars
0
2 Stars
0
1 Star
0
Sort by:
< Prev
1
Next >
Search filter:
Clear Filter
Your search term must have 3 or more characters.
Keep searches simple. Use keywords, e.g. "leaking", "pump", "broken" or "fit".
Sorry, we couldn't find any existing reviews that matched. Try using some different or simpler keywords.
★★★★★
★★★★★
Jesse K - December 17, 2018
Verified Purchase
Fast shipping, excellent service
The part arrived in less than two days with express shipping. The part was well packed and in great condition.
★★★★★
★★★★★
Meghan N - February 9, 2022
Verified Purchase
Great experience
It was wonderful to understand the process, and be walked through all the steps to fix my stove. Clear to follow video and the right part. A very satisfying experience!
★★★★★
★★★★★
Ronald S - May 30, 2019
Verified Purchase
Easy repair. Went in just like the video
Part was well packed.
< Prev
1
Next >
Installation Instructions
Average Repair Rating: 4.0 / 5.0, 3 reviews.
What's this?
Sort by:
< Prev
1
Next >
Search filter:
Clear Filter
Your search term must have 3 or more characters.
Keep searches simple. Use keywords, e.g. "leaking", "pump", "broken" or "fit".
Sorry, we couldn't find any existing installation instruction that matched.
Oven would take an hour to reach a temperature of 350 F. Broiler element worked fine.
1. Researched problem to identify components involved. 2. Made a conscious decision to replace both bake element and ECB at the same time since the oven will be 10 years old next year and both have been utilized heavily over those years. Baking is a daily routine in this family, so more days without an oven was less desirable than
... Read more a sure fix in one session. 3. With both parts on hand and my schedule cleared, set about making the repair: ECB 4. Unplugged stove from wall socket. 5. Removed bottom and top back panels. The ECB replacement required the top panel removed. The bake element replacement required the bottom panel removed. The ECB replacement came with an unexpected, but welcome power filter that attached easily to the power leads and grounded into the oven frame. 6. Took a digital photo of the ECB wiring before removing any leads. 7. Detached leads from the ECB (no tools required). 8. Removed screws holding ECB to oven frame. 9. Removed ECB 10. Using a plastic drywall putty knife, very gently and carefully separated the overlay from the ECB. I had ordered an overlay with my original order because I was unsure how difficult this process would be and whether I would be effective at making the separation without damage. The overlay was still on back-order when I started the repair, so I was able to cancel that part of the order when I had completed the overlay separation without any damage to the overlay. Just go nice and easy and don't rush and you'll be able to separate the overlay from the ECB without damage. 11. Lined up and applied overlay to new ECB unit. Again, just take your time and check all the edges and corners. 12. Attached new ECB unit with applied overlay to the oven frame with the screws that had been taken out earlier 13. Connected leads to ECB, verified everything looked the same as the digital photo. 14. Without re-attaching the back panels, carefully plugged in the stove to verify connectivity to the ECB. Unplugged stove again. Baking element: 15. Unscrewed oven bottom tray/bake element protector. There are two screws with attached washers in the back. These were very stuck, so used a squirt of WD40 on each and waited 10 minutes to loosen them up. They came out readily after that. 16. Press down on front of bottom tray. This will raise up the back of the bottom tray (like a see-saw), giving you just enough space to grasp it with your fingers and lift up. Wiggle the bottom tray past the convection fan louvers as you raise it up and back to free up the front lip. Set bottom tray aside. 17. Remove screws that hold the bake element in place against the back of the oven interior and on the bar that holds the bake element to the bottom of the oven interior. 18. Disconnect leads to the bake element from the back. You can tell which ones to remove easily if you have a helper jiggle the bake element a little from the other side while you observe the back of the stove. 19. Re-use the bar that holds the bake element to the bottom of the oven interior. Slide it off of the old bake element and carefully slide it onto the new bake element. Be careful to avoid scratches while doing this. 20. Align the bar that holds the bake element to the bottom of the oven interior with the screw holes, fasten this. 21. Adjust the bake element so that the fastener plates at the back line up with the screw holes on the back of the oven interior, fasten these. 22. Attach leads to the bake element in the back. 23. Plug in the stove and give it a test run after setting the time. In our case, with the new ECB and bake element in place, the oven reached 350 F in exactly 10 minutes. We were very happy with this. 24. Re-attach back panels 25. Done! NOTE: You may smell a little bit of machine oil burn on the first and second uses of the oven. This burns off completely by the third use.
Electronic control board defective. Caused by insect.
Remove door, take out screws to get to control board. remove the panel disconnect the attachments. Install the new board and connect the attachments. Reassemble the door.
Couldn't get the oven to work and had a constant beep. Unplugged it.
Followed the instructions that came with control board. The new contol kit came with a upgrade, which I think to help keep this from happening again. Very easy repair to do.
Gregory from SEFFNER, FL
Difficulty Level:
Very Easy
Total Repair Time:
30 - 60 mins
Tools:
Nutdriver, Socket set
8 of 8 peoplefound this instruction helpful.
Was this instruction helpful to you?
Thank you for voting!
< Prev
1
Next >
Questions and Answers
We're sorry, but our Q&A experts are temporarily unavailable.
Please check back later if you still haven't found the answer you need.
10 questions answered by our experts.
Sort by:
< Prev
1
Next >
Search filter:
Clear Filter
Your search term must have 3 or more characters.
Keep searches simple. Use keywords, e.g. "leaking", "pump", "broken" or "fit".
Sorry, we couldn't find any existing answers that matched.Try using some different or simpler keywords, or submit your new question by using the "Ask a Question" button above!
Jay Morgan
April 17, 2018
I have a f11 error on my Frigidaire gallery elect range fdef3055mfd had a service guy come out and quoted me more the half what a new range would cost me. He said it was the clock. It beeps and will not let me set the clock. Today i plugged the unit back in and the oven works????. i see that i can replace the overlay? and the control board at a reasonable cost. do i need both etc. what does the overlay do??? do i need the control board is the main question i guess?
For model number FGEF3055MFD
Hi Jay,
Thank you for your question. The F11 error code is referring to a shorted touchpad/overlay. If this error code appears, you can try to push the buttons on the touchpad to see if it will clear or you can unplug the stove for a few minutes and plug it back in to see it resolves the issue. Sometimes the issue can be a the electronic control board. To verify which part is causing the issue, you will need to test the parts with a multimeter. I hope this helps. Thank you and have a great day!
5 people found this helpful.
Did this question help you?
Thank you for voting!
Linnea
April 28, 2022
We are getting an F10 error code, we replaced the temp sensor which worked a few times using the oven then getting the code again. Heat won't shut off. Understand if it's not the temp sensor it could be the control panel. Is this the correct part I'm looking for? Thanks!!
For model number CGEF3055MFE
Hello Linnea, thank you for your question. Lets try resetting it first. Step 1 Enter a bake time using the oven's front panel. Step 2 Press the "Keep Warm" button on the front display. Step 3 Do nothing for 25 seconds. The "Keep Warm" function clears from the oven's settings after that time. Step 4 Listen for the sound of the blower to shut off. A blower sometimes stays on after the oven turns off, to cool down the oven. Don't mistake the sound of the blower running for the oven being on, too. Step 5 Press the "Cancel" button to turn off the oven timer -- and the oven -- if you set it to a longer cooking time than needed and want to change it. If this is not successful, then yes the Electronic Control PS9494056. We have a video for you to access. If you need help placing an order, customer service is open 7 days a week. Please feel free to give us a call. We look forward to hearing from you.
3 people found this helpful.
Did this question help you?
Thank you for voting!
Scott
November 20, 2019
What is the difference between control board 5304495521, and 5304495520 and which should i use?
For model number FGEF3055MBA
Hi Scott, thank you for your question. You would want to use the part directly listed underneath your model. This is the board listed underneath your model: 5304495521. Good luck with your repair.
3 people found this helpful.
Did this question help you?
Thank you for voting!
Sona
December 21, 2019
F62 error - cannot set clock or turn on oven
For model number CGEF3055MFF
Hi Sona, power-cycle the oven for 30 seconds. If you still have no power you will need to replace the control board. Thank you for your question and good luck with your repair!
2 people found this helpful.
Did this question help you?
Thank you for voting!
Vladimir
July 5, 2021
I have Frigidaire gallery range model cgef3059rfa. It turns off by itself after its oven works for 10 20 minutes. I removed a top metal back cover and placed a fan behind to cool a controller board. With cooling the oven was working in bake mode for 3 hours non stop. After the fan was turned off the range stopped working in a few minutes. Do I need to replace my control board? Thank you. Vladimir
For model number CGEF3059RFA
Hello Vladimir, Thank you for the question. We suggest checking to see if the Fan Motor is running to cool the appliance at the back. PartSelect Number PS2378860. Try testing it with a multi-meter and replace if it shows no continuity. We hope this helps!
F11 error. Removed back cover and the burnt bake wire/connector. Electronic control board to change... but what else should I check before changing this part? Thanks
For model number CGEF3055MFC
Hi Paul,
Thank you for your question. The F11 error code is letting you know that you have a shorted touchpad. If you have not already done this, try unplugging the unit for 30 seconds to see if this will reset it. If not you will need to replace the touchpad. I hope this helps. Thank you and have a great day!
1 person found this helpful.
Did this question help you?
Thank you for voting!
Michael
February 2, 2025
Oven element not working, but removed tested, and it is good. Oven says it is turned on, but light is showing bottom element lit up but there is only a broil element with convection fan on this model.
I've also tried using only Broil. It indicated on the display element is on, (upper broil indicator light on panel says it is on) but no heat. With element ON, mutimeter, from element supply wire coming out to ground, I'm getting 110V. On either wire. Between both wires, getting nothing. 0V
No error codes. I'm sustpecting soeone may have installed wrong control board?
For model number CGEF3055MFG
Hi Michael,
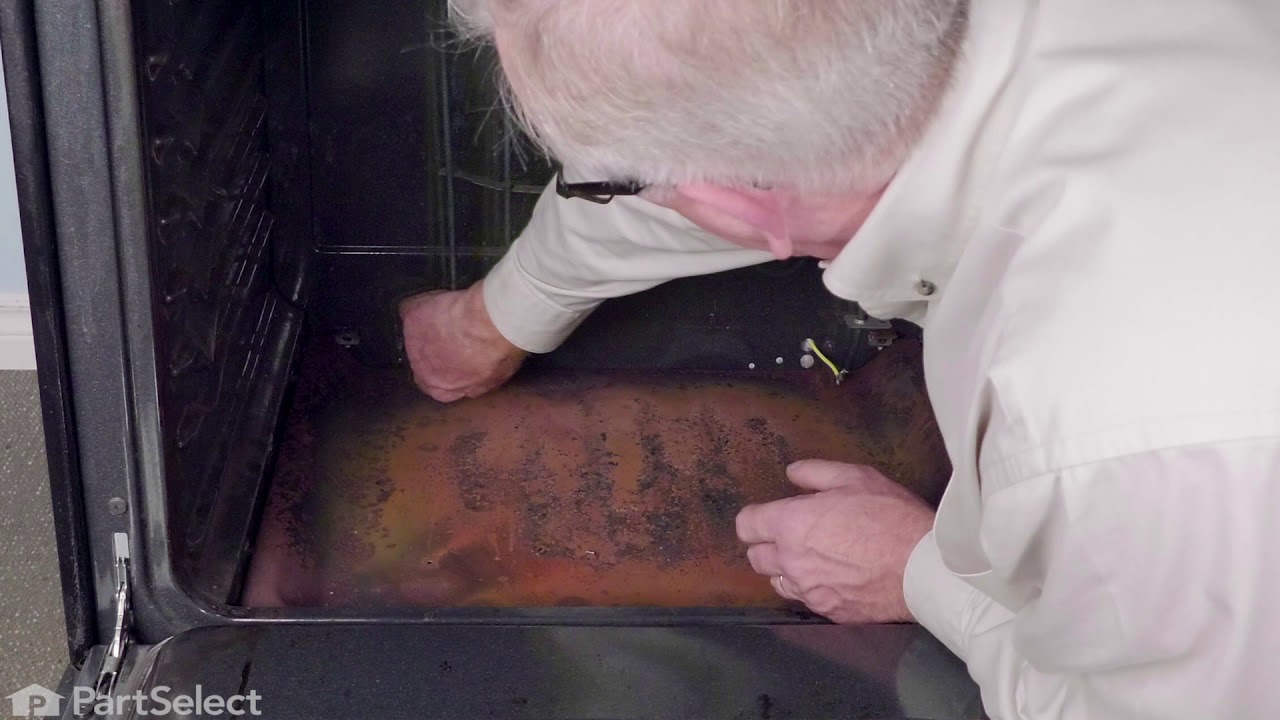
Thank you for your question. The bake element for this model is found under the bottom panel inside the oven. We have included a video that you may reference on how to access it. If the oven is not heating correctly, the issue may be with the oven temperature sensor. The oven temperature sensor monitors the oven temperature and signals the electronic control board to turn the elements on and off. Before removing this part from the oven and testing it for continuity with a multimeter on the Rx1 setting, unplug the oven from the electrical outlet. This test needs to be done with the sensor at room temperature to produce accurate results. The reading should be between 1080 and 1100 ohms. If you get any other reading, you need a replacement temperature sensor. If the sensor is fine, you will need to check the elements, the electronic control board, and the wiring between the parts to see which part is causing the issue. We hope this helps with the repair!
Hello, I want to be sure this is the issue before ordering a control board. I have checked thermostat, bake and broil elements, wiring to be sure 240 volt.
Oven will not heat up. The stove top still works fine. I am not getting any error codes.
When oven is turned on to bake, tested element with multimeter and no voltage shown going to the element.
Will ordering a control board be the part i need for the fix?
Thanks in advance
For model number CGEF3055MFF
Hey Tyler, thank you for your inquiry. We have researched your model and found that if it is not heating up and you have already checked other parts which can cause this, then we will recommend you first check its temperature sensor, part number PS1528542, then check its main terminal block kit, part number PS471605. If it is not working, you may need to replace it. But if it is working fine then the problem is with its control board, part number PS9494056. If you require assistance to place an order, please contact customer service. We hope that helps!
Did this question help you?
Thank you for voting!
Preston
December 6, 2023
Hello, I'm having trouble with the stove not heating up, and I wanted to make sure this is the part that will fix the problem. First of all, there are no error codes. I have tested both of the heating elements for continuity, and they are reading as good. I've tested the ohms for each and the lower element is reading 13.6 ohms, and the upper or broil reads approx 14 ohms. Based on the spec info, both of these elements are good. I've tested the temp sensor as well, and it was reading 1080 ohms, so it's good as well based on the multimeter readings. What else could be causing the oven to not heat up to proper temp. Currently, it won't heat up more than 174 degrees. Can you let me know what your experts perceive thw problem to be or if there are any other components to test. Thanks.
For model number FGEF3055MFG
Hello Preston, thank you for contacting us. Based on the description that you have provided, we would recommend replacing the control board, part number PS9494056, to fix the issue. We hope this helps!
Did this question help you?
Thank you for voting!
Neil
February 24, 2022
I was told by a technician that my stove requires this part, if I buy this and it doesn't happen to be the part I need, can I return this item for a refund?
For model number CGES3045KB1
Hi Neil,
Thank you for your question. We have a 30 day return period. We have included a link that you may reference for information on our return policy. If you have any questions, please let us know. We are open 7 days a week. We look forward to hearing from you!
Item is in stock and is estimated to be delivered in 2-3 business days via Standard Shipping.
On Order
Item is not in stock and usually ships 3-5 business days from the time you place your order.
Special Order
Item is not in stock and usually ships 10-15 business days from the time you place your order.
NLA - No Longer Available
This item is no longer being made by the manufacturer, and cannot be added to your shopping cart.
[{"position":0,"name":"Home","title":"Home","url":"/"},{"position":1,"name":"Range","title":"Range","url":"/Range-Parts.htm"},{"position":2,"name":"Circuit Board or Touch Pad","title":"Circuit Board or Touch Pad","url":"/Range-Circuit-Boards-and-Touch-Pads.htm"},{"position":3,"name":"5304495521","title":"5304495521","url":""}]
You added 1 item to your cart
✖
% OFF
$
$
Qty:
Total item(s) in cart:
Order Subtotal
$
*Taxes and shipping will be applied during checkout