















YWFC150M0AS0 Whirlpool Range - Instructions
Keep searches simple. Use keywords, e.g. "leaking", "pump", "broken" or "fit".
Trim piece on the botom of the oven was chipped in three places
I used the allen wrenches to block the hinges, removed the oven door and used the kitchen counter for a work station. I removed the trim piece at the bottom which released the side trim and oven glass front, and then reversed the procedure. It took more time to clean things than to do the exchange. My only issue is with Fed Ex who delived the first trim piece bent in the middle inside a crushed box. Part Select had another part sent the same day after I called them.
Parts Used:

-
Terry from Maple Valley, WA
-
Difficulty Level:Easy
-
Total Repair Time:30 - 60 mins
-
Tools:Screw drivers
0 of 1 people
found this instruction helpful.
Was this instruction helpful to you?
Thank you for voting!
Oven gets too hot,if set at 350 it heats to 550. Changed the sensor and was not the problem.
Took off the screws on the back of the stove and took out the sensor, and put in the new one.
Parts Used:

-
Joanne from Negaunee, MI
-
Difficulty Level:Really Easy
-
Total Repair Time:Less than 15 mins
-
Tools:Screw drivers
0 of 2 people
found this instruction helpful.
Was this instruction helpful to you?
Thank you for voting!
Bulb Replacement
I pulled down the wire around the glass cover. . . Released on end of the wire from its holder being careful to not let the glass cover drop. Unscrewed the bulb and replaced with replacement. Easy, easy.
Parts Used:

-
Judith from Phoenix, AZ
-
Difficulty Level:Really Easy
-
Total Repair Time:Less than 15 mins
0 of 2 people
found this instruction helpful.
Was this instruction helpful to you?
Thank you for voting!
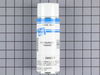
Both outside door handles turned very beige
Everything worked perfectly---thanks to the suggestion of your call center agent. She suggested that since the replacement door handles were no longer available, I should consider repainting them--it worked like a charm. Please tell her she was a life saver. We rent that house in Fl and my returning tenants had complained about the discoloring refer handles. Thank you
Parts Used:
-
Howard from Boynton Beach, FL
-
Difficulty Level:Easy
-
Total Repair Time:30 - 60 mins
-
Tools:Nutdriver
23 of 72 people
found this instruction helpful.
Was this instruction helpful to you?
Thank you for voting!
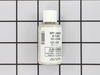
black scratchers from wheel chair
shook bottle and painted waited a day and repeated
Parts Used:

-
Linda from GLEN CARBON, IL
-
Difficulty Level:Very Easy
-
Total Repair Time:30 - 60 mins
3 of 12 people
found this instruction helpful.
Was this instruction helpful to you?
Thank you for voting!
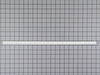
The Parts Came With No Instructions And We Couldn't Find Directions On Line.
We took the door off and took it and the side panels to the local dealer and he put them on for us - for anyone needing to replace the side panels on the over, be aware they slide under the glass front -not over it like we tried to do. We thought, though, that we were going to have a buy a new stove but for a little over $70. 00 We got the parts, had them installed and saved over $800 on a new stove - well worth the effort.
Parts Used:

-
Kathleen from Livingston, MT
-
Difficulty Level:A Bit Difficult
-
Total Repair Time:1- 2 hours
Was this instruction helpful to you?
Thank you for voting!
Bottom oven heating element burned out
Only difficult because one heating element connector broken off. Before receiving correct part, tried to install generic element, which had leads about 2 inches too long, so trying to force into place bent electrical connectors that go from oven to heating element. Tried to bend one back and it broke off, so did not bend 2nd one back. Received correct heating element, and slid unbroken connector on one element side, and soldered 2nd element on. Screwed heating element in and it works fine.
Parts Used:

-
Jan from Columbus, OH
-
Difficulty Level:A Bit Difficult
-
Total Repair Time:1- 2 hours
-
Tools:Pliers, Screw drivers
Was this instruction helpful to you?
Thank you for voting!
Bottom Door Trim Rusting
I remove bottom trim which is held on by 3 screws and try to install new bottom trim, did not work well. I then remove yop handle assem. Then the door glass which you need to clean after. Then install the new bottom trim then insert the glass into the new bottom strip using masking tape to hold the glass and side strips in place prior to installing the the top handle piece which is held on by two screws. Not a hard job to do.
Parts Used:
-
Dennis from Grimsley, TN
-
Difficulty Level:Easy
-
Total Repair Time:1- 2 hours
-
Tools:Screw drivers
Was this instruction helpful to you?
Thank you for voting!
Damaged Socket When Removing Bulb Base
This is a built-in oven, so the biggest problem was figuring out how to remove it from the cabinet. The solution turned out to be removing the cooktop above it and unscrewing two screws that connected the oven to the inside of the cabinet. The other problem was removing BOTH metal backs from the oven. The first one was easy. The second one wasn't. The old socket was recessed behind the second back, making it virtually impossible to access the metal "wings" that hold it in place, so I ended up pulling out the socket assembly from inside the oven with pliers.
Parts Used:

-
Charles from Oceanside, CA
-
Difficulty Level:A Bit Difficult
-
Total Repair Time:30 - 60 mins
-
Tools:Pliers, Screw drivers
Was this instruction helpful to you?
Thank you for voting!
Bake element replacement
Keep in mind that I am a 65 year old woman who has replaced bake elements on a much older range that was hard wired. I viewed the video so I knew what to expect. The job would have taken no more than 15 minutes if the retaining screws had not been stuck. After several doses of WD40, I finally managed to get them loose but only then after I had tried every screw driver in the house. I clamped the leads with vise grips to keep them from slipping back in the stove. Unplugging the old broken element and plugging in the new one took maybe a couple of minutes. The retaining screws went back in without a problem.
Parts Used:
-
Mary from Odenville, AL
-
Difficulty Level:A Bit Difficult
-
Total Repair Time:30 - 60 mins
-
Tools:Pliers, Screw drivers
Was this instruction helpful to you?
Thank you for voting!
Broil heater exploded. The corner was burned/ corroded.
Unplug power. Remove panel on the back. Unplug heater.From front remove 3 screws and remove heater. Installed new heater. On the back restored connections - squized the lugs to have better connection. Put panel back. Plug the power and see if the coil get red. It looked good. Used oven few times it works fine. Difficoult part is to clean oven all around from accumulated grease. First repair for this stove, most of the time spend on figuring out what to open, no instructions.
Parts Used:

-
Amadeusz from Simi Valley, CA
-
Difficulty Level:Really Easy
-
Total Repair Time:30 - 60 mins
-
Tools:Pliers, Screw drivers
Was this instruction helpful to you?
Thank you for voting!
The original trim rusted
I did the repair by myself. I used masking tape to hold the side trim in place. It was pretty easy and it looks great.
Parts Used:
-
Diane from Elyria, OH
-
Difficulty Level:Easy
-
Total Repair Time:30 - 60 mins
-
Tools:Screw drivers
Was this instruction helpful to you?
Thank you for voting!
range installer broke a screw off & busted the plastic piece

-
Christina from West Des Moines, IA
-
Difficulty Level:Easy
-
Total Repair Time:30 - 60 mins
-
Tools:Pliers, Screw drivers
Was this instruction helpful to you?
Thank you for voting!
E-2 F-3 codes..Oven inop w/trying to bake.Beeps @ start attempt.
Contrary to instructions(go thru front of oven) I had to pull out the range, remove two (2) screws from back chassis. At this point you pull out the connector, snap in new, reverse proceedure. Very simple. Hardest part is cleaning up debris generated by moving range.
Parts Used:
-
Dave from Titusville, FL
-
Difficulty Level:Really Easy
-
Total Repair Time:15 - 30 mins
-
Tools:Screw drivers
Was this instruction helpful to you?
Thank you for voting!
oven element burnt out
unscrew two screws..took old element out, put perfect fit new element in,screw two screws back in.
Parts Used:
-
JoAnne from Harrison, AR
-
Difficulty Level:Really Easy
-
Total Repair Time:15 - 30 mins
-
Tools:Screw drivers
Was this instruction helpful to you?
Thank you for voting!