















YISE630WS01 Whirlpool Range - Instructions
Keep searches simple. Use keywords, e.g. "leaking", "pump", "broken" or "fit".
None
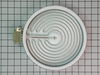
Turned off power.Removed 2 screws, flipped top over, removed old element, replaced new element,turned over top,fasten down with 2 screws.Turned on power. Turned on burner,made coffee-took a brake.
Parts Used:
-
Richard Finneman from Muskegon, MI
-
Difficulty Level:Really Easy
-
Total Repair Time:15 - 30 mins
-
Tools:Screw drivers
13 of 14 people
found this instruction helpful.
Was this instruction helpful to you?
Thank you for voting!
Scratches in Surface
This product comes in a bottle with a brush like Liquid Paper. It goes on incredibly easy. A second coat might be needed. I wanted to prevent rust from setting in so I covered the scratches and dings. The paint is a little brighter since my washer is 10 years old but it still looks great.
Parts Used:
-
Michelle from Richardson, TX
-
Difficulty Level:Really Easy
-
Total Repair Time:Less than 15 mins
83 of 227 people
found this instruction helpful.
Was this instruction helpful to you?
Thank you for voting!
Code said we needed a sensor
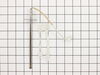
First I removed the two screws that hold the element in place. I then pulled the element out about 3 inches and disconnected the two wires to remove the old sensor. Went on line to find out where to order it from. Ordered it, It was on back order but was only about 1 week to receive. Reversed the procedure. WA LA. It works great.
Parts Used:
-
Janice from Portland, OR
-
Difficulty Level:Really Easy
-
Total Repair Time:Less than 15 mins
-
Tools:Screw drivers
12 of 14 people
found this instruction helpful.
Was this instruction helpful to you?
Thank you for voting!
After self cleaning the oven received an error code telling me the sensor was bad.
Removed the two screws holding the element in place. I then pulled the element and wiring out until I saw the connecter. I disconnected the two wires and then chose the correct connector from the package, snapped it back into place, put the screws back, turned on the breaker then tested the oven and found that everything was working correctly.
This is the second time I have ordered from Part Select, the first time was for a front LED panel on the same appliance. With the help finding the part you need and the comments from other customers I have saved a lot of money by repairing these problems myself. Oh, and the best part is the look on my husband's face when he came home and found out the repairs were made by me and not a repairman that he said I should call. He said he would laugh when the first repair by me didn't work but who's laughing now : )
This is the second time I have ordered from Part Select, the first time was for a front LED panel on the same appliance. With the help finding the part you need and the comments from other customers I have saved a lot of money by repairing these problems myself. Oh, and the best part is the look on my husband's face when he came home and found out the repairs were made by me and not a repairman that he said I should call. He said he would laugh when the first repair by me didn't work but who's laughing now : )
Parts Used:
-
Christine from Davie, FL
-
Difficulty Level:Really Easy
-
Total Repair Time:Less than 15 mins
-
Tools:Screw drivers
11 of 13 people
found this instruction helpful.
Was this instruction helpful to you?
Thank you for voting!
oven getting 50 degrees or more, hotter than setting
As the video described I just unscrewed the sensor from inside the oven. Although I couldn't pull the wiring harness through the insulation (the wires were gathered in back with a wire tie) just four screws to loosen the back panel for access to the connection. My wife says it seems to be heating perfectly now.
Parts Used:
-
Joseph from Wappingers Falls, NY
-
Difficulty Level:Really Easy
-
Total Repair Time:Less than 15 mins
-
Tools:Screw drivers
10 of 10 people
found this instruction helpful.
Was this instruction helpful to you?
Thank you for voting!
Baked on sauce
Used cooktop creme, oven cleaner and Mr. Clean sponges. After many days of working on the surface, we were able to remove 99% of the sauce.
Parts Used:
-
Julie from Newnan, GA
-
Difficulty Level:A Bit Difficult
-
Total Repair Time:More than 2 hours
12 of 16 people
found this instruction helpful.
Was this instruction helpful to you?
Thank you for voting!
Bad Element
Remove top by opening oven and taking out two screws in the front. Lift up top and unplug wire connectors on bad element, writing down where they are landed. Take out screw on element bracket and replace. That easy. Be sure to unplug appliance for your safety. :-) Also just wanted to add that PartSelect was great. Ordered it on saturday and was cooking with it on tuesday. Great job.
Parts Used:

-
Dean from Farmington, NY
-
Difficulty Level:Easy
-
Total Repair Time:Less than 15 mins
-
Tools:Screw drivers
14 of 23 people
found this instruction helpful.
Was this instruction helpful to you?
Thank you for voting!
F1 code and oven wouldn't operate
I was told by appliance repairman that sensor and electronic panel were out - so ordered both as PartSelect was less expensive (about 1/2) than service call price. Sensor was in stock and arrived in 2 days, panel was special order from factory.
Replaced the sensor. Pressed Control Lock pad for several seconds and oven clock came on. Was able to set baking temp, broiler, and convection operation as normal.
Canceled order on panel as Sensor fixed my problem.
Replaced the sensor. Pressed Control Lock pad for several seconds and oven clock came on. Was able to set baking temp, broiler, and convection operation as normal.
Canceled order on panel as Sensor fixed my problem.
Parts Used:
-
Robbie from Hillsboro, TX
-
Difficulty Level:Really Easy
-
Total Repair Time:Less than 15 mins
-
Tools:Nutdriver
11 of 15 people
found this instruction helpful.
Was this instruction helpful to you?
Thank you for voting!
Lower range burner element burned out
Should have been under the 'very easy' category, unscrew 2 screws, pull out old element, disconnect wires, reconnect new wires and screw back in. Unfortunately the right wire disconnected while pulling out the element, so I had to pull the the stove out, disconnecting vents in the process, then remove the back to be able to feed the wire back in thru the element hole . While back here I noticed that the reason the wire came off is that the way it was routed behind the stove cover was such that there was virtually no slack to be able to pull the element out in the first place. I'll bet that at the factory, the element was installed first, THEN the wires were connected. Whoever was on the line that day made extra sure of no slack in back, and that made the job take 5-6 times longer than it should have. As for the part replacement, it was a perfect match to the original part so it was super easy once the wire got back in the oven...
Parts Used:

-
Andrew from SAINT PAUL, MN
-
Difficulty Level:A Bit Difficult
-
Total Repair Time:30 - 60 mins
-
Tools:Nutdriver, Screw drivers
9 of 10 people
found this instruction helpful.
Was this instruction helpful to you?
Thank you for voting!
inner glass busted
I removed door by opening it to first stop and lifted it up off the hinge's. I removed all screws that held the inner panel to the outer panel and handle. Removed inner panel from outer panel, then glass and insulation, replaced glass and insulation and panel.
Replaced screws and handle,pulled hinge's out to first stop and slid door down on hinge's. This took about 20min. to do, most anybody handy with a screwdriver can do it.
PS: shipping was fast and price was great.
Thanks Bob G.
Replaced screws and handle,pulled hinge's out to first stop and slid door down on hinge's. This took about 20min. to do, most anybody handy with a screwdriver can do it.
PS: shipping was fast and price was great.
Thanks Bob G.
Parts Used:
-
robert from orange, CA
-
Difficulty Level:Easy
-
Total Repair Time:15 - 30 mins
-
Tools:Screw drivers
9 of 11 people
found this instruction helpful.
Was this instruction helpful to you?
Thank you for voting!
Top oven element burned out
Unplugged the unit. Removed the back of the range and disconnected the top element connectors. Then removed the screws holding top element from inside the range. I did not remove the bottom rack so that my arm could rest on that rather than risk hitting the bottom element. Removed the top element and inserted new element. Placed the front bracket to hold element in place and tightend the two screws holding the element to the back of the range. Then reattached the connecting wires, replaced the back panel. Then completed attaching the braces holding element to top of range. Did not tighten braces until all screws had been started.
Parts Used:
-
robert from Auburn, AL
-
Difficulty Level:Really Easy
-
Total Repair Time:15 - 30 mins
-
Tools:Pliers, Screw drivers
9 of 11 people
found this instruction helpful.
Was this instruction helpful to you?
Thank you for voting!
1998 oven unit flashing F3
SHUT OFF BREAKER FOR OVEN! pulled oven out to get at backside,removed 3 screws on back coverplate,removed 2 screws inside oven at sensor in top left corner of oven,disconnected plastic clip at back ,pulled old sensor through hole.replaced sensor with new in reverse order. 15minutes tops.
Parts Used:
-
chris from houston, TX
-
Difficulty Level:Really Easy
-
Total Repair Time:Less than 15 mins
-
Tools:Screw drivers
10 of 14 people
found this instruction helpful.
Was this instruction helpful to you?
Thank you for voting!
Inner Galls on door was craked
Remove outer panel first, outer glass and handle come off as one piece. Be carefull to secure as last screws are removed. Remove inner silver panel. Remove broken glass and replace with new. Reaassemble. Around 10 Phillips head screws altogether. Much easier than I thought
Parts Used:

-
Randall from Katy, TX
-
Difficulty Level:Easy
-
Total Repair Time:15 - 30 mins
-
Tools:Screw drivers
8 of 11 people
found this instruction helpful.
Was this instruction helpful to you?
Thank you for voting!
Two digits on the touch pad didn't work "9" & "0". Went to utube and they said hinges go bad causing heat to leak affecting touch pad
Pull range out 6 inches. Open door to 45 degrees and pull up to remove door. Remove both side plates, two screws each side. Remove both hinges by loosening two small bolts on the front of range that connect to the hinges. Place new hinges in place. Bolt hinges using bolts you removed, replace side panels. Slide door on hinges and push back range.
Parts Used:
-
Patrick from MORAGA, CA
-
Difficulty Level:Really Easy
-
Total Repair Time:15 - 30 mins
-
Tools:Screw drivers, Socket set
7 of 9 people
found this instruction helpful.
Was this instruction helpful to you?
Thank you for voting!
Oven would stop heating after a few minutes of operation
Heat escaping from the top of the over door would overheat the electronics and cause the system to show error codes F1 and F3-1. Error code F3-1 suggests that the oven temperature sensor was bad. I replaced the sensor but that did not stop the problem. Replacing the oven door gasket stop the heat leak and solved the problem. I simply pull the old gasket off the door (it stuck a bit at the bottom but a pair of pliers solved that problem, then push the new gasket into place without any tools. The old gasket was very hard and non-complient where food had spilled on it and baked hard.
Parts Used:
-
John from Ashland, OR
-
Difficulty Level:Easy
-
Total Repair Time:Less than 15 mins
-
Tools:Pliers
6 of 6 people
found this instruction helpful.
Was this instruction helpful to you?
Thank you for voting!