















YIES505DS0 Whirlpool Range - Instructions
Keep searches simple. Use keywords, e.g. "leaking", "pump", "broken" or "fit".
oven light not working
replaced light socket but did not repair problem. must have burned the motherboard.
pleased with service from your company.
pleased with service from your company.
Parts Used:

-
Richard from Gaylord, MI
-
Difficulty Level:A Bit Difficult
-
Total Repair Time:30 - 60 mins
-
Tools:Nutdriver, Screw drivers
2 of 6 people
found this instruction helpful.
Was this instruction helpful to you?
Thank you for voting!
Inside Light would not work
Turned off CB for the oven,Remove the oven from the cabinet , remove the back of the oven, replaced the light Assembly. turned on CB for the oven, tested the light. and truned off the CB and replace the back and reinstalled the oven in the cabinet.
Parts Used:
-
Dan from Caddo Mills, TX
-
Difficulty Level:Really Easy
-
Total Repair Time:15 - 30 mins
-
Tools:Nutdriver
2 of 7 people
found this instruction helpful.
Was this instruction helpful to you?
Thank you for voting!
Light burned out in upper oven

-
Shirley from Las Vegas, NV
-
Difficulty Level:Really Easy
-
Total Repair Time:Less than 15 mins
0 of 1 people
found this instruction helpful.
Was this instruction helpful to you?
Thank you for voting!
replaced oven lightbulb
-
peggy ann from forest city, NC
-
Difficulty Level:Really Easy
-
Total Repair Time:Less than 15 mins
0 of 1 people
found this instruction helpful.
Was this instruction helpful to you?
Thank you for voting!
oven light burnt out
1. Unscrewed glass cover on bulb
2. Removed old bulb
3. Screwed in new bulb
4. Replaced glass cover
5. Mixed drink & baked cupcakes
2. Removed old bulb
3. Screwed in new bulb
4. Replaced glass cover
5. Mixed drink & baked cupcakes
Parts Used:
-
William from Schwenksville, PA
-
Difficulty Level:Easy
-
Total Repair Time:Less than 15 mins
3 of 10 people
found this instruction helpful.
Was this instruction helpful to you?
Thank you for voting!
light bulb went out in my oven
My husband took the plastic cover off and took out old bulb and screwed in the new one. Then put the cover back on.
Parts Used:
-
Janet from Ada, MI
-
Difficulty Level:Really Easy
-
Total Repair Time:Less than 15 mins
2 of 7 people
found this instruction helpful.
Was this instruction helpful to you?
Thank you for voting!
Oven gets too hot,if set at 350 it heats to 550. Changed the sensor and was not the problem.
Took off the screws on the back of the stove and took out the sensor, and put in the new one.
Parts Used:

-
Joanne from Negaunee, MI
-
Difficulty Level:Really Easy
-
Total Repair Time:Less than 15 mins
-
Tools:Screw drivers
0 of 2 people
found this instruction helpful.
Was this instruction helpful to you?
Thank you for voting!
Bulb Replacement
I pulled down the wire around the glass cover. . . Released on end of the wire from its holder being careful to not let the glass cover drop. Unscrewed the bulb and replaced with replacement. Easy, easy.
Parts Used:
-
Judith from Phoenix, AZ
-
Difficulty Level:Really Easy
-
Total Repair Time:Less than 15 mins
0 of 2 people
found this instruction helpful.
Was this instruction helpful to you?
Thank you for voting!
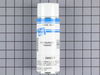
Both outside door handles turned very beige
Everything worked perfectly---thanks to the suggestion of your call center agent. She suggested that since the replacement door handles were no longer available, I should consider repainting them--it worked like a charm. Please tell her she was a life saver. We rent that house in Fl and my returning tenants had complained about the discoloring refer handles. Thank you
Parts Used:
-
Howard from Boynton Beach, FL
-
Difficulty Level:Easy
-
Total Repair Time:30 - 60 mins
-
Tools:Nutdriver
23 of 72 people
found this instruction helpful.
Was this instruction helpful to you?
Thank you for voting!
Damaged Socket When Removing Bulb Base
This is a built-in oven, so the biggest problem was figuring out how to remove it from the cabinet. The solution turned out to be removing the cooktop above it and unscrewing two screws that connected the oven to the inside of the cabinet. The other problem was removing BOTH metal backs from the oven. The first one was easy. The second one wasn't. The old socket was recessed behind the second back, making it virtually impossible to access the metal "wings" that hold it in place, so I ended up pulling out the socket assembly from inside the oven with pliers.
Parts Used:
-
Charles from Oceanside, CA
-
Difficulty Level:A Bit Difficult
-
Total Repair Time:30 - 60 mins
-
Tools:Pliers, Screw drivers
Was this instruction helpful to you?
Thank you for voting!
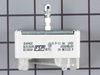
the dial would not work unless the special screws, which are extra short, are utilized.
since I only had one of two screws, i installed with just the one. it would not work at all using a slightly longer screw, which is very odd.
Parts Used:
-
Bruce E from Oxford, MS
-
Difficulty Level:Easy
-
Total Repair Time:30 - 60 mins
-
Tools:Nutdriver, Screw drivers
Was this instruction helpful to you?
Thank you for voting!
Drawer Glide Snapped Off And Broke
-
PATRICIA from GEORGETOWN, MA
-
Difficulty Level:Really Easy
-
Total Repair Time:Less than 15 mins
Was this instruction helpful to you?
Thank you for voting!
Oven light not on.
Turn off the breaker to the range. Unplug, too. Took off the 8 screws that hold the upper back panel on. Took a picture of the wire setup (this ain't my first rodeo). Removed two screws on the bottom of the old latch that hold it in place. Carefully removed the wire leads with needle-nose pliers because I didn't want to replace the wire leads. Reconnected the wires to the new latch, replaced the two screws to hold it onto the oven. Tested with the rocker switch on top and the oven door, both worked. Put the back panel on with the 8 screws.
Parts Used:

-
Kasey from Morrisville, NC
-
Difficulty Level:Easy
-
Total Repair Time:Less than 15 mins
-
Tools:Pliers, Screw drivers
Was this instruction helpful to you?
Thank you for voting!
Heating element would not get red hot
Replaced Infinite control switch in just a few minutes. Unfortunately the new switch had a lose terminal that was not supposed to be in the switch that came from the factory that way. I connected the switch, turned it on, and it instantly shorted the switch out. At that point the lose terminal was real easy to see.
Parts Used:

-
James from Lewisville, NC
-
Difficulty Level:Really Easy
-
Total Repair Time:Less than 15 mins
-
Tools:Screw drivers
Was this instruction helpful to you?
Thank you for voting!
An Insect got in between the element coil & shorted it out
unplugged the range, removed the cooktop left & right front screws, unplugged left & right plug & unscrewed ground wire. Parts arrived fast & reassembled. . Happy, Happy, Happy! Happy Wife...Happy Life!
Parts Used:

-
Howard from Land O' Lakes, FL
-
Difficulty Level:Really Easy
-
Total Repair Time:Less than 15 mins
-
Tools:Screw drivers
Was this instruction helpful to you?
Thank you for voting!