















YIES426AS1 Whirlpool Range - Instructions
Keep searches simple. Use keywords, e.g. "leaking", "pump", "broken" or "fit".
Oven wasn't preheating to temperature
Repair of oven sensor easy to install; however, product did not resolve the problem. Returned new sensor and awaiting refund (2 weeks passed so far).
Parts Used:

-
Margaret from WALDORF, MD
-
Difficulty Level:Really Easy
-
Total Repair Time:30 - 60 mins
-
Tools:Screw drivers
8 of 11 people
found this instruction helpful.
Was this instruction helpful to you?
Thank you for voting!
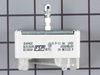
Element wasn't being controlled by the switch it would stay on high
Ordered a new switch and replaced the old one with it.
Parts Used:
-
George from FRANKLIN, KY
-
Difficulty Level:Very Easy
-
Total Repair Time:15 - 30 mins
-
Tools:Screw drivers
6 of 7 people
found this instruction helpful.
Was this instruction helpful to you?
Thank you for voting!
light bulb in water ice freezer door went bad
I didn't. Don't know how to get to light bulb to change it for this specific model
Parts Used:

-
Carl from RIVERSIDE, CA
-
Difficulty Level:Very Difficult
-
Total Repair Time:More than 2 hours
-
Tools:Screw drivers
8 of 14 people
found this instruction helpful.
Was this instruction helpful to you?
Thank you for voting!
Bad element replacement
Took off top and pulled out old element and plugged in the new one
Parts Used:

-
Thomas from Warren, CT
-
Difficulty Level:Easy
-
Total Repair Time:30 - 60 mins
-
Tools:Pliers, Screw drivers, Socket set
9 of 17 people
found this instruction helpful.
Was this instruction helpful to you?
Thank you for voting!
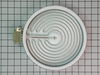
Burned out large range top element
After identifying the part and taking delivery of it, I opened the breaker for the unit and then removed the range top by taking out 2 Phillips screws and lifting the part away from the hinges in the back. The element was attached with only 2 spring loaded clips which I then removed, noting the numbered position of each. I then photographed the wiring (x4) from several angles and removed each of them. I attached the clips to the new element and reconnected the wiring to the main heating element and the sensor per the photographs. The element was then re-positioned into its mounting slots, the range cover was reattached with the screws and the unit tested once power was restored.
Parts Used:
-
Stan from STOW, OH
-
Difficulty Level:Easy
-
Total Repair Time:30 - 60 mins
-
Tools:Pliers, Screw drivers
5 of 5 people
found this instruction helpful.
Was this instruction helpful to you?
Thank you for voting!
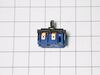
Bard burner switch
Removed rear panel disconnect power from wall removed old switch and replaced with new switch and reassembled
Parts Used:
-
Edward from KISSIMMEE, FL
-
Difficulty Level:Easy
-
Total Repair Time:1- 2 hours
-
Tools:Nutdriver, Screw drivers
5 of 6 people
found this instruction helpful.
Was this instruction helpful to you?
Thank you for voting!
Burner Element did not work
Shut off breaker. Remove a total of 3 screws attach wires, replace screws, turn breaker on. Done!
Parts Used:
-
Paul from Reedsburg, WI
-
Difficulty Level:Really Easy
-
Total Repair Time:15 - 30 mins
-
Tools:Pliers, Screw drivers
7 of 12 people
found this instruction helpful.
Was this instruction helpful to you?
Thank you for voting!
2nd 8 inch burner switch in a little over a year to not always hold selected tempurature.
As a former appliance repairman, the installation went just like the repair instruction video.
Just use care not to scratch anything and clean behind the appliance and cabinet walls, etc. It's worth a hug and a piece of pie!
Just use care not to scratch anything and clean behind the appliance and cabinet walls, etc. It's worth a hug and a piece of pie!
Parts Used:
-
LELAND from HERMISTON, OR
-
Difficulty Level:Really Easy
-
Total Repair Time:15 - 30 mins
-
Tools:Pliers, Screw drivers
4 of 4 people
found this instruction helpful.
Was this instruction helpful to you?
Thank you for voting!
Oven sensor was not regulating heat set for oven
Following your installation, the old part came out easily, with new part installing easily., oven heat is being regulated properly..with range pulled out for part replacement, got that area cleaned too
Parts Used:
-
Linda from SAINT CLOUD, MN
-
Difficulty Level:Really Easy
-
Total Repair Time:30 - 60 mins
-
Tools:Screw drivers
4 of 4 people
found this instruction helpful.
Was this instruction helpful to you?
Thank you for voting!
The burner would operate at full power even with set to low.
The repair was successful. I know the dual element burner was good because it operated at full heat. After installing the dual element control switch, the burner was operating as expected with no further issues. After the back was removed, the dual element control switch was easy to access. After removal of the two Philips screws (and the knob), it's easy to pull out the switch to pry off the two cable harnesses (which are keyed). Removal of the cable harnesses was the hardest part because they come off very hard. I used a flat blade screwdriver to help pry off the harness. Installation of the new dual element control switch was very fast/easy, along with the back cover.
Parts Used:
-
Lance from West Salem, WI
-
Difficulty Level:Really Easy
-
Total Repair Time:15 - 30 mins
-
Tools:Pliers, Screw drivers
4 of 4 people
found this instruction helpful.
Was this instruction helpful to you?
Thank you for voting!
temp sensor went oven not heating
-
patrick from HUGHESTOWN, PA
-
Difficulty Level:Very Easy
-
Total Repair Time:Less than 15 mins
-
Tools:Screw drivers
4 of 5 people
found this instruction helpful.
Was this instruction helpful to you?
Thank you for voting!
Broiler element not working
It went great. I am not very handy, but with a little help from your website reviews, I was able to easily remove the old broiler element and replace it with the new one in less than an hour. I immediately tested it and found that it worked great.
Parts Used:

-
Normand from Lincoln, RI
-
Difficulty Level:Easy
-
Total Repair Time:30 - 60 mins
-
Tools:Screw drivers
6 of 11 people
found this instruction helpful.
Was this instruction helpful to you?
Thank you for voting!
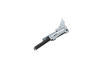
The hinge was mounted on the right . The screw to remove it got it's square head chewed up because of using the wrong ssize driver
I left the old broken hinge in place, & put the new hinge on the left side.
Parts Used:
-
Howard from CROWNSVILLE, MD
-
Difficulty Level:Really Easy
-
Total Repair Time:30 - 60 mins
-
Tools:Screw drivers
3 of 3 people
found this instruction helpful.
Was this instruction helpful to you?
Thank you for voting!
Oven lamp socket had broken center electric tab - failed.
1993 model oven, built in wall model, so didn't to remove oven for the normal rear access to replace the lamp socket. As someone else posted, replacement can be done from inside the oven -- BUT the socket removal was more complex than just 'twisting it out.' But below worked! (1) Turned off oven power at circuit breaker panel. To facilitate working in the oven compartment, removed oven door (2 screws on back of door), raised the over door almost closed, put 2 large nails through the hinge holes when they lined up. Lifted the door out (heavy ~20-25 lbs) and put aside. (2) Put work light inside oven. (3) unscrew glass socket lens and the bulb). (3) Using inspection mirror, studied the inside of the socket to determine that its lock tab type and locations -> were on left and right sides of the socket. These tabs needed to be bent in, but they were each held out by a small circumferential length of think metal, a tab about 3/16" x 3/8". These small tabs could be moved/positioned by just finger friction, with a little start with a screwdriver tip on their edge! I got an end positioned to put sharp screwdriver under that end, then pried it (bent it) inward a short distance. Enough to use needle-nosed pliers to pull it completely out - came fairly easily. Repeated on other side of socket. (4) Then, with pliers, bent each of the 4 locking tabs inward a short distance, Used sharp tool to get one socket edge lifted a small amount; then use mini-pry bar and screwdriver to gently pry around the socket in steps, working evenly around its edge. At about 3/8", it was free. Lifted it inward gently so as not to damage the insulation of the 2 wires attached to its rear. Noted the direction of the wire tabs was straight up (keep same orientation on new socket). (5) Needle-nosed pliers on each connector to gently work the connectors off their socket tabs. Note one tab is larger than the other. Keep the wires inside the oven compartment. Don't damage the insulation. (6) Pushed the wire connectors onto their respective new socket tabs. Aligned socket with the tabs upward, and inserted it, careful to nurse the wires back into the oven wall hole; press socket into the hole, pushing it in evenly and firmly until flush. (7) Pushed in the new type bulb that came with new Socket. Turned on power, and light came on. (8) screwed on new glass cover. (9) Lifted oven back onto the hinge prongs. (easier with two people to get the prongs aligned and into their door slots.) Worked door left and right to get it to lower down fully. Removed nails, lowered door, and put its 2 screws back on. (10) Poured a glass of wine.
Parts Used:

-
Stan from FLAT ROCK, NC
-
Difficulty Level:A Bit Difficult
-
Total Repair Time:30 - 60 mins
-
Tools:Pliers, Screw drivers
3 of 3 people
found this instruction helpful.
Was this instruction helpful to you?
Thank you for voting!
The door wouldn't close.
Watched a video on you tube!
When I ordered the hinge it was recomended to replace both hinges. so I ordered two hinges not knowing that one of the hinges didn't have a spring. I ended up with an extra hinge.
When I ordered the hinge it was recomended to replace both hinges. so I ordered two hinges not knowing that one of the hinges didn't have a spring. I ended up with an extra hinge.
Parts Used:
-
Dorothy from PORT ST LUCIE, FL
-
Difficulty Level:A Bit Difficult
-
Total Repair Time:More than 2 hours
-
Tools:Screw drivers
3 of 3 people
found this instruction helpful.
Was this instruction helpful to you?
Thank you for voting!