















YIES426AS0 Whirlpool Range - Instructions
Keep searches simple. Use keywords, e.g. "leaking", "pump", "broken" or "fit".
Oven not reaching temperature
Simple-pulled range away from wall, unplug from socket. Removed back panel unscrewed thermoses and replace. Put back panel back on plug in, tested temperature setting before sliding range back on place
Parts Used:

-
Marsha from Clermont, FL
-
Difficulty Level:Really Easy
-
Total Repair Time:Less than 15 mins
-
Tools:Screw drivers
2 of 2 people
found this instruction helpful.
Was this instruction helpful to you?
Thank you for voting!
Extremely easy repair
Unplug stove. Remove the two screws attaching the element to the rear of the oven. Carefully pull out. Disconnect wires. Reconnect wires. Screw back in. Done. The hardest part was moving the stove away from the wall.
Parts Used:

-
Melissa from MILL CITY, OR
-
Difficulty Level:Very Easy
-
Total Repair Time:Less than 15 mins
-
Tools:Screw drivers
2 of 2 people
found this instruction helpful.
Was this instruction helpful to you?
Thank you for voting!
Heating element, broken
Unplugged appliance, removed the 2 screws that mount element. Unhooked the electric wires,with pliers.
Connected, the wires to new element replaced the 2 screws. And was done in about 9 minutes.
Connected, the wires to new element replaced the 2 screws. And was done in about 9 minutes.
Parts Used:
-
Frank from COLUMBIA, TN
-
Difficulty Level:Very Easy
-
Total Repair Time:Less than 15 mins
-
Tools:Pliers, Screw drivers
2 of 2 people
found this instruction helpful.
Was this instruction helpful to you?
Thank you for voting!
Bottom element stopped working
Unplug the stove from outlet so no power going to appliance. Had to use wd on screws to help loosen
Little bit of effort to loosen. Took new element from package. Replaced screws just tight donot over tighten. Plug stove into outlet turned on. Did a automatic clean. Oven clean and baked cake later I am back in business and 63 years. Was quote 240.00 to from a local repair person. When using wd make sure you wipe any drip from before turning on oven.
Little bit of effort to loosen. Took new element from package. Replaced screws just tight donot over tighten. Plug stove into outlet turned on. Did a automatic clean. Oven clean and baked cake later I am back in business and 63 years. Was quote 240.00 to from a local repair person. When using wd make sure you wipe any drip from before turning on oven.
Parts Used:
-
ArLinda from ALTON, IL
-
Difficulty Level:Really Easy
-
Total Repair Time:30 - 60 mins
-
Tools:Screw drivers
2 of 2 people
found this instruction helpful.
Was this instruction helpful to you?
Thank you for voting!
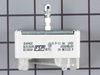
R/Front Range Element would not change to Med or Low setting. Stayed on full hot and burned food.
I disconnected power cord from house current. Removed back panels (2). I then removed round knob on front of range. I then removed the 2 screws holding the switch in place. After doing that, I gently removed the actual switch itself from back of face panel. I then separated the 2 elements of the switch.
I took new replacement switch and reinstalled the 2 parts of switch and placed back into hole in face panel. I reinserted the 2 front screws that holds the switch in place. I put the selection knob back on. However, the knob does not fit tightly. The shaft on the switch itself is to long, but the switch works fine. You do not even know that knob sticks out further than before. I plugged unit back into house current and tested range element to see if it works. It did so with no problem. I then replaced rear panels and secured all screws back to their original location and that was all there was to it.
No problem. Was a fast and effective installation.
I took new replacement switch and reinstalled the 2 parts of switch and placed back into hole in face panel. I reinserted the 2 front screws that holds the switch in place. I put the selection knob back on. However, the knob does not fit tightly. The shaft on the switch itself is to long, but the switch works fine. You do not even know that knob sticks out further than before. I plugged unit back into house current and tested range element to see if it works. It did so with no problem. I then replaced rear panels and secured all screws back to their original location and that was all there was to it.
No problem. Was a fast and effective installation.
Parts Used:
-
John from KENNEWICK, WA
-
Difficulty Level:Easy
-
Total Repair Time:30 - 60 mins
-
Tools:Screw drivers
2 of 2 people
found this instruction helpful.
Was this instruction helpful to you?
Thank you for voting!
Bake element was broken
Remove the old part and install the new part.
Parts Used:
-
Alexander from LINCOLN, NE
-
Difficulty Level:Really Easy
-
Total Repair Time:30 - 60 mins
-
Tools:Pliers, Screw drivers
2 of 2 people
found this instruction helpful.
Was this instruction helpful to you?
Thank you for voting!
Door hinge fell apart
-
myron from west salem, WI
-
Difficulty Level:Really Easy
-
Total Repair Time:30 - 60 mins
-
Tools:Screw drivers
2 of 2 people
found this instruction helpful.
Was this instruction helpful to you?
Thank you for voting!
Very hard to close the door range, especially one way and it sticks to close.
First, view videos to know what is an active door range problem.
Second, when you know the problem, see videos on you tube and be sure you will replace the right part
Third, I go to Part Select, see reference video for your problem if you need and buy the part on line, good price, very quick delivery.
Second, when you know the problem, see videos on you tube and be sure you will replace the right part
Third, I go to Part Select, see reference video for your problem if you need and buy the part on line, good price, very quick delivery.
Parts Used:
-
Joanne from LAUDERHILL, FL
-
Difficulty Level:Very Easy
-
Total Repair Time:30 - 60 mins
-
Tools:Screw drivers
2 of 2 people
found this instruction helpful.
Was this instruction helpful to you?
Thank you for voting!
Active spring broken
Removed the oven door listened to a video/You tube and the rest was easy.When you remove the door panels make sure all the parts are assembled correctly.
Parts Used:
-
Angelo from NAPLES, FL
-
Difficulty Level:A Bit Difficult
-
Total Repair Time:1- 2 hours
-
Tools:Screw drivers
2 of 3 people
found this instruction helpful.
Was this instruction helpful to you?
Thank you for voting!
Burner didn’t work right
-
Ralph from MARION, OH
-
Difficulty Level:Really Easy
-
Total Repair Time:30 - 60 mins
-
Tools:Screw drivers
2 of 3 people
found this instruction helpful.
Was this instruction helpful to you?
Thank you for voting!
Replace Door Hinges
So glad I found the parts I needed! I followed the GREAT video instructions on this site and when I opened the oven door up discovered there had only been ONE spring inside this whole time! I replaced both springs & hinges easily, cleaned up the glass while I had the door off, and everything went right back into place!
Parts Used:
-
Glenda from ROCK HILL, SC
-
Difficulty Level:Very Easy
-
Total Repair Time:30 - 60 mins
-
Tools:Screw drivers
2 of 3 people
found this instruction helpful.
Was this instruction helpful to you?
Thank you for voting!
the oven temperature was not working right. I installed a new oven sensor. Works get now
-
Rosalind from APOLLO, PA
-
Difficulty Level:Very Easy
-
Total Repair Time:15 - 30 mins
-
Tools:Screw drivers
3 of 6 people
found this instruction helpful.
Was this instruction helpful to you?
Thank you for voting!
temp level uneven
-
Paul from HARMONY, MN
-
Difficulty Level:Very Easy
-
Total Repair Time:15 - 30 mins
2 of 3 people
found this instruction helpful.
Was this instruction helpful to you?
Thank you for voting!
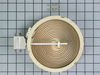
Coil shorted out.
Removed cooktop, wiring and coil. Marked where wires went on limiter
tabs. Ordered coil 1200 Watt, received a 1500 one. Sent back to PS with prepaid shipping label {great}. New one had a different limiter tab arrangement. The instructions included warned this but doesn't tell you where to put the wiring. Instructions say to remove the old limiter and put it on the new coil but this can not be physically be done plus who would want an old limiter on a new coil.
Found a YOU TUBE video on how to test and place wires on limiter switches which shows the number letter sequence on the ceramic part. Maybe PS will put that info in their instructions. Coil works great !!
tabs. Ordered coil 1200 Watt, received a 1500 one. Sent back to PS with prepaid shipping label {great}. New one had a different limiter tab arrangement. The instructions included warned this but doesn't tell you where to put the wiring. Instructions say to remove the old limiter and put it on the new coil but this can not be physically be done plus who would want an old limiter on a new coil.
Found a YOU TUBE video on how to test and place wires on limiter switches which shows the number letter sequence on the ceramic part. Maybe PS will put that info in their instructions. Coil works great !!
Parts Used:
-
James from HILTON, NY
-
Difficulty Level:A Bit Difficult
-
Total Repair Time:15 - 30 mins
-
Tools:Nutdriver, Pliers
1 person
found this instruction helpful.
Was this instruction helpful to you?
Thank you for voting!
Right front burner would only stay on high
Turned off breaker, pulled stove from wall, took off knob, unscrewed and pull off backing from stove, unscrewed heat control part, unplugged wires, plugged into new part, installed part, replaced stove backing, replaced knob, pushed stove back in place and turned on breaker. It worked fine.
Parts Used:
-
Brian from YORK HAVEN, PA
-
Difficulty Level:Really Easy
-
Total Repair Time:15 - 30 mins
-
Tools:Screw drivers
1 person
found this instruction helpful.
Was this instruction helpful to you?
Thank you for voting!