















YIES426AS0 Whirlpool Range - Instructions
Keep searches simple. Use keywords, e.g. "leaking", "pump", "broken" or "fit".
The Range took forever to achieve the proper heating temperature with an inability to maintain a steady heat
I removed the bottom drawer,unplugged the Range and pulled it out to expose the rear cover panel. Using a nut driver (a screw driver can be used), I removed the rear panel to expose the Thermal fuse located almost dead center in the back of the Range. Unplug the two wires and loosen the screw holding it in position. Replace the thermal fuse, plug the two wires into the new part and replace the rear cover panel. Return the Range to its original position and plug it in. The job is done in less than 30 minutes.
Parts Used:

-
Robert from Mifflinburg, PA
-
Difficulty Level:Really Easy
-
Total Repair Time:15 - 30 mins
-
Tools:Nutdriver
3 of 4 people
found this instruction helpful.
Was this instruction helpful to you?
Thank you for voting!
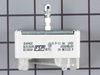
8" surface element stayed on high.
Pulled range out from wall, unplugged AC, unplugged infinite switch, plugged in new switch, broke off end of stem, plugged AC in put range back and tested.
Parts Used:

-
Donald from STOCKTON, NJ
-
Difficulty Level:Really Easy
-
Total Repair Time:15 - 30 mins
-
Tools:Pliers
2 of 2 people
found this instruction helpful.
Was this instruction helpful to you?
Thank you for voting!
Compressor would not shut off at the maximum recommended pressure (150psi)
Removed face plate (4 screws). Removed 2 screws holding manifold in place. Detached wires from the switch. No need to mark them - they don't have to go back on any particular terminal. Remove the switch from the manifold with an adjustable wrench. Replace with new switch (thread sealing compound on the new switch is sufficient - no need for teflon tape). Reattach wires and reassemble manifold and face plate. Easy fix!
Parts Used:
-
Mark from SYLVA, NC
-
Difficulty Level:Really Easy
-
Total Repair Time:15 - 30 mins
-
Tools:Screw drivers, Wrench (Adjustable)
2 of 2 people
found this instruction helpful.
Was this instruction helpful to you?
Thank you for voting!
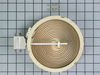
Element burn. Not working.
Element was sent by buyer, As they recommended, when model of stove given to them. It was upper right rear. When element came. First took off old element. ...Match both element , new element did not look exactly the same, small variation. It did not come on.. I moved old element from left side to right side . Old element worked on both side .. tried new element on left side also.. still didn't work.. so I called right away and explained.. new element did not work.. not defective, but, just wasn't the right one.. I had a specialist came and check it out also. I was told wrong element.
Parts Used:
-
Marc from SUNRISE, FL
-
Difficulty Level:Really Easy
-
Total Repair Time:Less than 15 mins
-
Tools:Pliers, Screw drivers
2 of 2 people
found this instruction helpful.
Was this instruction helpful to you?
Thank you for voting!
Broiler element burned out
After doing a YouTube search. I successfully completed the repair by easily diagnosing the issue with the element.
I watched a video about 5 most common problems with whirlpool broiler elements.
The first being to inspect the element for damage. I found a small section that appeared to be rough and had a raised bump.
I decided to order a new element because the oven is older and it wouldn’t hurt to install a new one even if this wasn’t the issue.
Once the part arrived, which it did quickly, I followed the video instructions. It was easy and straight forward. I completed the task in under thirty minutes. It was very simple and I now have a functional broiler element.
I watched a video about 5 most common problems with whirlpool broiler elements.
The first being to inspect the element for damage. I found a small section that appeared to be rough and had a raised bump.
I decided to order a new element because the oven is older and it wouldn’t hurt to install a new one even if this wasn’t the issue.
Once the part arrived, which it did quickly, I followed the video instructions. It was easy and straight forward. I completed the task in under thirty minutes. It was very simple and I now have a functional broiler element.
Parts Used:

-
chris from HILTON HEAD, SC
-
Difficulty Level:Really Easy
-
Total Repair Time:15 - 30 mins
-
Tools:Screw drivers
3 of 5 people
found this instruction helpful.
Was this instruction helpful to you?
Thank you for voting!
Drawer guides missingJust
-
Mark from Killbuck, OH
-
Difficulty Level:Really Easy
-
Total Repair Time:15 - 30 mins
-
Tools:Screw drivers
3 of 5 people
found this instruction helpful.
Was this instruction helpful to you?
Thank you for voting!
Sparks flying out of the oven, broiler element melting
First Things first, unplug unit, remove rear cover with Phillips head screwdriver, disconnect, wires from broiler element which is the top, one, open oven, unscrew top screws first, then two at the back, wiggle out element, then reverse Steps , test repair before putting cover back on. Then ta-da, you saved yourself a $300. Service call to the appliance repair guy.
Parts Used:
-
corey from SHAKER HEIGHTS, OH
-
Difficulty Level:Really Easy
-
Total Repair Time:15 - 30 mins
-
Tools:Screw drivers
2 of 2 people
found this instruction helpful.
Was this instruction helpful to you?
Thank you for voting!
Could not control temperature for 8" burner (front right).
The repair was easy. I unplugged the stove, removed back panel, pulled knob and removed 2 screws to remove switch. Unplugged old switch, plugged in new one and installed the 2 screws for switch. Had to snap off stem for new switch to fit knob (easily done with pliers with provided notch). Put knob and back panel back on. Total time, maybe 20 minutes.
Parts Used:
-
Sean from LISLE, NY
-
Difficulty Level:Really Easy
-
Total Repair Time:15 - 30 mins
-
Tools:Pliers, Screw drivers
2 of 2 people
found this instruction helpful.
Was this instruction helpful to you?
Thank you for voting!
Dual burner would go to highn heat.
Watched video & did just guy in video did. Very easy job & the burner works like new.
Parts Used:
-
LOUIS C from GRAND JCT, CO
-
Difficulty Level:Really Easy
-
Total Repair Time:15 - 30 mins
-
Tools:Screw drivers
2 of 2 people
found this instruction helpful.
Was this instruction helpful to you?
Thank you for voting!
Replacing the bulb in the freezer side
Removed the ice brucket,
Removed the light shield by releasing one screw using a nutdriver.
Replacing the bulb and reinstalled the light shield.
Your web site is one of the best and most helpfull service sites I ever used. Just wish that in the future you will ship parts overseas.
Removed the light shield by releasing one screw using a nutdriver.
Replacing the bulb and reinstalled the light shield.
Your web site is one of the best and most helpfull service sites I ever used. Just wish that in the future you will ship parts overseas.
Parts Used:

-
Yafa (and David) from Bothell, WA
-
Difficulty Level:Easy
-
Total Repair Time:Less than 15 mins
-
Tools:Nutdriver
5 of 11 people
found this instruction helpful.
Was this instruction helpful to you?
Thank you for voting!
Burner would stay on when switch set to low heat
Unplug and pull out range.
Unscrew the back of the range with Phillips #2.
Unplug wiring harness from switch.
Unscrew the switch from the front of the range with P2 driver.
Install and plug in new switch.
Remove the spring steel knob retainer from shaft.
Cut off extra knob shaft with dremel to match others (there is a narrow segment at the proper length).
Reinstall knob retainer, knob, and range panels.
Unscrew the back of the range with Phillips #2.
Unplug wiring harness from switch.
Unscrew the switch from the front of the range with P2 driver.
Install and plug in new switch.
Remove the spring steel knob retainer from shaft.
Cut off extra knob shaft with dremel to match others (there is a narrow segment at the proper length).
Reinstall knob retainer, knob, and range panels.
Parts Used:
-
Casey from WARBA, MN
-
Difficulty Level:Really Easy
-
Total Repair Time:Less than 15 mins
-
Tools:Screw drivers
2 of 2 people
found this instruction helpful.
Was this instruction helpful to you?
Thank you for voting!
Baking element had burned into

-
Rebecca from LANCASTER, SC
-
Difficulty Level:Very Easy
-
Total Repair Time:Less than 15 mins
-
Tools:Screw drivers
2 of 2 people
found this instruction helpful.
Was this instruction helpful to you?
Thank you for voting!
Replaced screw

-
Judith from SALEM, OR
-
Difficulty Level:Very Easy
-
Total Repair Time:Less than 15 mins
-
Tools:Screw drivers
2 of 2 people
found this instruction helpful.
Was this instruction helpful to you?
Thank you for voting!
Oven bake would not heat up at all.
Very simple.
Remove 2 mount screws using a #2 phillips screwdriver.
Pull the element out to expose the 2 wires.
Using pliers, slip both wire terminals off the existing element.
Push wires onto the new element and install both mounting screws..
Done!
NOTE: The existing element showed no exterior signs of being bad.
The damage must have been internal.
Remove 2 mount screws using a #2 phillips screwdriver.
Pull the element out to expose the 2 wires.
Using pliers, slip both wire terminals off the existing element.
Push wires onto the new element and install both mounting screws..
Done!
NOTE: The existing element showed no exterior signs of being bad.
The damage must have been internal.
Parts Used:
-
Wilton from CANYON LAKE, TX
-
Difficulty Level:Very Easy
-
Total Repair Time:Less than 15 mins
-
Tools:Pliers, Screw drivers
2 of 2 people
found this instruction helpful.
Was this instruction helpful to you?
Thank you for voting!
Old lower element fell apart
1. Unplug the power
2. Unscrew the two screws that hold the element
3. Pull the element out a little to expose the wires.
4. Gently pull off each wire (best done with needle nose) MAKE SURE THE WIRES DONT FALL INTO THE BACK OF THE OVEN.
5. Firmly seat wires back onto new element and replace screws
6. Bake stuff!
2. Unscrew the two screws that hold the element
3. Pull the element out a little to expose the wires.
4. Gently pull off each wire (best done with needle nose) MAKE SURE THE WIRES DONT FALL INTO THE BACK OF THE OVEN.
5. Firmly seat wires back onto new element and replace screws
6. Bake stuff!
Parts Used:
-
Matthew from MIDDLETOWN, CT
-
Difficulty Level:Very Easy
-
Total Repair Time:Less than 15 mins
-
Tools:Pliers, Screw drivers
2 of 2 people
found this instruction helpful.
Was this instruction helpful to you?
Thank you for voting!