















YIES350XW3 Whirlpool Range - Instructions
Keep searches simple. Use keywords, e.g. "leaking", "pump", "broken" or "fit".
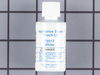
Scratches in Surface
This product comes in a bottle with a brush like Liquid Paper. It goes on incredibly easy. A second coat might be needed. I wanted to prevent rust from setting in so I covered the scratches and dings. The paint is a little brighter since my washer is 10 years old but it still looks great.
Parts Used:
-
Michelle from Richardson, TX
-
Difficulty Level:Really Easy
-
Total Repair Time:Less than 15 mins
83 of 227 people
found this instruction helpful.
Was this instruction helpful to you?
Thank you for voting!
Bottom door trim was rusted
Removed oven door and the 3 screws holding the bottom door trim. Attached new trim piece and reinstalled oven door. Entire job took less than 5 minutes.
Parts Used:

-
Timothy from Terre Haute, IN
-
Difficulty Level:Really Easy
-
Total Repair Time:Less than 15 mins
-
Tools:Screw drivers
11 of 13 people
found this instruction helpful.
Was this instruction helpful to you?
Thank you for voting!
Oven light would not work--faulty socket
After removing the back of the stove, the old light socket was fairly easy to remove. The new socket slipped in place and the wires reattached and now the oven has a light again. A very simple process--especially for someone who's not an expert in repairing appliances.
Parts Used:

-
Delores from Warren, MN
-
Difficulty Level:Easy
-
Total Repair Time:15 - 30 mins
-
Tools:Screw drivers, Socket set
10 of 12 people
found this instruction helpful.
Was this instruction helpful to you?
Thank you for voting!
Baked on sauce
Used cooktop creme, oven cleaner and Mr. Clean sponges. After many days of working on the surface, we were able to remove 99% of the sauce.
Parts Used:

-
Julie from Newnan, GA
-
Difficulty Level:A Bit Difficult
-
Total Repair Time:More than 2 hours
11 of 15 people
found this instruction helpful.
Was this instruction helpful to you?
Thank you for voting!
Broiler element failed
Slide range out,unplug range,remove rear cover to unplug element wires, open door remove screws inside oven remove element
Parts Used:

-
steven from SEDRO WOOLLEY, WA
-
Difficulty Level:Very Easy
-
Total Repair Time:15 - 30 mins
-
Tools:Screw drivers
9 of 10 people
found this instruction helpful.
Was this instruction helpful to you?
Thank you for voting!
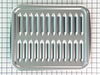
Purchased home but stove had no broiler pan.
-
Raymond from BLOOMINGTON, MN
-
Difficulty Level:Very Easy
-
Total Repair Time:Less than 15 mins
16 of 31 people
found this instruction helpful.
Was this instruction helpful to you?
Thank you for voting!
Oven wasn't preheating to temperature
Repair of oven sensor easy to install; however, product did not resolve the problem. Returned new sensor and awaiting refund (2 weeks passed so far).
Parts Used:

-
Margaret from WALDORF, MD
-
Difficulty Level:Really Easy
-
Total Repair Time:30 - 60 mins
-
Tools:Screw drivers
8 of 11 people
found this instruction helpful.
Was this instruction helpful to you?
Thank you for voting!
Both right and left side trims were broken.
Ordered both parts using the excellent breakdown illustrations of the door. Received the parts along with video instructions on how to repair.
Parts Used:


-
A D from HOUSTON, TX
-
Difficulty Level:Really Easy
-
Total Repair Time:30 - 60 mins
-
Tools:Screw drivers
6 of 6 people
found this instruction helpful.
Was this instruction helpful to you?
Thank you for voting!
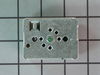
The 8-inch burner only heated on high regardless of the temperature setting dialed in.
Unplugged stove from electrical outlet. Pulled temperature control dial off by hand. Remove screws to top back stove panel with Phillips screwdriver. Removed top stove back panel. Unscrewed broken infinity switch from stove. Unclipped wiring harness to broken switch by prying loose with flat head screw driver. Reclipped wiring harness to new switch. Screwed replacement switch back onto stove. Reattached back panel with screws.
Parts Used:
-
Reginald from PLAINFIELD, IN
-
Difficulty Level:Very Easy
-
Total Repair Time:15 - 30 mins
-
Tools:Screw drivers
6 of 7 people
found this instruction helpful.
Was this instruction helpful to you?
Thank you for voting!
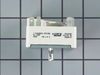
The burner would not shut off.
Pulled the dial off, unscrew two screws. Pull the switch out from the back. Disconnect the wires from the old switch and connect to the new switch one by one. Set the new switch in place. Sctew the two screws in to hold the switch in place. Push on the dial.
Parts Used:
-
Richard from CONCORD, NH
-
Difficulty Level:Really Easy
-
Total Repair Time:15 - 30 mins
-
Tools:Pliers, Screw drivers
6 of 8 people
found this instruction helpful.
Was this instruction helpful to you?
Thank you for voting!
light bulb in water ice freezer door went bad
I didn't. Don't know how to get to light bulb to change it for this specific model
Parts Used:

-
Carl from RIVERSIDE, CA
-
Difficulty Level:Very Difficult
-
Total Repair Time:More than 2 hours
-
Tools:Screw drivers
8 of 14 people
found this instruction helpful.
Was this instruction helpful to you?
Thank you for voting!
I broke a piece of the trim and had to replace it
took the handle off, replaces the side trim piece and replaced the handle. Very simple!
Parts Used:
-
Gregg from SOUTH BEND, IN
-
Difficulty Level:Really Easy
-
Total Repair Time:30 - 60 mins
-
Tools:Screw drivers
4 of 4 people
found this instruction helpful.
Was this instruction helpful to you?
Thank you for voting!
Oven sensor was not regulating heat set for oven
Following your installation, the old part came out easily, with new part installing easily., oven heat is being regulated properly..with range pulled out for part replacement, got that area cleaned too
Parts Used:
-
Linda from SAINT CLOUD, MN
-
Difficulty Level:Really Easy
-
Total Repair Time:30 - 60 mins
-
Tools:Screw drivers
4 of 4 people
found this instruction helpful.
Was this instruction helpful to you?
Thank you for voting!
Loose terminal caused block to overheat and break
Removed all terminals and block mounting screws. Repaired one burnt terminal and reassembled. Replacement part was an exact fit and reassembly whnet very well.
Parts Used:

-
Dana from Black Mountain, NC
-
Difficulty Level:Really Easy
-
Total Repair Time:Less than 15 mins
-
Tools:Nutdriver, Screw drivers
6 of 10 people
found this instruction helpful.
Was this instruction helpful to you?
Thank you for voting!
temp sensor went oven not heating
-
patrick from HUGHESTOWN, PA
-
Difficulty Level:Very Easy
-
Total Repair Time:Less than 15 mins
-
Tools:Screw drivers
4 of 5 people
found this instruction helpful.
Was this instruction helpful to you?
Thank you for voting!