















YAER6303MFS1 Whirlpool Range - Instructions
Keep searches simple. Use keywords, e.g. "leaking", "pump", "broken" or "fit".
Heating element, broken
Unplugged appliance, removed the 2 screws that mount element. Unhooked the electric wires,with pliers.
Connected, the wires to new element replaced the 2 screws. And was done in about 9 minutes.
Connected, the wires to new element replaced the 2 screws. And was done in about 9 minutes.
Parts Used:

-
Frank from COLUMBIA, TN
-
Difficulty Level:Very Easy
-
Total Repair Time:Less than 15 mins
-
Tools:Pliers, Screw drivers
2 of 2 people
found this instruction helpful.
Was this instruction helpful to you?
Thank you for voting!
Burner didn’t work
I shut off the breaker to the stove. I removed 2 screws from the underside of the cooktop at the front of the unit. I raised the cooktop and had my helper hold the top at an angle to access the burner. I removed 2 screws attached to the burner and then loosened the 2 clips and moved them to release the burner. I transferred the electrical connections from the old to the new. Reinstalled the burner and cooktop. Turned the breaker on, tested the new burner and I was fone
Parts Used:

-
Marc from MIDDLETOWN, CT
-
Difficulty Level:Easy
-
Total Repair Time:15 - 30 mins
-
Tools:Nutdriver, Screw drivers
2 of 2 people
found this instruction helpful.
Was this instruction helpful to you?
Thank you for voting!
Broiler element burned out
After doing a YouTube search. I successfully completed the repair by easily diagnosing the issue with the element.
I watched a video about 5 most common problems with whirlpool broiler elements.
The first being to inspect the element for damage. I found a small section that appeared to be rough and had a raised bump.
I decided to order a new element because the oven is older and it wouldn’t hurt to install a new one even if this wasn’t the issue.
Once the part arrived, which it did quickly, I followed the video instructions. It was easy and straight forward. I completed the task in under thirty minutes. It was very simple and I now have a functional broiler element.
I watched a video about 5 most common problems with whirlpool broiler elements.
The first being to inspect the element for damage. I found a small section that appeared to be rough and had a raised bump.
I decided to order a new element because the oven is older and it wouldn’t hurt to install a new one even if this wasn’t the issue.
Once the part arrived, which it did quickly, I followed the video instructions. It was easy and straight forward. I completed the task in under thirty minutes. It was very simple and I now have a functional broiler element.
Parts Used:

-
chris from HILTON HEAD, SC
-
Difficulty Level:Really Easy
-
Total Repair Time:15 - 30 mins
-
Tools:Screw drivers
3 of 5 people
found this instruction helpful.
Was this instruction helpful to you?
Thank you for voting!
temp level uneven

-
Paul from HARMONY, MN
-
Difficulty Level:Very Easy
-
Total Repair Time:15 - 30 mins
2 of 3 people
found this instruction helpful.
Was this instruction helpful to you?
Thank you for voting!
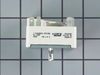
could not control the temp of the element
take off back panel, simply unplug the old switch and plug in the new one. Simple
Parts Used:
-
Steve from GREENBRIER, TN
-
Difficulty Level:Very Easy
-
Total Repair Time:Less than 15 mins
-
Tools:Nutdriver, Screw drivers
2 of 3 people
found this instruction helpful.
Was this instruction helpful to you?
Thank you for voting!
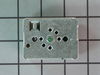
Burner did not always reduce heat when temp. Was lowered.
My husband unscrewed the bad switch and replaced with the new one.
Parts Used:
-
Annie S from RIDGEVILLE, SC
-
Difficulty Level:Really Easy
-
Total Repair Time:15 - 30 mins
-
Tools:Screw drivers
2 of 3 people
found this instruction helpful.
Was this instruction helpful to you?
Thank you for voting!
the oven temperature was not working right. I installed a new oven sensor. Works get now
-
Rosalind from APOLLO, PA
-
Difficulty Level:Very Easy
-
Total Repair Time:15 - 30 mins
-
Tools:Screw drivers
3 of 6 people
found this instruction helpful.
Was this instruction helpful to you?
Thank you for voting!
Oven would not heat up.
Unplugged the range. Opened the oven door and took out the shelves. Took the right screw out, but had trouble getting the left one out do to the age of the range. Unhooked the two wires and took the element out. Put the new one in and hooked up the two wires. Attached the two screws and checked to see that the element laid flat and then tighten screws. Closed the door and plugged the range back in and turned the oven on and it worked perfect.
Parts Used:
-
Johnie from PARKERSBURG, WV
-
Difficulty Level:Really Easy
-
Total Repair Time:15 - 30 mins
-
Tools:Screw drivers
1 person
found this instruction helpful.
Was this instruction helpful to you?
Thank you for voting!
Electric burner element not working
Video said to remove screws and lift stove top off, remove contacts and ground. My stove top was hinged and required me to lift and pivot stovetop up. The burners were anchored to the stove base not the top. I secured the topso that it would not drop down and proceeded with repair
Parts Used:
-
Ronald from The Villages, FL
-
Difficulty Level:A Bit Difficult
-
Total Repair Time:30 - 60 mins
-
Tools:Pliers, Screw drivers
1 person
found this instruction helpful.
Was this instruction helpful to you?
Thank you for voting!
Over heating element.
Just turn off power , remover screws. Remove and plug in new part.
Parts Used:
-
carlos from TRACY, CA
-
Difficulty Level:Easy
-
Total Repair Time:30 - 60 mins
-
Tools:Screw drivers
1 person
found this instruction helpful.
Was this instruction helpful to you?
Thank you for voting!
range would not heat right
-
bobby from HERSCHER, IL
-
Difficulty Level:Really Easy
-
Total Repair Time:30 - 60 mins
-
Tools:Screw drivers
1 person
found this instruction helpful.
Was this instruction helpful to you?
Thank you for voting!
surface element not working
Ordered new element from PartSelect. It arrived shortly. It did not match the original. Guy at appliance store explained how I could connect the wires on the new one. It still did not fix the problem. A repair man tried for 2.5 hours to fix it with no success. Now I will return the replacement element in the return envelope provided.
Parts Used:
-
bruce from PORTLAND, OR
-
Difficulty Level:Really Easy
-
Total Repair Time:More than 2 hours
-
Tools:Pliers, Screw drivers, Socket set
1 person
found this instruction helpful.
Was this instruction helpful to you?
Thank you for voting!
Replacing oven light and socket
The old part, including lightbulb and socket, had corroded into place, and the glass light cover was stuck to the socket. I used a dead blow hammer and a dowel just under the diameter of the hole to tap on the back side of the socket to loosen it and get it out. The metal tabs on the old socket were folded back to make it fit better (?), which made it harder to remove. Lots of muscling of the part to get it out. Easy to install new part once old one was out of the way. An experienced person would have removed the old part and installed the new in no time.
Parts Used:

-
Carol from BELLINGHAM, WA
-
Difficulty Level:A Bit Difficult
-
Total Repair Time:1- 2 hours
-
Tools:Pliers, Screw drivers, Wrench (Adjustable)
1 person
found this instruction helpful.
Was this instruction helpful to you?
Thank you for voting!
electrical short from oven light.
I trouble shot and traced out to electrical short in face panel and found burnt wires. I've been a licensed electrician for years and it takes alot of comon sense to trouble shoot and find problem. I found schetch-matic of appliance and searched computor and found partselect.com and tried it. It wasnt no time and the part was at my door. Thank you partselect and i would use them again in the future. billy
Parts Used:
-
William H. from morehead city, NC
-
Difficulty Level:A Bit Difficult
-
Total Repair Time:1- 2 hours
-
Tools:Nutdriver, Pliers, Screw drivers
2 of 4 people
found this instruction helpful.
Was this instruction helpful to you?
Thank you for voting!
Bake element died
Followed instructions on urine that you provided. Instructions were great.
Only problem had was the screw was hard to get loose on one due to oven usage from previous people but I got it after a bit and then fairly simple from there. Unplugged and plugged new element in. Works although seems to run a bit hotter than before.
Only problem had was the screw was hard to get loose on one due to oven usage from previous people but I got it after a bit and then fairly simple from there. Unplugged and plugged new element in. Works although seems to run a bit hotter than before.
Parts Used:
-
Jill from LYNNWOOD, WA
-
Difficulty Level:Easy
-
Total Repair Time:30 - 60 mins
-
Tools:Screw drivers
1 person
found this instruction helpful.
Was this instruction helpful to you?
Thank you for voting!