















WRX735SDHB01 Whirlpool Refrigerator - Instructions
Keep searches simple. Use keywords, e.g. "leaking", "pump", "broken" or "fit".
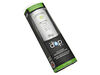
The filter was clogged.
Replaced filter and the water started to flow like the Nile River and the ice maker came back to life.
Parts Used:
-
Debbie from Bluffton, SC
-
Difficulty Level:Easy
-
Total Repair Time:Less than 15 mins
8 of 14 people
found this instruction helpful.
Was this instruction helpful to you?
Thank you for voting!
Did not need filter
-
Geraldine from MUNDELEIN, IL
-
Difficulty Level:Very Easy
-
Total Repair Time:15 - 30 mins
5 of 6 people
found this instruction helpful.
Was this instruction helpful to you?
Thank you for voting!
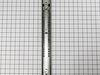
Broken black plastic spring mechanism inside freezer rail
Remove rail and removed broken black plastic spring mechanism with new one and then replace rail.
Parts Used:
-
Ronald from WESTERVILLE, OH
-
Difficulty Level:Really Easy
-
Total Repair Time:30 - 60 mins
-
Tools:Nutdriver, Screw drivers
7 of 12 people
found this instruction helpful.
Was this instruction helpful to you?
Thank you for voting!
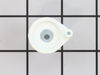
RH door closure broke
Removed the door and replaced the broken door closure bushing. I had courteous help and responce from Parts Select people. Excelent turn around time on parts delivery.
Parts Used:
-
Estel from Luling, TX
-
Difficulty Level:Easy
-
Total Repair Time:1- 2 hours
-
Tools:Nutdriver, Screw drivers
10 of 21 people
found this instruction helpful.
Was this instruction helpful to you?
Thank you for voting!
Noisy damper
Easy fix, it's right in the back of the fridge under a cover that just clips in, a piece of foam, and two screws. The hardest part is getting the clips free without breaking them. After replacement it's silent instead of making a grinding noise regularly.
Parts Used:

-
Keith from OLYMPIA, WA
-
Difficulty Level:Really Easy
-
Total Repair Time:Less than 15 mins
-
Tools:Screw drivers
4 of 4 people
found this instruction helpful.
Was this instruction helpful to you?
Thank you for voting!
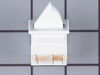
Broke the Rocker Switch in Fridge side
Popped out with butter knife and unplugged 3 prong connector and reversed with anew switch.
But, unfortunately it got broken again exactly same way as before.
So, I ordered same switch again for 2nd time.
Maytag should recall that Rocker Switch and build with better materials.
But, unfortunately it got broken again exactly same way as before.
So, I ordered same switch again for 2nd time.
Maytag should recall that Rocker Switch and build with better materials.
Parts Used:
-
Sung-Su from BISMARCK, ND
-
Difficulty Level:Very Easy
-
Total Repair Time:Less than 15 mins
4 of 4 people
found this instruction helpful.
Was this instruction helpful to you?
Thank you for voting!
Control noisy when opening and closing removed damper housing
Pop off vent cover remove 2 screws removed cover housing and foam. Removed damper by unclipping tabs on left and right side of control lift up and out. Unplugged power wires reinstalled in reverse order.
Parts Used:
-
Nelson from CATSKILL, NY
-
Difficulty Level:Easy
-
Total Repair Time:Less than 15 mins
-
Tools:Screw drivers
4 of 4 people
found this instruction helpful.
Was this instruction helpful to you?
Thank you for voting!
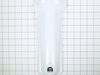
A cover over the water filter was broken
The old cover was off and I just slid the replacement part that I got from you'll, it just slid in place and snapped close. Perfect fit. Thanks guys
Parts Used:
-
Jerry from MIDLOTHIAN, VA
-
Difficulty Level:Very Easy
-
Total Repair Time:Less than 15 mins
4 of 5 people
found this instruction helpful.
Was this instruction helpful to you?
Thank you for voting!
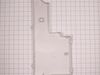
Pan is easy part, fan motor assembly is appliance orgami
Remove back cover
Remove drip thing from top to tray in the back
Remove fan motor assembly. This is squirrely. Top bends towards you, bottom pushes in to the unit. Not fun.
CAREFULLY remove copper tube that rests on drip tray
Remove tray - there are clips in the front that get released by screwdriver
Clean up
Replace new tray
Replace copper tube
Play with fan motor assembly till it fits. It doesn't look like it's gonna work until it does. See youtube videos on this.
Replace drip thing from top to tray - I forgot this one the first time.
Replace cover.
This is a simple, but squirrely, repair. Right on the border of easy (because so few tools and steps) and A Bit Difficult because of the patience required.
Remove drip thing from top to tray in the back
Remove fan motor assembly. This is squirrely. Top bends towards you, bottom pushes in to the unit. Not fun.
CAREFULLY remove copper tube that rests on drip tray
Remove tray - there are clips in the front that get released by screwdriver
Clean up
Replace new tray
Replace copper tube
Play with fan motor assembly till it fits. It doesn't look like it's gonna work until it does. See youtube videos on this.
Replace drip thing from top to tray - I forgot this one the first time.
Replace cover.
This is a simple, but squirrely, repair. Right on the border of easy (because so few tools and steps) and A Bit Difficult because of the patience required.
Parts Used:
-
Thomas from MELBOURNE, FL
-
Difficulty Level:Easy
-
Total Repair Time:15 - 30 mins
-
Tools:Nutdriver, Screw drivers
4 of 5 people
found this instruction helpful.
Was this instruction helpful to you?
Thank you for voting!
Light switch that causes light to turn on when door is open was nroken.
Truth is, this took a couple hours of cursing, but that was due to poor information and no prior experience. I imagine the next one would take 20 minutes. The issues are these: videos tell you to use a putty knife to pry the old switch out. That is harder than it seems because each switch has a plastic spring that pops open to hold the switch on, and you can't access the spring when the switch is installed. So it is important to use the knife on the side of the switch (left or right of spring -- look at the new switch), and back and forth until the switch is worked out. Then it can get worse. The new switch has to plug in electrically before it can be installed mechanically. In my case, with the switch on the fridge wall rather than the top, the outlet for the plug was encased in foam insullation. That gives the appearance that the plug was fixed, immovable, which makes it impossible to plug it in electrically before the switch is in place, and of course once it is in place you can't then plug it in. The problem here was poor instructions. Just scrape out a lot of the foam around the plug and you find that the plug is really not fixed, but attached to reasonably long wires that allow you to plug it in with the switch a couple inches from the wall, and then insert the switch. None of the online instructions tell you this about the wires.
Parts Used:

-
John from WASHINGTON, DC
-
Difficulty Level:Really Easy
-
Total Repair Time:30 - 60 mins
4 of 5 people
found this instruction helpful.
Was this instruction helpful to you?
Thank you for voting!
Broken light switch
Watched video. Unplugged refrigerator and popped out switch. In plugged connector and pushed switch in place. Plugged in refrigerator and the light worked
Parts Used:
-
Terry from WARMINSTER, PA
-
Difficulty Level:Really Easy
-
Total Repair Time:15 - 30 mins
-
Tools:Screw drivers
4 of 5 people
found this instruction helpful.
Was this instruction helpful to you?
Thank you for voting!
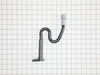
Freezer iced up
Let the ice in the freezer melt while installing P trap drain tube
Parts Used:
-
Dale from MECHANICSBURG, PA
-
Difficulty Level:Really Easy
-
Total Repair Time:30 - 60 mins
-
Tools:Nutdriver, Screw drivers
3 of 3 people
found this instruction helpful.
Was this instruction helpful to you?
Thank you for voting!
Fresh Food Compartment occasionally going down to 28-30 degrees F
Failure detected as Damper Control at upper rear of compartment would continuously open/close, would never stay open or closed. Sometimes the main board would turn it off (maybe a low thermistor limit?), but it would stick open a bit, and keeping letting freezer air into fridge. Could have potentially been control board, but as it turns out after disassembly of the defective damper, the internal microswitch was stuck in the closed position so it wouldn't shut off the motor. Easy fix by gently pulling the cover off the damper control, pull out Styrofoam encasement, then a phillips to remove the damper assembly. Gently push tabs to release wire connectors. Reverse the process and you're done! If I really wanted to go on the cheap, I could have just changed the microswitch, but that looked like a shaky maneuver at best. This site saved me on this one, so happy to share my experience with this Maytag and its nasty habit of freezing my milk and eggs!! :)
Parts Used:
-
Galen from WASECA, MN
-
Difficulty Level:Really Easy
-
Total Repair Time:15 - 30 mins
-
Tools:Screw drivers
3 of 3 people
found this instruction helpful.
Was this instruction helpful to you?
Thank you for voting!
Snap on cover broke
-
Arja L. from NEWBURY PARK, CA
-
Difficulty Level:Easy
-
Total Repair Time:Less than 15 mins
3 of 3 people
found this instruction helpful.
Was this instruction helpful to you?
Thank you for voting!
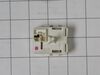
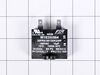
The refrigerator and freezer stopped getting cold after the some water flooding in the basement.
I safely unplugged the power from the refrigerator first before starting the repair. I then had to remove the bottom access panel which is secured with hex head screws, then disconnected the two plugs from the two failed parts that connects to the appliance compressor. After installing the replacement parts and returning power back to the refrigerator I buttoned up the access panel and I waited at least three hours to turn the cooling system back on. This allows the coolant in the compressor to settle. The two replacements parts fixed the cooling system.
Parts Used:
-
Alfred from Chicago, IL
-
Difficulty Level:Very Easy
-
Total Repair Time:15 - 30 mins
-
Tools:Socket set
3 of 3 people
found this instruction helpful.
Was this instruction helpful to you?
Thank you for voting!