















WRS321SDHB05 Whirlpool Refrigerator - Instructions
Keep searches simple. Use keywords, e.g. "leaking", "pump", "broken" or "fit".
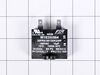
Capacitor shorted out due to power surge.
Access back of unit, lower left corner. Remove wire capacitor retention clip. Unplug cold capacitor, plug in replacement, reinstall wire retention clip, test.
Parts Used:
-
J. David from BRENTWOOD, TN
-
Difficulty Level:Easy
-
Total Repair Time:30 - 60 mins
-
Tools:Pliers, Screw drivers
3 of 3 people
found this instruction helpful.
Was this instruction helpful to you?
Thank you for voting!
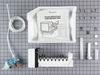
It was my first time to install a ice maker.
I first read the instruction manual then I watched the installation video. My water line to it was 3/8. Went to the local ACE Hardware to purchase a short peace of 1/4 copper tubing and the fittings to connect them together. It makes ice every 55 minutes.
Parts Used:
-
Gary from MACOMB, OK
-
Difficulty Level:Easy
-
Total Repair Time:1- 2 hours
-
Tools:Nutdriver, Screw drivers, Wrench (Adjustable), Wrench set
3 of 3 people
found this instruction helpful.
Was this instruction helpful to you?
Thank you for voting!
my drum was broken and would not put ice down to be used
I could not have done it without reading the repair story about this same issue. I DID take a digital picture before taking the blades out and that was helpful. NO ONE, except in the repair story, ever mentioned the reverse screw to get the blades off. It simply made it possible for me.
I fixed it!!!! I am a 69 year old widow who loves crushed ice, so I am happy!!
The PartSelect service is great!
I fixed it!!!! I am a 69 year old widow who loves crushed ice, so I am happy!!
The PartSelect service is great!
Parts Used:

-
Sue from Covington, GA
-
Difficulty Level:A Bit Difficult
-
Total Repair Time:30 - 60 mins
-
Tools:Screw drivers
3 of 3 people
found this instruction helpful.
Was this instruction helpful to you?
Thank you for voting!
Auger Busted
Removed all ice from bin and let it thaw. Removed all screws and nuts from the front to release the ice crusher and the long bit. Had already printed out all the advice from others on the on-line section about taking photos and not getting the crusher blades out of order. Removed the clip with needle nose pliers and the washer. Removed the blades laying them down in exact order and direction they came off. Put on the new auger drum and reversed everything. It was nice to know that the plastic screw that held the clip is a reverse thread, otherwise we might have broken the dang thing. Too bad there aren't instructions with the part when you get it instead of just a diagram. All-in-all, it went well.
Parts Used:
-
Jan from Chandler, AZ
-
Difficulty Level:Easy
-
Total Repair Time:30 - 60 mins
-
Tools:Nutdriver, Pliers
3 of 3 people
found this instruction helpful.
Was this instruction helpful to you?
Thank you for voting!
lights wouldn't come on/work in refrigerator
Referencing the info/schematics you have on your website, I unscrewed/unattached top-front panel (carefully), from behind the panel you have to detach the wires (2) from the switch, pushed "in" the switch to remove, put in new switch and attach wires to test BEFORE remounting panel. Tada!! Thank you PartSelect! You saved me at least $80...would have been at least $100 to have a repair person come to the house!
Parts Used:

-
Jane from Albuquerque, NM
-
Difficulty Level:Easy
-
Total Repair Time:15 - 30 mins
-
Tools:Pliers, Screw drivers, Socket set
4 of 6 people
found this instruction helpful.
Was this instruction helpful to you?
Thank you for voting!
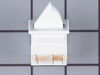
Broke the Rocker Switch in Fridge side
Popped out with butter knife and unplugged 3 prong connector and reversed with anew switch.
But, unfortunately it got broken again exactly same way as before.
So, I ordered same switch again for 2nd time.
Maytag should recall that Rocker Switch and build with better materials.
But, unfortunately it got broken again exactly same way as before.
So, I ordered same switch again for 2nd time.
Maytag should recall that Rocker Switch and build with better materials.
Parts Used:
-
Sung-Su from BISMARCK, ND
-
Difficulty Level:Very Easy
-
Total Repair Time:Less than 15 mins
4 of 6 people
found this instruction helpful.
Was this instruction helpful to you?
Thank you for voting!
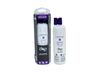
ice container bin cracked and had a hole in it.
Took it out of the box. Emptied the ice out of the broken bin. Slid the new one in and all done.
Parts Used:
-
Joseph from MESQUITE, NV
-
Difficulty Level:Very Easy
-
Total Repair Time:Less than 15 mins
5 of 9 people
found this instruction helpful.
Was this instruction helpful to you?
Thank you for voting!
Installed a Ice Maker
-
Don from HOUMA, LA
-
Difficulty Level:Very Easy
-
Total Repair Time:15 - 30 mins
-
Tools:Nutdriver, Screw drivers
3 of 3 people
found this instruction helpful.
Was this instruction helpful to you?
Thank you for voting!
Auger would not turn properly
I took out the ice bin and in the back where the auger meets the ice bin I had to replace the small plastic piece to hold the auger in place when using the automatic ice maker. It was an easy fix.
Parts Used:
-
Tanya from Lakebay, WA
-
Difficulty Level:Easy
-
Total Repair Time:Less than 15 mins
6 of 12 people
found this instruction helpful.
Was this instruction helpful to you?
Thank you for voting!
Getting Ice Maker to sit in place prior to tightening screws.
Don not completely remove holding icemaker screws. Unit slips over screws and drops down into place and the use nutdriver to tighten in place. Rest of unit was sound and wasn’t replaced.
After icemaker is installed wait for a while and unit self activated and creates ice cubes.
After icemaker is installed wait for a while and unit self activated and creates ice cubes.
Parts Used:
-
George from POWELL, OH
-
Difficulty Level:Easy
-
Total Repair Time:15 - 30 mins
-
Tools:Nutdriver
3 of 3 people
found this instruction helpful.
Was this instruction helpful to you?
Thank you for voting!
Drum broken; ice wouldn't dispense
1. Pull out drawer. 2. Remove screws to release the auger. 3. Unscrew the end of the auger. 4. Pull parts off. 5. Replace drum. 6. Replace parts in the correct order. 7. Twist end of auger back on. 8. Replace unit onto drawer and install mounting screws. 9. Place drawer in freezer. 10. Test ice dispenser. 11. Watch kitten run to refrigerator and beg for ice cube. 12. See smiles on family members faces.
Parts Used:
-
Brenda from Downs, IL
-
Difficulty Level:Really Easy
-
Total Repair Time:Less than 15 mins
-
Tools:Nutdriver
3 of 3 people
found this instruction helpful.
Was this instruction helpful to you?
Thank you for voting!
Raplaced switch
Repair went well,took about five to ten minutes to disconnect the power from the fridge removed the defective switch installed the new one ,reconnected the power,,,and Let there be light and there was light!
Parts Used:
-
Winston A from Brooklyn, NY
-
Difficulty Level:Really Easy
-
Total Repair Time:Less than 15 mins
-
Tools:Pliers
5 of 9 people
found this instruction helpful.
Was this instruction helpful to you?
Thank you for voting!
defective light switch
inserted a knife between the switch and the plastic interior in order to pop the switch out.
then took off the 2 wires on the old switch put them on the new switch and reinserted the switch into the plastic interior.
then took off the 2 wires on the old switch put them on the new switch and reinserted the switch into the plastic interior.
Parts Used:
-
THOMAS from WILLARD, OH
-
Difficulty Level:Really Easy
-
Total Repair Time:Less than 15 mins
3 of 4 people
found this instruction helpful.
Was this instruction helpful to you?
Thank you for voting!
Light switch wasn't working.. As I would close the door I would notice our frig light wasn't going off...
I simply removed the old switch by gently pulling down on the old switch with a screwdriver. When it was about half way out I just gently pulled down on the old switch and it popped out... I removed the two connectors attached to the old switch by pulling on the connectors with a pliers...I tried using my fingers but wasn't able to pull the connectors off so I used pliers. It worked perfectly.. When pulling off the old connectors, make sure you attach the new switch to the same tabs on the new switch... It was very easy to do and took under 5 mins.....The light switch works perfect....P.S. You should unplug the frig while making the connection just in case....Safety first....!!!
Parts Used:
-
David from Hemet, CA
-
Difficulty Level:Really Easy
-
Total Repair Time:Less than 15 mins
-
Tools:Pliers, Screw drivers
3 of 4 people
found this instruction helpful.
Was this instruction helpful to you?
Thank you for voting!
Inlet valve was broken at the water line connection
-
James from VANCEBURG, KY
-
Difficulty Level:Very Easy
-
Total Repair Time:15 - 30 mins
-
Tools:Nutdriver
3 of 4 people
found this instruction helpful.
Was this instruction helpful to you?
Thank you for voting!