















WRF736SDAT00 Whirlpool Refrigerator - Instructions
Keep searches simple. Use keywords, e.g. "leaking", "pump", "broken" or "fit".
Rocker on switch broke off
Eased the putty knife under the edge of the switch housing and pried it off. Pulled two wires off the old terminals and hooked them onto the new one and reinstalled into the refrigerator body.
Parts Used:

-
David Barnes from ROSWELL, NM
-
Difficulty Level:Very Easy
-
Total Repair Time:Less than 15 mins
1 of 2 people
found this instruction helpful.
Was this instruction helpful to you?
Thank you for voting!
light did not work on the refrigerator side
bulbs were not burnt out. received the new switch in a few days. watch the short video, was good to see how it comes out. used a putty knife to release the defective switch, removed wires put them on the new one and posed the new switch back in. Not bad Part cost $11.00 7 dollars shipping so for 17 bucks it works great. nice to see what is inside the refer!
Parts Used:
-
David from GROVESPRING, MO
-
Difficulty Level:Easy
-
Total Repair Time:Less than 15 mins
1 of 2 people
found this instruction helpful.
Was this instruction helpful to you?
Thank you for voting!
Broken front cover of drawer-left lower side
I found the web site and the pictorial schematic of the refrigerator but it really didn't show the part as well as I had hoped, so I called the toll free Partselect number and spoke with a representative who took down all of the information and told me the part would be shipped out in a few days. Well, low and behold the next day Fedex was delivering this ling box to my door-I carefully opened it-it was the front cover plate of the drawer BELOW the broken one-perhaps my mistake in explaining it properly over the telephone-so back to the toll free number to try and straighten out the problem and reorder the correct part-that was even simpler than the first call-the correct part was ordered, return Fedex paperwork was sent to me via email, and several days later the correct part did indeed arrive. Installation took probably a total of 5 minutes or less-the old cover came off effortlessly (it was half off anyway) and the identical new replacement simply snapped into place and..............wah-lah as they say-back in business. It was a pleasure to do business with this company-their staff is courteous and efficient-and oh, yes, the first shipment was indeed picked up by Fedex when they delivered the correct package and was credited back to my credit card as promised. Thank you for being there Partselect.
John Reid
Cape Coral Florida
John Reid
Cape Coral Florida
Parts Used:
-
John from CAPE CORAL, FL
-
Difficulty Level:Very Easy
-
Total Repair Time:Less than 15 mins
1 of 2 people
found this instruction helpful.
Was this instruction helpful to you?
Thank you for voting!
Replace the follow items Secondary Duel Water inlet valve Part no: WPW10341329 Control electric W10861900 Ice maker Fascia Heater Kit part PD00026897 W10619962 Ice Maker Assembly PS117392 replaced it two times And now icemaker is not ejected ice Roland Crenwelge 804-789-1795
Replace the follow items
Secondary Duel Water inlet valve Part no: WPW10341329
Control electric W10861900
Ice maker Fascia Heater Kit part PD00026897 W10619962
Ice Maker Assembly PS117392 replaced it two times
And now icemaker is not ejected ice
Roland Crenwelge
804-789-1795
Secondary Duel Water inlet valve Part no: WPW10341329
Control electric W10861900
Ice maker Fascia Heater Kit part PD00026897 W10619962
Ice Maker Assembly PS117392 replaced it two times
And now icemaker is not ejected ice
Roland Crenwelge
804-789-1795
Parts Used:
-
Roland from Mechanicsville, VA
-
Difficulty Level:Very Difficult
-
Total Repair Time:More than 2 hours
-
Tools:Nutdriver, Screw drivers
1 of 2 people
found this instruction helpful.
Was this instruction helpful to you?
Thank you for voting!
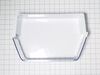
broken door bin.
-
Ronald from DELRAY BEACH, FL
-
Difficulty Level:Really Easy
-
Total Repair Time:Less than 15 mins
1 of 2 people
found this instruction helpful.
Was this instruction helpful to you?
Thank you for voting!
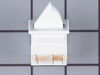
Broken light switch
-
James from Shrewsbury, MA
-
Difficulty Level:Easy
-
Total Repair Time:15 - 30 mins
1 of 2 people
found this instruction helpful.
Was this instruction helpful to you?
Thank you for voting!
Light switch broke off
We looked up the problem online with the model number of the refrigerator. We ordered the part and followed the video installation that was sent with the order and was found online prior to purchasing
Parts Used:
-
Kathy from TEMECULA, CA
-
Difficulty Level:Very Easy
-
Total Repair Time:Less than 15 mins
-
Tools:Pliers
1 of 2 people
found this instruction helpful.
Was this instruction helpful to you?
Thank you for voting!
Light hinge broke
Repair was tremendously easy. All I did was remove old light switch by prying out with screw driver and plugging in the new light switch and pushing it into the hole. Simple! The instructions weren't needed, but they were very thorough.
Parts Used:
-
Justin from Huntersville, NC
-
Difficulty Level:Really Easy
-
Total Repair Time:Less than 15 mins
-
Tools:Screw drivers
1 of 2 people
found this instruction helpful.
Was this instruction helpful to you?
Thank you for voting!
Light in my refrigerator didn't work.
At first I went to a local part supplier and they didn't have it in stock but could order it for me for $55.00 plus $10.00 to ship it. I told them I would have to think about it. I went home and got on the computer and found your web site and was I shocked when I saw the same part listed for $6.98 and $7.00 to ship it. You guys saved me $50.00. The part arrived in two day and took 5 min. to install. I now have light in my refrigerator. Thank you.
Parts Used:
-
Joseph from Byron Center, MI
-
Difficulty Level:Really Easy
-
Total Repair Time:Less than 15 mins
-
Tools:Screw drivers
1 of 3 people
found this instruction helpful.
Was this instruction helpful to you?
Thank you for voting!
icemaker
-
Harold from Lindenhurst, IL
-
Difficulty Level:Really Easy
-
Total Repair Time:30 - 60 mins
-
Tools:Nutdriver, Pliers, Screw drivers
1 of 3 people
found this instruction helpful.
Was this instruction helpful to you?
Thank you for voting!
Broken refrigerator compartment light switch.
The best part of the repair was how easy it was to find and order the part. Instead of searching the parts houses around town I just went to the PartSelect web site, quickly found and ordered the part in about five minutes, received the part the next day at my home and was ready to make the repair. Wow! What a pleasure for something to work the way it was meant to. Removed old switch located by prying out with sharp knife or screwdriver. Don't worry about breaking it or cracking plastic. Disconnect(unplug) wires from back of switch. Replace (plug-in) wires on back of new switch. Insert in location of old switch. Finisheed.
Parts Used:
-
Jack from Topsail Beach, NC
-
Difficulty Level:Really Easy
-
Total Repair Time:Less than 15 mins
-
Tools:Screw drivers
1 of 3 people
found this instruction helpful.
Was this instruction helpful to you?
Thank you for voting!
Internal light did not come on each time the door was opened.
After disconnecting the electricity. I followed the instructions as indicated in the "HOW TO" article on the website. I used a steel putty knife and pried the light switch out of its retaining hole. I worked the right side the most since this is the side with the retaining clip. After I removed the switch I transferred the two electrical outlets to the new switch and easily snapped it into place. Engaged the electric power and tested the switch.
Parts Used:
-
John from Jefferson Hills, PA
-
Difficulty Level:Really Easy
-
Total Repair Time:Less than 15 mins
0 of 1 people
found this instruction helpful.
Was this instruction helpful to you?
Thank you for voting!
rocker switch broke off
disconnected el. power to fridge. pried out broken switch with small screwdriner and pulled out w/water pump pliers. installed new switch and pressed into opening.
Parts Used:
-
STANLEY from OAKLAND, NJ
-
Difficulty Level:Really Easy
-
Total Repair Time:Less than 15 mins
-
Tools:Screw drivers
0 of 1 people
found this instruction helpful.
Was this instruction helpful to you?
Thank you for voting!
Door Light switch cracked Mounting
I noticed that the refrigerator was having trouble maintaining temperature. Thought it might be time for new one until I found out that a new frig was $5k to $7K. Just happened to notice that the light switch didn't look quite right (was not sitting sqaure to the door). Once I pressed it it came loose. I then realized the the lights were staying on (50 watts of heating). Replaced the switch and the frig started working like new.
Parts Used:
-
Paul from Hinsdale, IL
-
Difficulty Level:Really Easy
-
Total Repair Time:Less than 15 mins
-
Tools:Screw drivers
0 of 1 people
found this instruction helpful.
Was this instruction helpful to you?
Thank you for voting!
Replace Bad Switch
Pry old switch and pull out. Disconect two wires. Put two wires on new switch, must be inserted right and connections not loose. Put switch in, making shure wies do not come off and snap in place
Parts Used:
-
carlos from haverstraw, NY
-
Difficulty Level:Easy
-
Total Repair Time:Less than 15 mins
-
Tools:Pliers, Screw drivers
0 of 1 people
found this instruction helpful.
Was this instruction helpful to you?
Thank you for voting!