















TGS325MQ2 Estate Range - Instructions
Keep searches simple. Use keywords, e.g. "leaking", "pump", "broken" or "fit".
Oven would bot heat
Removed trays to expose the ignitor, replaced ignitor and re-assembled.
Would be much faster the second time.
Would be much faster the second time.
Parts Used:

-
Peter from HARTLAND, WI
-
Difficulty Level:Easy
-
Total Repair Time:1- 2 hours
-
Tools:Screw drivers
1 person
found this instruction helpful.
Was this instruction helpful to you?
Thank you for voting!
Worn/Bulb Socket
It was alittle difficult at 1st to remove the clips that held in the socket. But once out everything went smoothly.
Parts Used:

-
JOSEPH from COON RAPIDS, MN
-
Difficulty Level:Really Easy
-
Total Repair Time:Less than 15 mins
-
Tools:Screw drivers
2 of 4 people
found this instruction helpful.
Was this instruction helpful to you?
Thank you for voting!
outer glass on door broke

-
Marc from FOXBORO, MA
-
Difficulty Level:Very Easy
-
Total Repair Time:15 - 30 mins
-
Tools:Screw drivers
2 of 4 people
found this instruction helpful.
Was this instruction helpful to you?
Thank you for voting!
Oven temperature was 50 degrees off
Unplugged stove.
Pulled stove out.
Unscrewed screws and removed cover.
Removed & replaced sensor.
Reinstalled cover & screws.
Plugged in stove and pushed back in.
Only problem was when I pulled stove out, lid opened and disconnected the gas line to a burner.
Pulled stove out.
Unscrewed screws and removed cover.
Removed & replaced sensor.
Reinstalled cover & screws.
Plugged in stove and pushed back in.
Only problem was when I pulled stove out, lid opened and disconnected the gas line to a burner.
Parts Used:

-
Gregory from BRIDGEBORO, GA
-
Difficulty Level:A Bit Difficult
-
Total Repair Time:30 - 60 mins
-
Tools:Screw drivers
1 of 2 people
found this instruction helpful.
Was this instruction helpful to you?
Thank you for voting!
Pan scratched by housekeeper

-
Kenneth A. from SANGER, CA
-
Difficulty Level:Very Easy
-
Total Repair Time:Less than 15 mins
-
Tools:Screw drivers
1 of 2 people
found this instruction helpful.
Was this instruction helpful to you?
Thank you for voting!
Light would not light
-
Frank from LEBANON, VA
-
Difficulty Level:Easy
-
Total Repair Time:15 - 30 mins
-
Tools:Pliers
1 of 2 people
found this instruction helpful.
Was this instruction helpful to you?
Thank you for voting!
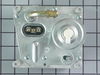
The Bake and Broil both stopped working. You could hear the igniters but no gas flowed.
Replace the gas valve. It is simple to replace, but please note that it comes configured for Natural Gas. If you are using Propane, there are two changes you need to make first.
1. Remove and invert the gas pressure regulator. See page 11 of the owners manual.
2. Tighten down the orifice hood all the way about 2 1/2 turns. It comes configured to stick farther up into the air mixer. See page 12.
1. Remove and invert the gas pressure regulator. See page 11 of the owners manual.
2. Tighten down the orifice hood all the way about 2 1/2 turns. It comes configured to stick farther up into the air mixer. See page 12.
Parts Used:
-
Glen from LOS GATOS, CA
-
Difficulty Level:Easy
-
Total Repair Time:30 - 60 mins
-
Tools:Screw drivers, Wrench set
1 of 2 people
found this instruction helpful.
Was this instruction helpful to you?
Thank you for voting!
burned oven bulb
The hardest part was taking out original light bulb because screws on shield where hard to unscrew after all this years . The old bulb vent out leaving neck in socket. It took narrow electrical pliers to get neck out .The generic appliance bulb did not fit and had aluminum neck ,not recommended for brass sockets in ovens.Putting new light bulb in was not the problem.
Parts Used:

-
Ivanka from Atlantra, GA
-
Difficulty Level:Really Easy
-
Total Repair Time:30 - 60 mins
-
Tools:Pliers, Screw drivers
3 of 9 people
found this instruction helpful.
Was this instruction helpful to you?
Thank you for voting!
broken glide
replaced glide with screwdriver. very easy
Parts Used:


-
Andrew J from MASSAPEQUA, NY
-
Difficulty Level:Really Easy
-
Total Repair Time:15 - 30 mins
-
Tools:Screw drivers
1 of 3 people
found this instruction helpful.
Was this instruction helpful to you?
Thank you for voting!
slides on lower drawer were broken
I used a phillips screwdriver and replaced the part with one screw.Very easy and replaced my lower drawer under my oven,it tool about three to five minutes at the most and my drawer works fine now.Thanks for the instruction video on line, it really helped.
Parts Used:
-
Leona R from Louisville, KY
-
Difficulty Level:Really Easy
-
Total Repair Time:Less than 15 mins
-
Tools:Screw drivers
1 of 3 people
found this instruction helpful.
Was this instruction helpful to you?
Thank you for voting!
oven light not working
replaced light socket but did not repair problem. must have burned the motherboard.
pleased with service from your company.
pleased with service from your company.
Parts Used:
-
Richard from Gaylord, MI
-
Difficulty Level:A Bit Difficult
-
Total Repair Time:30 - 60 mins
-
Tools:Nutdriver, Screw drivers
2 of 6 people
found this instruction helpful.
Was this instruction helpful to you?
Thank you for voting!
oven light burnt out
1. Unscrewed glass cover on bulb
2. Removed old bulb
3. Screwed in new bulb
4. Replaced glass cover
5. Mixed drink & baked cupcakes
2. Removed old bulb
3. Screwed in new bulb
4. Replaced glass cover
5. Mixed drink & baked cupcakes
Parts Used:
-
William from Schwenksville, PA
-
Difficulty Level:Easy
-
Total Repair Time:Less than 15 mins
3 of 10 people
found this instruction helpful.
Was this instruction helpful to you?
Thank you for voting!
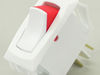
Switch had burned out due to faulty wiring by electrician when appliance first installed
my son simply replaced the switch, so now I have a working oven light once again
Parts Used:
-
Doriss from Cartersville, VA
-
Difficulty Level:Really Easy
-
Total Repair Time:Less than 15 mins
-
Tools:Screw drivers
1 of 4 people
found this instruction helpful.
Was this instruction helpful to you?
Thank you for voting!
Light burned out in upper oven
-
Shirley from Las Vegas, NV
-
Difficulty Level:Really Easy
-
Total Repair Time:Less than 15 mins
0 of 1 people
found this instruction helpful.
Was this instruction helpful to you?
Thank you for voting!
light bulb went out in my oven
My husband took the plastic cover off and took out old bulb and screwed in the new one. Then put the cover back on.
Parts Used:
-
Janet from Ada, MI
-
Difficulty Level:Really Easy
-
Total Repair Time:Less than 15 mins
2 of 7 people
found this instruction helpful.
Was this instruction helpful to you?
Thank you for voting!