















TF8500XLP0 Whirlpool Trash Compactor - Instructions
Keep searches simple. Use keywords, e.g. "leaking", "pump", "broken" or "fit".
Ram was stuck in the down position
-
Joseph N from Wheaton, IL
-
Difficulty Level:Really Easy
-
Total Repair Time:15 - 30 mins
-
Tools:Nutdriver
Was this instruction helpful to you?
Thank you for voting!
Ram stuck in down poaition
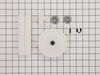
Replaced drive gears.They arrived in a kit from Parts Select with instructions.They fit perfectly and the compactor works like new.
Parts Used:
-
Candace from Ocala, FL
-
Difficulty Level:Really Easy
-
Total Repair Time:15 - 30 mins
-
Tools:Wrench set
Was this instruction helpful to you?
Thank you for voting!
the compactor was stuck in the down position
Had to first raise the screw plate that compacts the garbage. Then had to turn the compactor over and remove screws holding the bottom plate on in order to get to the gears. Once that was done I removed the worn gears and the chain drive and replaced with the new gears and the chain. Put the unit back together and works like a new one. A $35 dollar fix for a unit that sells for around $900 today. Thanks to partslect for being able to help me with the parts needed. Not only did I save on a new unit but by doing this myself I saved around $100 in labor charges.
Parts Used:
-
Rod from Quincy, IL
-
Difficulty Level:Easy
-
Total Repair Time:15 - 30 mins
-
Tools:Screw drivers, Socket set
Was this instruction helpful to you?
Thank you for voting!
Directional Switch lever broke
The part was suppose to come with instructions, but did not. However, it was easy after reading the comments on-line, and discovering that the front cover had to be removed in order to expose the whole switch and wires. I did drop one of the mounting screws down the front of the compactor and was not able to recover it. So, I had to make a trip to the hardware store for a replacement. They couldn't match the remaining screw but I found 2 similar ones with lock washers and nuts that worked just fine. I saved a $90 service charge and probably double the cost of the switch by doing it myself.
Parts Used:

-
Dick from Penn Valley, CA
-
Difficulty Level:Easy
-
Total Repair Time:15 - 30 mins
-
Tools:Nutdriver, Screw drivers
Was this instruction helpful to you?
Thank you for voting!
Compacting part would not move correctly
The part that doews the actual compacting would not move correctly. The machine would not stop because the part never contacted the spring loaded switch. I had known about this for about a year, but put it off until it stopped working altogether. I ordered 2 power nuts and rec'd them in B.F.E. Alaska in about 5 days. I quickly replaced the parts and the machine works like brand new again. I estimate this compactor to be at least 10 -15 years old and replacing the occassional part once in awhile is a lot cheaper than buying a new compactor.
Parts Used:

-
John from Anchor Point, AK
-
Difficulty Level:Really Easy
-
Total Repair Time:15 - 30 mins
-
Tools:Screw drivers, Socket set
Was this instruction helpful to you?
Thank you for voting!
compactor will not stop when compaction complete on top cycle
take 2 screws out on top cover with key switch. remove two screw holding directional switch. remove wires, one at a time, and place on the new switch. put new switch in place with two screws. put front cover on with two screws and test. works like a charm.
Parts Used:
-
BRUCE from CASPER, WY
-
Difficulty Level:Really Easy
-
Total Repair Time:Less than 15 mins
-
Tools:Pliers, Screw drivers
Was this instruction helpful to you?
Thank you for voting!
Would not turn off after crush cycle.
Ordered three parts, however if I had read your repair page more thoroughly I could have avoided buying the top of cycle off switch. Oh well... This thirty year old trash compactor is back in business running like a new one. My one recommendation? READ YOUR FAQ PAGE. It will save you money.dan
Parts Used:
-
Daniel from Saint Louis, MO
-
Difficulty Level:Easy
-
Total Repair Time:1- 2 hours
-
Tools:Nutdriver, Screw drivers
Was this instruction helpful to you?
Thank you for voting!
Power nut was cracked. Had to replace with new.
Used visuals from partselect web site to dismantle the trash compactor , remove broken power nut , order new nuts. Only took a few days to receive new nuts. Replaced nuts , put back together and now works fine.
Parts Used:
-
Gary from Memphis, TN
-
Difficulty Level:Really Easy
-
Total Repair Time:1- 2 hours
-
Tools:Pliers, Screw drivers
Was this instruction helpful to you?
Thank you for voting!
20+ plactic gears striped them selfs who da thunk
took longer to pull it out and put it backunder the counter then to pull the panel take the chane gear & drive gear off and put it back together
Parts Used:
-
Fred from Belmont, NH
-
Difficulty Level:Really Easy
-
Total Repair Time:Less than 15 mins
-
Tools:Nutdriver
Was this instruction helpful to you?
Thank you for voting!
compactor was crushing the bag holder
easy ... got the new bag holder and replaced old one. the impressive part of the process is how easy it was to get the part info from partselect website. could have spun my wheels a lot without that.
Parts Used:
-
Myles from Jackson, NH
-
Difficulty Level:Really Easy
-
Total Repair Time:Less than 15 mins
Was this instruction helpful to you?
Thank you for voting!
the switch did not click off
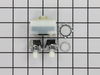
very easy to fix. all it took was pulling the compactor out to unplug,take off the removable front nob, unscrew two screws located just below the front panel.using needle nose pliers to remove the actual switch, unplug the wires conected to the switch and put the new one on the same way. It almost took me longer to write this discription than it took to fix!
Parts Used:
-
janie from mcHenry, IL
-
Difficulty Level:Really Easy
-
Total Repair Time:Less than 15 mins
-
Tools:Pliers, Screw drivers
Was this instruction helpful to you?
Thank you for voting!
minor replacement

-
Rhonda from ODESSA, TX
-
Difficulty Level:Really Easy
-
Total Repair Time:Less than 15 mins
-
Tools:Screw drivers
Was this instruction helpful to you?
Thank you for voting!
stripped pinion gear
I took the hex screws out with a nut driver and then punched out the role pin in the pinion gear (the little gear) and replaced it along with the large gear, less than 15 minutes. I was surprised how fast (day and a half) the parts were here.
Parts Used:
-
jeff from lincoln, AR
-
Difficulty Level:Really Easy
-
Total Repair Time:Less than 15 mins
-
Tools:Nutdriver
Was this instruction helpful to you?
Thank you for voting!
Compacting unit would compact trash and return but the motor would not turn off and it made a rotary grinding sound.
I read the Parts Select trouble shooting guide which indicated that 99% of the time the problem was with the Directional Switch so I ordered one. I pulled the unit out from under the countertop, unplugged the electrical plug from the outlet and took the trash tray out of the unit and set it aside. I took the top panel off with the nutdriver as well as the front panel along with the handle of the power switch. Better access to the Directional Switch can be made by removing the compacting unit. This can be done by sliding it up out of appliance and setting it aside. I used a phillips screw driver to unscrew the two screws on the right side of the switch and the two thin compression plates on the left side which hold the switch in place. I then carefully removed the contact wires from the Directional Switch one at a time and placed them on the new switch in the proper locations. The switch can then be reinstalled with the screws and compression plates. The compacting unit can then be loaded back into the appliance with the activating bracket to the front, BUT be very careful that the arm on the Directional Switch is out of the way when it is slid back into place and be sure that the bracket that activates the Directional Switch is facing the switch in order to send the message to the On/Off Switch to stop the motor when the cycle is completed. The bracket on the front of the compacting unit will force the thin arm on the back of the switch to activate a relay button that is supposed to tell the Rotary switch to shut off the motor and stop the cycle. The front panel and the top panel can then be reinstalled. I checked to see if it solved the problem before putting it back under the countertop. I had to tape the black cutoff switche on the front and on the inside of the container compartment to accomplish this. I then plugged it in and turned the Off/On switch. The unit cycled down and back up but did not shut off and the same noise came from one side at the bottom of the unit. I unplugged the unit and turned it on it's side and removed the bottom plate to inspect the gears and drive chain belt. All the gears and the drive belt were in good condition. So that was not the problem either. That left the Rotary Switch to be the faulty part. I then had to order the Rotary Switch Kit and wait for it to arrive which it did in a short period of time. The old switch was removed by pulling off the handle then using needle nosed pliers to loosen the ring nut that holds the switch in place. This released the old Rotary Switch from the front frame. A flat head screw driver was used to release the wires from the terminals on the switch and place them on the new switch. As per the instructions with the switch kit, the hole for the threaded end of the switch to fit through the hole in the front plate needed to be enlarged. The instructions tell you to use a 9/16 inch drill to carefully enlarge the hole size. Since I did not have that size drill bit, I used a small rat tail file to enlarge the hole. I placed the threaded end of the switch through the hole in the front plate and tried to screw the ring nut back on to the threaded end of the switch. The threads did not pass far enough through the front plate to allow the ring nut to thread and hold the switch in place. I found that there were two plastic ridges on the back side of the front plate that did not allow the threaded end of the switch to fit far enough through the hole to attach the ring nut. I then had to take the front plate off and used a chizel and hammer to carefully chip off the ridges so the theads would fit through the plate and allow installaton of the ring nut. The wires could then be placed on the Rotary Switch, ring nut installed and tightened, the front panel replaced and the top plate reinstalled and the unit tested. This time it worked and the trash compactor was plugged in and shoved back in place under the counter top. Now for the rest of the sto
Parts Used:
-
Ronald from Brentwood, TN
-
Difficulty Level:Difficult
-
Total Repair Time:More than 2 hours
-
Tools:Nutdriver, Pliers, Screw drivers
Was this instruction helpful to you?
Thank you for voting!
Trash compactor would not turn off at end of cycle and made a grinding noise and some vibration
I removed the unit from under the kitchen counter by first pulling the trash drawer all the way out and lifting it out of the track and setting it out on the floor. I then slowly pulled the compacting unit out and unplugged the cord from the electrical outlet. With the entire unit out in the floor I took a nut driver and removed the screws from the top plate and the screws from both sides at the bottom of the front housing. This allowed access to the directional switch. Two screws on the right side of the switch have to be removed to remove the switch along with two holding plates on the left side of the switch. The switch can then be accesses for removal. Several wires are attached to the switch and should be removed one at a time and installed to the identical identical location on the new switch. The new switch can then be installed by aligning the holes and reinstalling the holding plates. When this is done the front frame and top plate can be replaced with the nut screws. Plug back into the electrical outlet and see if it works. In this case it did exactly what it was doing before I started. So either I did not reinstall the directional switch properly or I am in the one percent rather than the 99 percent that should successfully solve the problem as suggested in the trouble shooting guide. I will now recheck the installation of the directional switch nd then check the bottom of the unit to see if the gears or chain drive are broken .
Parts Used:
-
Ronald from Brentwood, TN
-
Difficulty Level:A Bit Difficult
-
Total Repair Time:1- 2 hours
-
Tools:Nutdriver, Screw drivers
Was this instruction helpful to you?
Thank you for voting!