















RTW4516FW2 Whirlpool Washer - Instructions
Keep searches simple. Use keywords, e.g. "leaking", "pump", "broken" or "fit".
Timing tabs securing the agitator center
There are 4 tabs that come from the main agitator body through the center & lock into the centerpiece that holds the directional cogs. They have a tab similar to a cable tie that can only be put on once. They need to be clipped before it will dissassemble & reassembly is difficult because they need to be timed to reattach the round center cog plate. Maybe cut off 2 of them & taper the other 2 them for easier reassembly.
Parts Used:


-
Keith from Mount Vernon, WA
-
Difficulty Level:A Bit Difficult
-
Total Repair Time:30 - 60 mins
-
Tools:Screw drivers, Socket set, Wrench set
2 of 2 people
found this instruction helpful.
Was this instruction helpful to you?
Thank you for voting!
Agitator cogs wore out in about three years, requiring replacement.
I ordered these parts for next day delivery. The next morning they were on my door step!
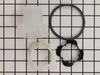
I pulled off the plastic cover inside the agitator, under the softener dispenser and replaced the old "O" rign with the new one. Next I used a 3/8" socket with a 6" extension to loosen the agitator nut and removed it. The one on our machine was on rather tightly - a bit too tight in my estimation.
The upper part of the agitator lifted easily. I lifted out the cog mechanism and studied it. I took the new parts, and assembled them, using the old parts for visual reference. All of this took about ten minutes. Be sure you push firmly on the retainer until it locks in place to keep the cogs in their slots.
Next I spent about 15 minutes cleaning up the agitator just because I like to put stuff back together in 'clean condition'.
Next I replaced the thrust bearing. The instruction specified a special grease to lubricate the thrust bearing - order this when you order the parts. The original one had no grease on it and was quite worn. I used food grade vaseline. You could probably also use silicone lube on this, the part is nylon.
After I cleaned the assembly and put in the new thrust bearing, I replaced the agitator. I had slight difficulty lining up two grooves on the cog holder for the guides in the main agitator mount but got them lined up on the third try - that took less than a minute. I put the new washer on the nut, inserted the nut and tightened it down - be careful not to over tighten, just make sure it is snugged down.
Over-all this is a fairly straight-forward repair job and is not difficult - anyone who can follow easy to read instructions and run a socket wrench can do this. I would only caution to make sure the new cogs are correctly oriented in their holder. Study how the original is assembled so you can duplicate it with the new parts. Just for the record, the nut is standard right hand thread - lefty loosey, righty tighty.
I think these parts are made to fail on purpose - if the machine gets over loaded and the agitator can't work it will chew up the cogs rather than break the agitator. Good thinking on some engineer's part!
I was lucky when I found Parts Select - I'll come here for my parts from now on!
I pulled off the plastic cover inside the agitator, under the softener dispenser and replaced the old "O" rign with the new one. Next I used a 3/8" socket with a 6" extension to loosen the agitator nut and removed it. The one on our machine was on rather tightly - a bit too tight in my estimation.
The upper part of the agitator lifted easily. I lifted out the cog mechanism and studied it. I took the new parts, and assembled them, using the old parts for visual reference. All of this took about ten minutes. Be sure you push firmly on the retainer until it locks in place to keep the cogs in their slots.
Next I spent about 15 minutes cleaning up the agitator just because I like to put stuff back together in 'clean condition'.
Next I replaced the thrust bearing. The instruction specified a special grease to lubricate the thrust bearing - order this when you order the parts. The original one had no grease on it and was quite worn. I used food grade vaseline. You could probably also use silicone lube on this, the part is nylon.
After I cleaned the assembly and put in the new thrust bearing, I replaced the agitator. I had slight difficulty lining up two grooves on the cog holder for the guides in the main agitator mount but got them lined up on the third try - that took less than a minute. I put the new washer on the nut, inserted the nut and tightened it down - be careful not to over tighten, just make sure it is snugged down.
Over-all this is a fairly straight-forward repair job and is not difficult - anyone who can follow easy to read instructions and run a socket wrench can do this. I would only caution to make sure the new cogs are correctly oriented in their holder. Study how the original is assembled so you can duplicate it with the new parts. Just for the record, the nut is standard right hand thread - lefty loosey, righty tighty.
I think these parts are made to fail on purpose - if the machine gets over loaded and the agitator can't work it will chew up the cogs rather than break the agitator. Good thinking on some engineer's part!
I was lucky when I found Parts Select - I'll come here for my parts from now on!
Parts Used:
-
Edward from Pacific Grove, CA
-
Difficulty Level:Really Easy
-
Total Repair Time:15 - 30 mins
-
Tools:Nutdriver
2 of 2 people
found this instruction helpful.
Was this instruction helpful to you?
Thank you for voting!
Top of the agitator wasn't spinning.
I simply removed the bolt from the inside of the agitator and pull the whole the straight up. It came aloose pretty easily. I took the old clothes mover off and put the new one on. On the inside of the mover the dog ears and spacer easily comes out. I removed the spacer and replaced the dogs ears. I put everything back together the way it was when I took it apart. It works as good as it did when I first got it.
Parts Used:

-
April from Lufkin, TX
-
Difficulty Level:Really Easy
-
Total Repair Time:15 - 30 mins
-
Tools:Socket set
2 of 2 people
found this instruction helpful.
Was this instruction helpful to you?
Thank you for voting!
The cloths mover stopped working
I took out the softner dispencer and there is a bolt under tthe the plastic cover,I removed the bolt and the whole assembly came out,then I installed the new one and reinstlled the bolt and plastic cover,and reinserted the liquid softner dispencer.All only took about fifteen min.
Parts Used:

-
Bruce from Bentonville, AR
-
Difficulty Level:Really Easy
-
Total Repair Time:Less than 15 mins
-
Tools:Socket set
3 of 5 people
found this instruction helpful.
Was this instruction helpful to you?
Thank you for voting!
top of agitator wouldn't move to pull clothes down
Removed softener dispenser, removed part under that to reveal bolt that holds agitator on to washer. Figured out there was more to the problem than just the dog ear things and had to end up getting a whole new agitator. Probably saved us $60 minimum in labor and trip charge and was a piece of cake! Took my husband less than 15 mins. to remove old agitator and put on new one. Geez, I guess I have to do laundry again!
Parts Used:
-
Marsha K from Colorado Springs, CO
-
Difficulty Level:Really Easy
-
Total Repair Time:Less than 15 mins
-
Tools:Socket set
3 of 5 people
found this instruction helpful.
Was this instruction helpful to you?
Thank you for voting!
Found seal had split on agitator cap
I clean out the fabric softner dispenser on my machine on a regular basis and found the seal split. After looking at several sites to try and find this part, I found this one. Ordering couldn't have been easier and repair only required pulling up the cup for the softner and installing the cap.
Thanks for making finding part so easy . . . .
Thanks for making finding part so easy . . . .
Parts Used:

-
Kim from Cleveland, OH
-
Difficulty Level:Really Easy
-
Total Repair Time:Less than 15 mins
3 of 5 people
found this instruction helpful.
Was this instruction helpful to you?
Thank you for voting!
Agitator not moving
Half inch extension. Removed plastic set piece. Remove agitator cap. Remove ring remove worn cogs. Replaced new cogs Replace lock ring, back together. 10 minutes
Parts Used:
-
Kevin from ALBUQUERQUE, NM
-
Difficulty Level:Very Easy
-
Total Repair Time:Less than 15 mins
-
Tools:Socket set
2 of 2 people
found this instruction helpful.
Was this instruction helpful to you?
Thank you for voting!
Agitator cogs all broken
Removed Softner dispenser and cap. With a 3/8" socket wrench and extension And 7/16" socket I took out the screw holding the agitator and removed top section of agitator. Turned upside down and removed the rubber grommet that holds the cogs in place. Replaced cogs and reinstalled grommet. Aligned top part of agitator with 2 tabs and put back in place and secured with 7/16" screw. Replaced cap And dispenser. Good to go. Works perfectly. Very easy repair.
Parts Used:
-
Kelly from AMARILLO, TX
-
Difficulty Level:Very Easy
-
Total Repair Time:Less than 15 mins
-
Tools:Socket set
2 of 2 people
found this instruction helpful.
Was this instruction helpful to you?
Thank you for voting!
Water drained but would not spin.
Just watched the video. Take from a 63 year old. Who never fixed a washer. Thx a lot for the video it saved me a lot of money being on a fix income. and it was less than $ 10 that was included shipping.
Parts Used:
-
Ramona from MESA, AZ
-
Difficulty Level:Very Easy
-
Total Repair Time:15 - 30 mins
-
Tools:Screw drivers, Socket set
2 of 2 people
found this instruction helpful.
Was this instruction helpful to you?
Thank you for voting!
Agitator top wasn't rotating
Repair was extremely simple by using the video provided online. Works perfectly! Thanks so much.
Parts Used:
-
Wheel Man Enterprises, from UTICA, OH
-
Difficulty Level:Really Easy
-
Total Repair Time:15 - 30 mins
-
Tools:Pliers, Socket set
2 of 2 people
found this instruction helpful.
Was this instruction helpful to you?
Thank you for voting!
agitator was making a large amount of noise
After the wife held the phone to the washer so I could hear the horrendous noise it was making. And I screaming at her "shut it off, shut it off!' I came home and took the agitator apart, and found the directional dogs worn out. Went to the computer and easily ordered new parts, which came very quickly. I took off the agitator with a long extension and socket, put in the new dogs and reversed for installation. Told the wife get back to doing the laundry!
Parts Used:
-
Timothy from Kansas City, MD
-
Difficulty Level:Easy
-
Total Repair Time:15 - 30 mins
-
Tools:Socket set
2 of 2 people
found this instruction helpful.
Was this instruction helpful to you?
Thank you for voting!
Agitator did not work
-
Stephen from WINTER PARK, FL
-
Difficulty Level:Really Easy
-
Total Repair Time:15 - 30 mins
-
Tools:Socket set
2 of 2 people
found this instruction helpful.
Was this instruction helpful to you?
Thank you for voting!
Belt needed to be replaced
-
Raymond from BRISTOL, CT
-
Difficulty Level:Really Easy
-
Total Repair Time:30 - 60 mins
-
Tools:Socket set
2 of 2 people
found this instruction helpful.
Was this instruction helpful to you?
Thank you for voting!
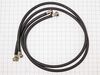
Washer hoses due for replacement
Replaced each hose. Did discover that either hose can be used for hot or cold water lines. No longer required to label hot and cold replacement hoses.
Parts Used:
-
James from PINE MOUNTAIN, GA
-
Difficulty Level:Easy
-
Total Repair Time:30 - 60 mins
3 of 5 people
found this instruction helpful.
Was this instruction helpful to you?
Thank you for voting!
Agitator not turning on the top
I ordered a whole agitator repair kit. Had a few problems getting everything to line up right.Finally figured out what I needed to do and everything worked like it should.
Parts Used:
-
patrick from LA PINE, OR
-
Difficulty Level:Easy
-
Total Repair Time:30 - 60 mins
-
Tools:Screw drivers, Socket set
2 of 2 people
found this instruction helpful.
Was this instruction helpful to you?
Thank you for voting!