















RGB745BEHAWH Hotpoint Range - Instructions
Keep searches simple. Use keywords, e.g. "leaking", "pump", "broken" or "fit".
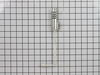
Oven did not heat
I took all of the oven racks out , then the bottom cover, over the element. I immediately saw the igniter coil was broken. I took the element out and disconnected the two wires. (I saw that the igniter coil was broken and knew that must be my problem. I got my manual out and found the part number and got on line and started shopping. I found part select, the price was fair and ordered it the same day. It was shipped out to me the same day I ordered it. Received it the next day and had the oven working again. Easy to order, great customer service, fast shipping department. Great job to all of you folks at Part Select. I would recommend PS to anyone that wants to save money and do it yourself. Go for it. tk middlebury IN.
Parts Used:
-
Thomas from Middlebury, IN
-
Difficulty Level:Really Easy
-
Total Repair Time:1- 2 hours
-
Tools:Nutdriver, Screw drivers
2 of 3 people
found this instruction helpful.
Was this instruction helpful to you?
Thank you for voting!
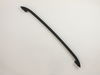
Removal reinstalling
Removal old fashioned oven door handle took time after removing the oven door. New replacement handle was easy to install! Try to reinstall was long and finally got installed after 5 attempts due hinge on right side issue
Parts Used:
-
Thomas from HAMPSTEAD, NH
-
Difficulty Level:A Bit Difficult
-
Total Repair Time:More than 2 hours
-
Tools:Screw drivers, Socket set
1 person
found this instruction helpful.
Was this instruction helpful to you?
Thank you for voting!
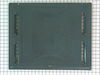
Oven bottom badly marred after 16 years.
Two set screws in rear; removed easily with a screwdriver. Old oven floor lifted out easily; new oven floor dropped in just as easily; set screws re-installed. Done. Pleasantly surprised at how easy this went.
Parts Used:
-
Charlie from NAPLES, FL
-
Difficulty Level:Very Easy
-
Total Repair Time:Less than 15 mins
-
Tools:Screw drivers
1 person
found this instruction helpful.
Was this instruction helpful to you?
Thank you for voting!
Oven would not heat
Removed the two screws that hold the oven bottom to expose the glow element. Also removed the lower draw to get to the connections. The job was only complicated by getting to the two bolts holding the glow plug to the oven frame. Getting them off and getting the new plug on was not easy with standard tools. There was not a lot of room to work the hex bolts and i wound up cutting the old unit out and attaching the bolts to the frame and cutting slots in the new unit so I could slot it in. That worked. The glow plug was the problem and the oven came right on.
Parts Used:
-
Richard from Seaford, NY
-
Difficulty Level:A Bit Difficult
-
Total Repair Time:1- 2 hours
-
Tools:Screw drivers, Socket set, Wrench set
1 person
found this instruction helpful.
Was this instruction helpful to you?
Thank you for voting!
2 hexhead screws on back side of igniter with no room to get to them.
They turned out to be 1/4 inch hex head screws. Only after soaking with penetrating oil could we budge them. There must be a special tool to loosen them on the back side where there is no room to get a socket on them and since they are in the heated part of the oven they are almost welded in. We were successful, but could only get one screw back in. So never use your oven with the door left open as I did if you do not want to repeat what happened to me.
Parts Used:
-
Clayton from NEWBERRY, MI
-
Difficulty Level:Very Difficult
-
Total Repair Time:More than 2 hours
-
Tools:Nutdriver, Pliers, Screw drivers, Socket set, Wrench (Adjustable)
1 person
found this instruction helpful.
Was this instruction helpful to you?
Thank you for voting!
some of electrodes not working at times,found were bad,wires had some insulation missing, clips looked burnt,found all new parts replaced
the electrodes on this model have to be removed before you can raise cooktop, once cooktop is raised remove wire from burner bracket, use needle nose pliers to squeeze bottom of clip,remove &replace with new parts.
Parts Used:
-
Dana from LEEDS, AL
-
Difficulty Level:Really Easy
-
Total Repair Time:More than 2 hours
-
Tools:Pliers
1 person
found this instruction helpful.
Was this instruction helpful to you?
Thank you for voting!
Mini-explosions caused by delayed gas ignition.
Removed grills, oven bottom, heat deflector, and the two igniter mounting screws. Pulled out igniter, removed two wire twist caps and old igniter. Cut off ragged ends of wires coming from the stove side and re-stripped the wire ends. Attached oven side wires to new igniter wires using new twist caps. Reassembled everything in reverse order. Tested oven operation to ensure that the gas ignited promptly. (It did).
Parts Used:
-
David from Bel Air, MD
-
Difficulty Level:Really Easy
-
Total Repair Time:Less than 15 mins
-
Tools:Nutdriver
3 of 7 people
found this instruction helpful.
Was this instruction helpful to you?
Thank you for voting!
Oven would not work. Burners worked fine. Igniter would not glow.
It was easy. I removed the guts. Removed the heat deflector (one nut). Then removed the igniter and the cover over the wires in order to unplug the wires so I could work with attaching the new part on top of the counter. Replaced everything and it worked great. When the old igniter did not work, the gas valve would not let the gas into the oven, Once replaced, you can here the gas flow in and ignite. Repair man wanted $65 to show up and $175 for part and labor. I paid $77 for the part and did it myself. I do not consider myself handy.
Parts Used:
-
Joe from Kansas City, MO
-
Difficulty Level:Really Easy
-
Total Repair Time:15 - 30 mins
-
Tools:Nutdriver
1 person
found this instruction helpful.
Was this instruction helpful to you?
Thank you for voting!
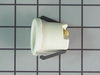
BASE OF BULB BROKE OFF & WELDED TO SOCKET
PULL RANGE OUT FROM WALL & ALSO REMOVED OVEN DOOR BY SLIDING UP. WORKING FROM INSIDE OVEN & ALSO BEHIND I REPLACED PART . ALWAYS " UNPLUG " RANGE BEFORE YOU START.
Parts Used:
-
NEIL from ROCKY POINT, NY
-
Difficulty Level:Easy
-
Total Repair Time:30 - 60 mins
-
Tools:Nutdriver, Pliers
1 person
found this instruction helpful.
Was this instruction helpful to you?
Thank you for voting!
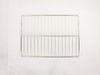
oven racks old and ugly
1. Open oven door
2. insert oven racks (perfect fit)
3. close oven door. Done and finished - man am I tired
2. insert oven racks (perfect fit)
3. close oven door. Done and finished - man am I tired
Parts Used:
-
Claudene from ORCUTT, CA
-
Difficulty Level:Very Easy
-
Total Repair Time:Less than 15 mins
1 person
found this instruction helpful.
Was this instruction helpful to you?
Thank you for voting!
Our oven would not lite
First shut down electric power to oven. remove
oven racks and botton tray. Removed boiler rack and door. Next unscrew 2 bolts holding igniter. remove nuts or cap for two white electric wires.
installed new igniter, hooked backup wires. replaces racks and tray and that was it, job done.
oven racks and botton tray. Removed boiler rack and door. Next unscrew 2 bolts holding igniter. remove nuts or cap for two white electric wires.
installed new igniter, hooked backup wires. replaces racks and tray and that was it, job done.
Parts Used:
-
Kirk from New Castle, DE
-
Difficulty Level:Really Easy
-
Total Repair Time:15 - 30 mins
-
Tools:Screw drivers, Wrench set
1 person
found this instruction helpful.
Was this instruction helpful to you?
Thank you for voting!
Ignitor would glow, gas valve would not open
This web site is awesome!!! their forum told me what part i needed, and they shipped it out, super fast, i couldn't hardly believe it! I tried using the Sears Parts web site for my "kenmore" oven and that was a joke, seriously! no more kenmore for me, thanks. It took this site to figure out that i really had a G.E. with a kenmore name on it.
I found out that even though the old ignitor glows well, it may not pull enough amps to open the gas valve.
First i disconnected the two wires on the gas safety valve that lead to the ignitor. These are accessed after taking the bottom drawer out. Then using a nut driver, i took out the two screws holding the bottom of the burner tube. Then inside the oven, i took out the racks and then the two screws in the back on the bottom. Then took out the bottom plate. I removed the one screw on the front of the burner tube, and removed the burner tube with the ignitor attached. I cut the wires off the old ignitor and attached them to the new ignitor with the supplied ceramic wire nuts. I attached the new ignitor to the burner tube and put everything back together. The bottom screws on the burner tube were very difficult for me to reach. Almost impossible to get both hands there to do the job.
I found out that even though the old ignitor glows well, it may not pull enough amps to open the gas valve.
First i disconnected the two wires on the gas safety valve that lead to the ignitor. These are accessed after taking the bottom drawer out. Then using a nut driver, i took out the two screws holding the bottom of the burner tube. Then inside the oven, i took out the racks and then the two screws in the back on the bottom. Then took out the bottom plate. I removed the one screw on the front of the burner tube, and removed the burner tube with the ignitor attached. I cut the wires off the old ignitor and attached them to the new ignitor with the supplied ceramic wire nuts. I attached the new ignitor to the burner tube and put everything back together. The bottom screws on the burner tube were very difficult for me to reach. Almost impossible to get both hands there to do the job.
Parts Used:
-
Arthur from Saint Francisville, LA
-
Difficulty Level:A Bit Difficult
-
Total Repair Time:15 - 30 mins
-
Tools:Nutdriver
1 person
found this instruction helpful.
Was this instruction helpful to you?
Thank you for voting!
Bake didn't work, broiler did
Unplugged the oven. First i removed the 2 screws from the pan at the bottom of the oven and took the pan out. Next i took out the drawer underneath and took the screws out of the pans below to get to the ignitor. Unscrewed the ignitor and cut the wires below it to splice the new ignitor on. Spliced the two sets of wires and put the ceramic wire nuts on. Replaced the top and bottom pans and put the drawer back. plugged the oven back in and started the oven right up. Pretty easy.
Parts Used:
-
Bill from Harleysville, PA
-
Difficulty Level:Easy
-
Total Repair Time:15 - 30 mins
-
Tools:Nutdriver, Screw drivers
2 of 4 people
found this instruction helpful.
Was this instruction helpful to you?
Thank you for voting!
The oven igniter burned out.
I rempved the top and bottom doors, than the wire rackes followed by the bottom base of the oven. Then I removed the burner cover plate so I could get to the igniter.. I removed the cover plate for the wiring (2 wires), unpluged them, removed the igniter (2 screws). I had to cut the wires on the old igniter and couple the ends to the new igniter and then replaced everything by just reversing all that I did. Simple! Easy!
Parts Used:
-
Michael from Las Vegas, NV
-
Difficulty Level:Easy
-
Total Repair Time:15 - 30 mins
-
Tools:Pliers, Screw drivers
1 person
found this instruction helpful.
Was this instruction helpful to you?
Thank you for voting!
Igniter would not glow and light oven.
Straight forward as per instructions. Removed old igniter, replaced and tested new one and it worked. However, the gas oven would not turn of. Valve may be defective. Knob control is not stripped and turned to full stop. Troubleshooting continues. Part(s) and instructions worked perfectly.
Parts Used:
-
Robert from FALL CITY, WA
-
Difficulty Level:Really Easy
-
Total Repair Time:15 - 30 mins
-
Tools:Nutdriver, Screw drivers
1 person
found this instruction helpful.
Was this instruction helpful to you?
Thank you for voting!